Prose.io is called "a content editor for GitHub". One thing is does really well is it gives people the ability to update their own websites, especially those who don't have the time and energy to learn how to write code. While there is plenty of great technical documentation for Prose on GitHub, there is very little documentation for people who don't code. Prose is very similar to the visual editor included in WordPress that many people use for writing blog posts. But not everybody has a WordPress website and I encourage most of my clients to steer clear of it (4 Reasons to Leave Wordpress).
This documentation is intended for those who are new to using Prose. It follows the process of publishing a new blog post from start to finish on a site powered by Jekyll.
Subscribe Today
I plan to create a video tutorial series for each of the topics below. Enter your email address and be notified as soon as each part of the video series is released.
Navigation
Back
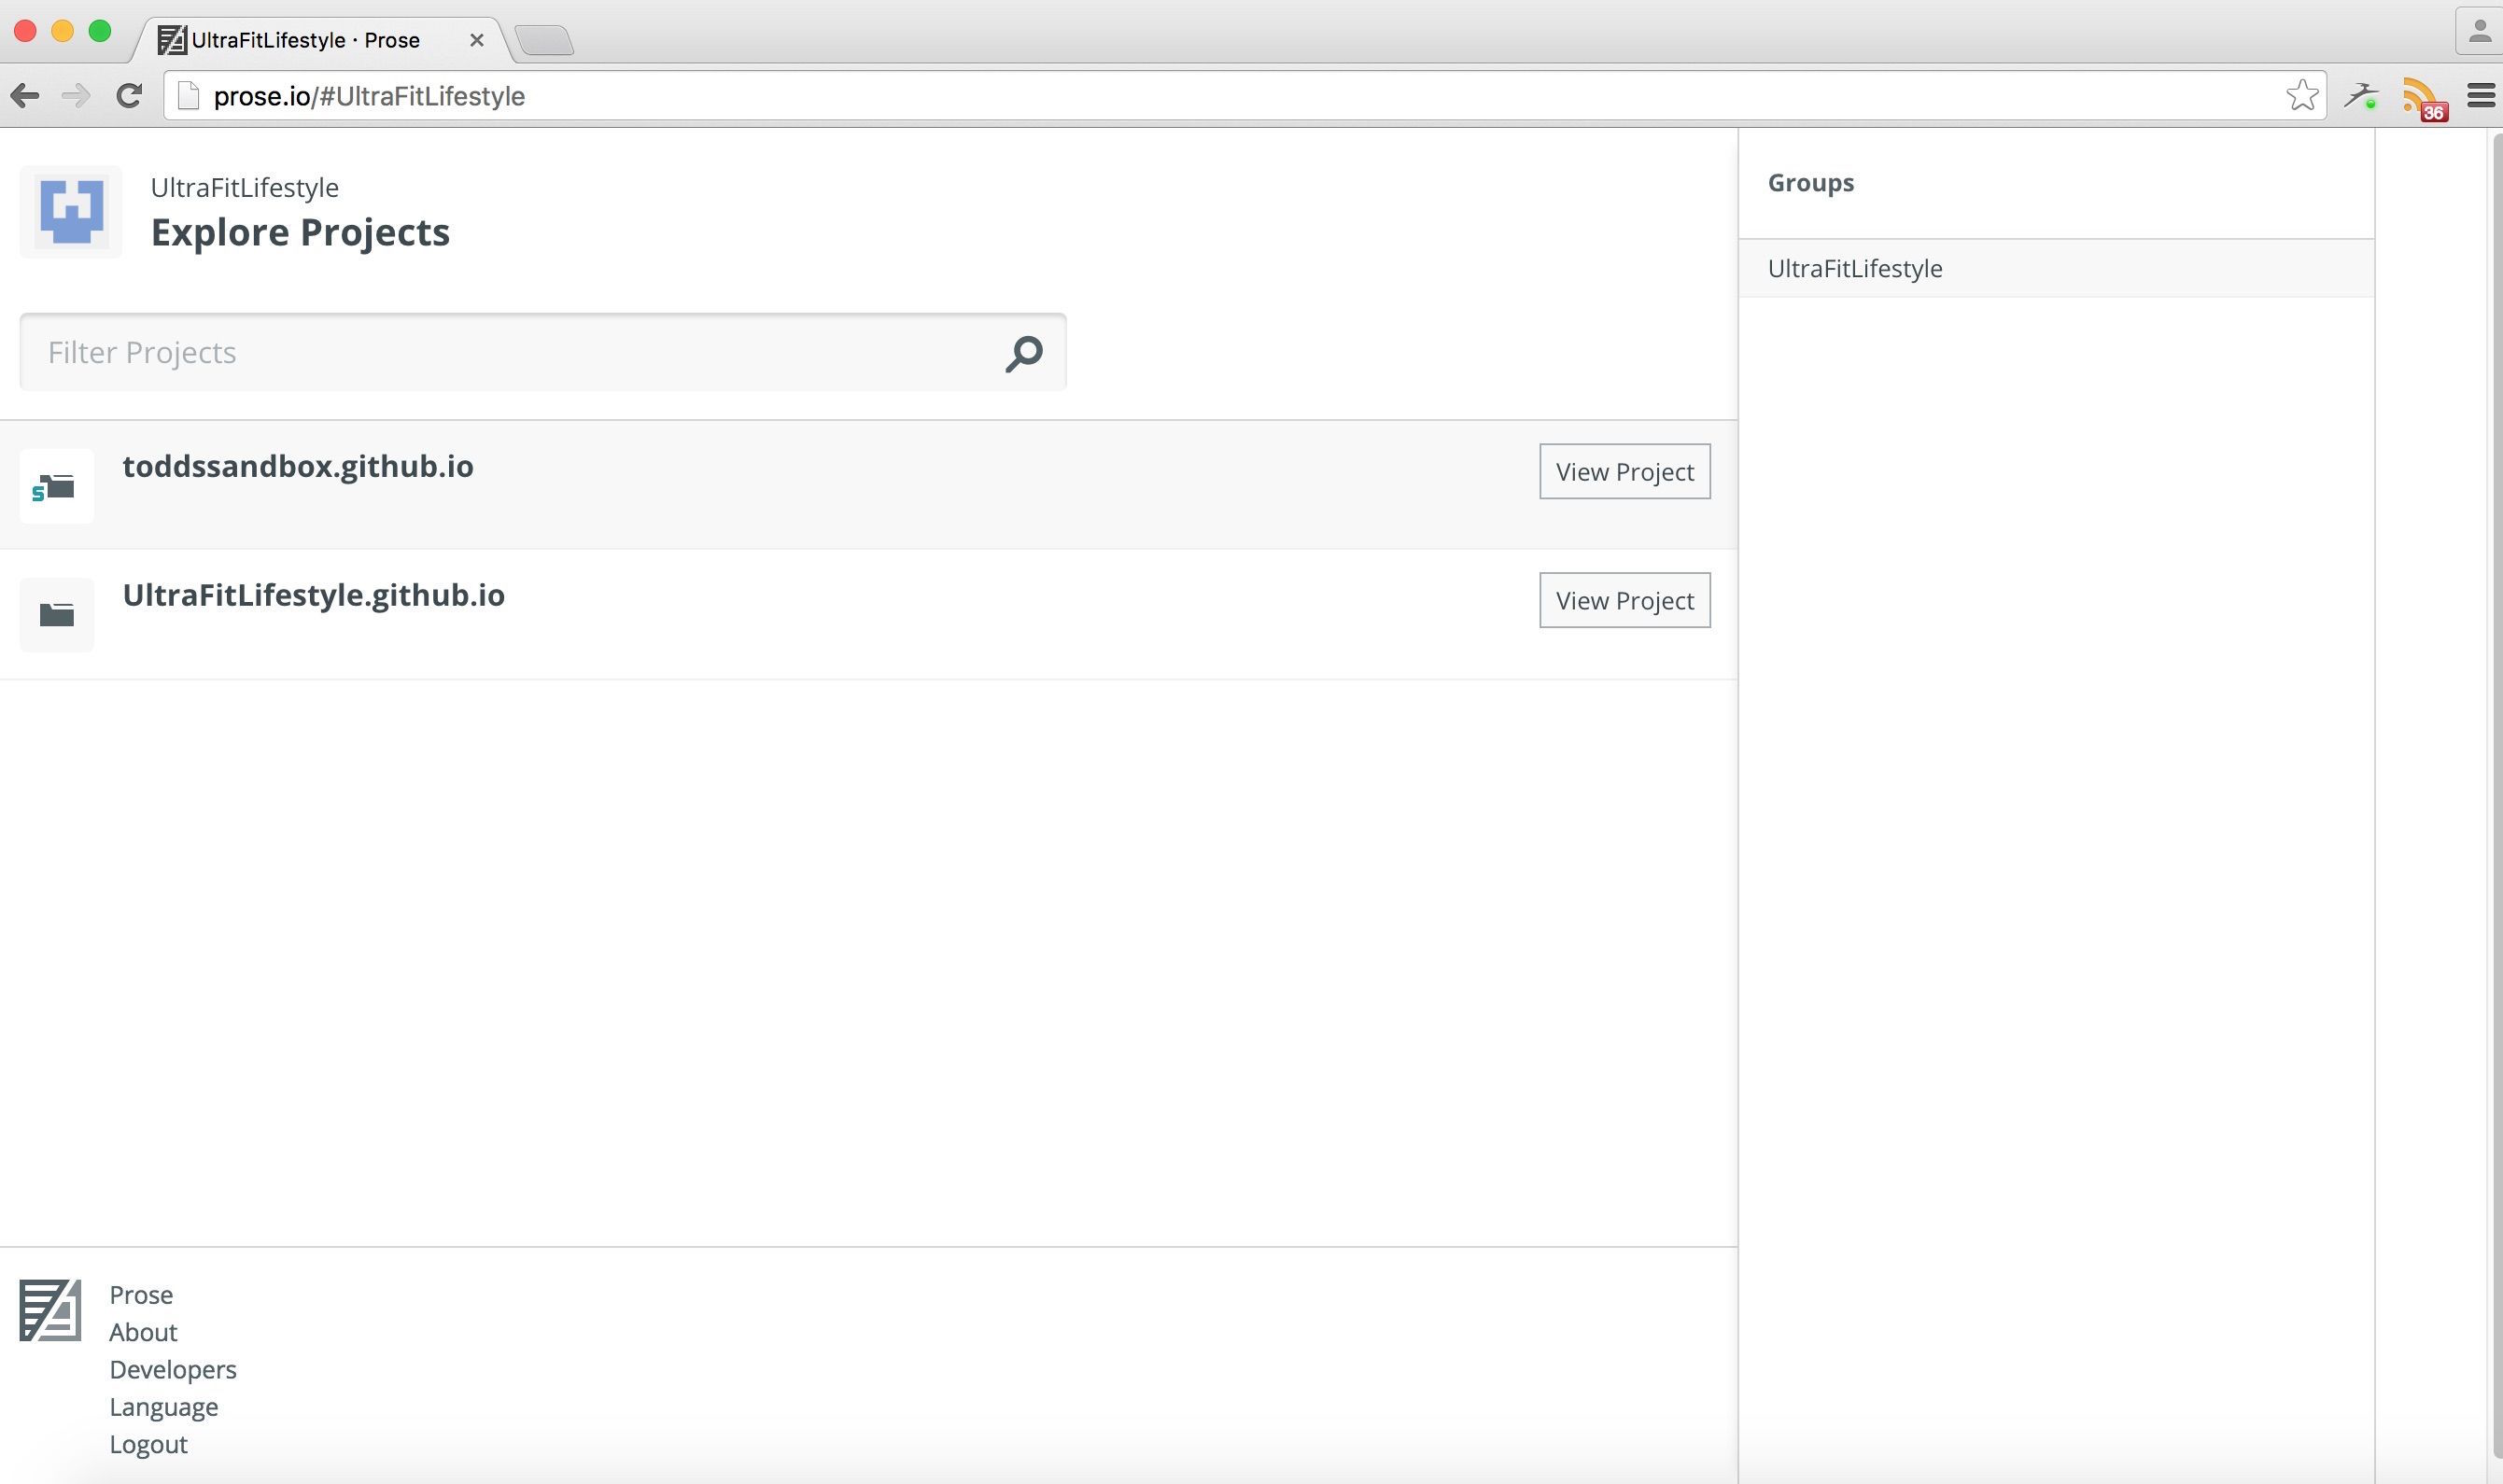
The first time you use Prose.io you will have to click the "Authorize On Github" button. This will direct you to github.com to sign in before taking you to the landing page that contains projects you have access to. To get started click the project that you would like to work on.
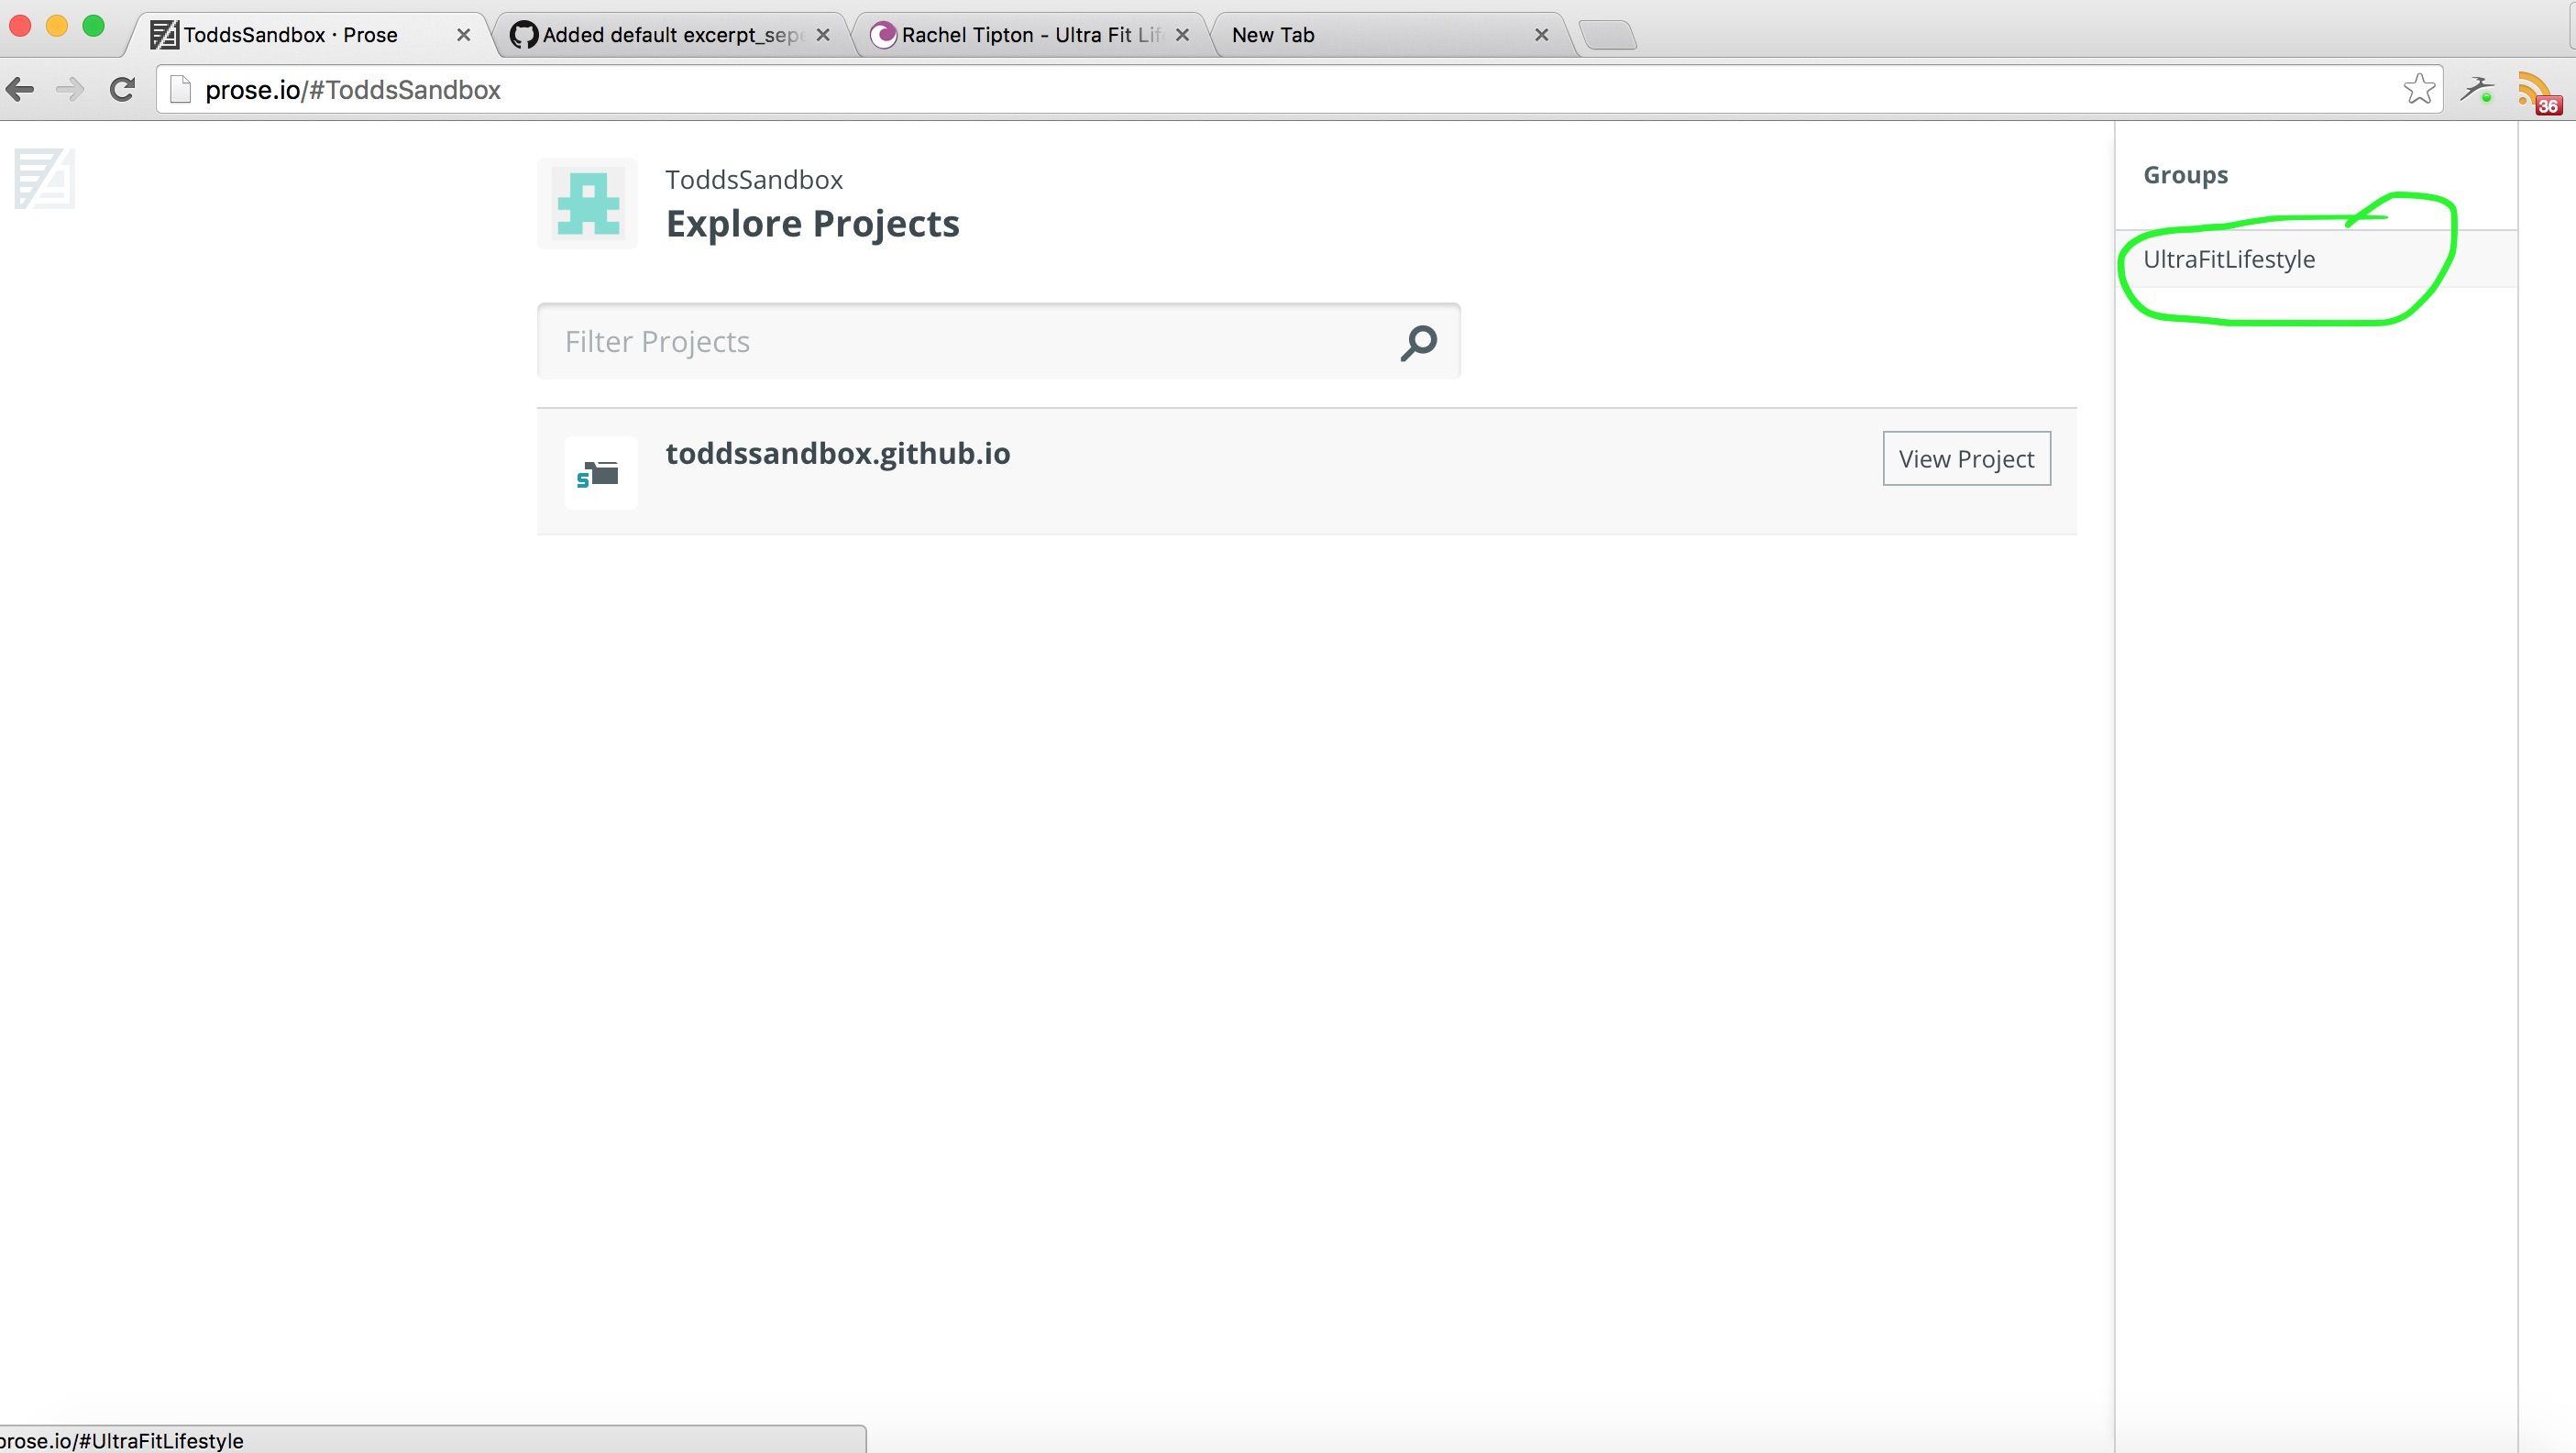
If at any time you want to go back to the landing page to choose a different project, you must first click the Group you belong to that's listed in the sidebar. In this case "UltraFitLifestyle" will take you back to the landing page.
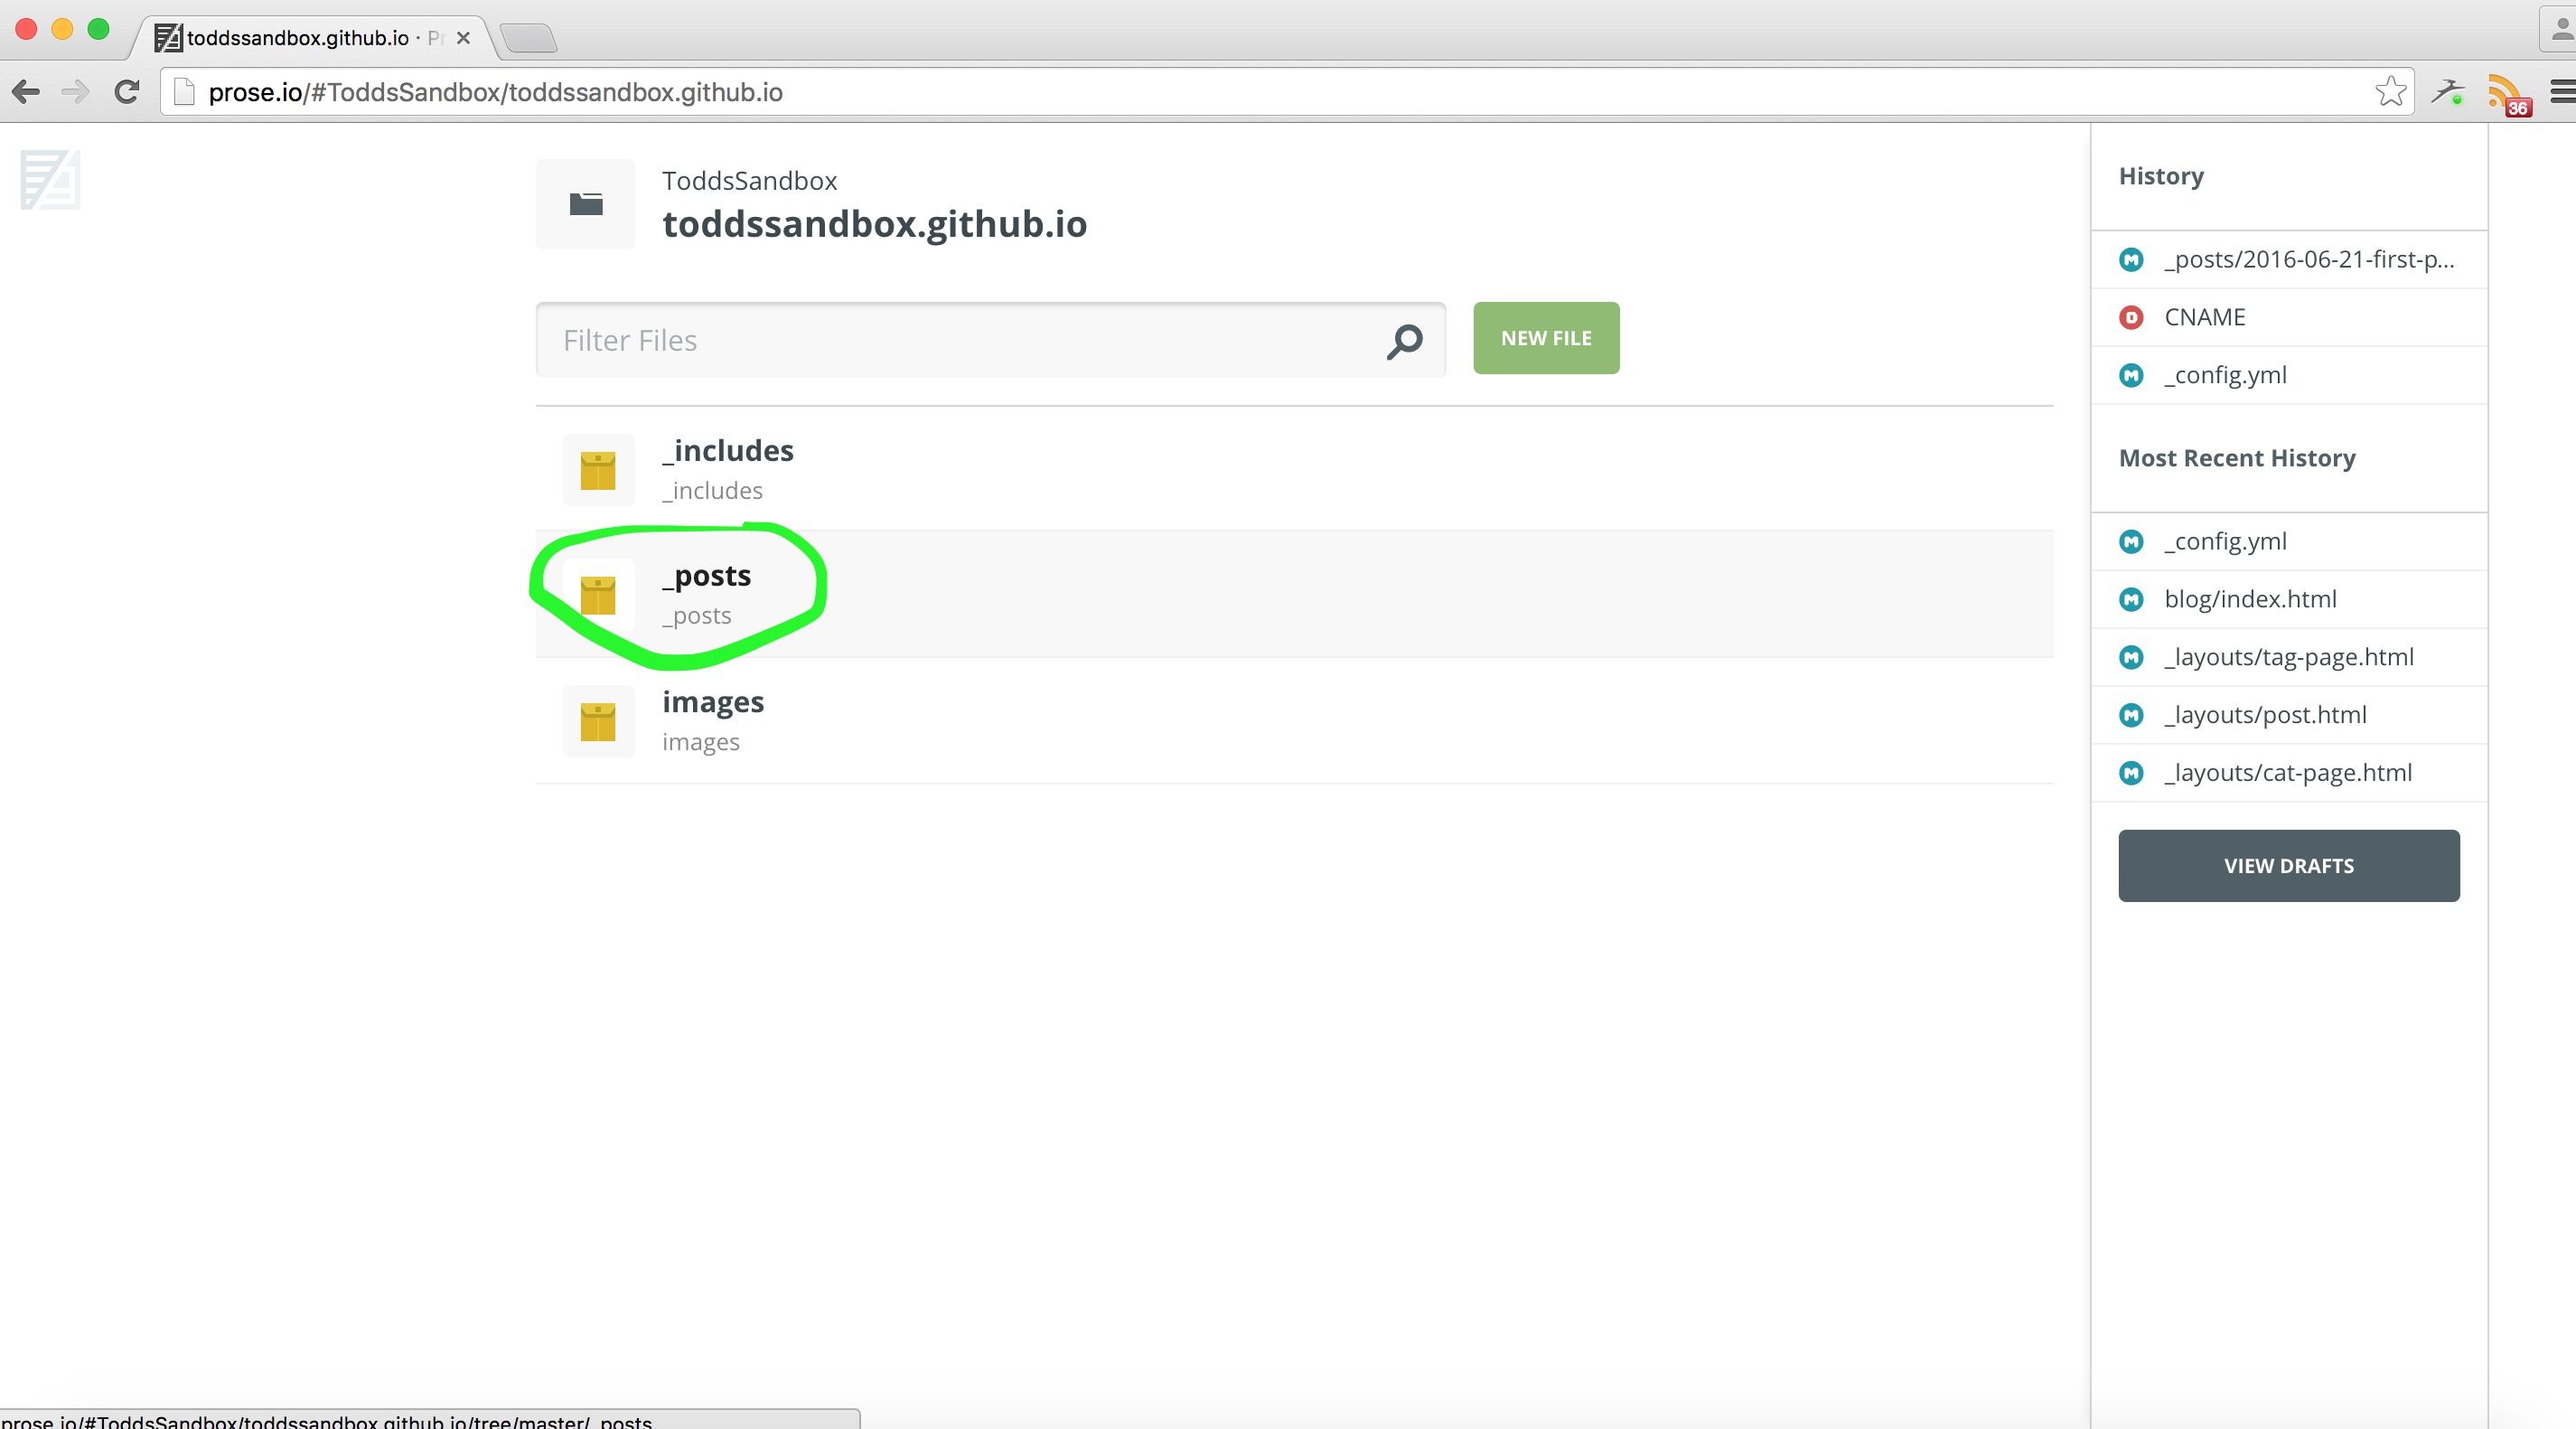
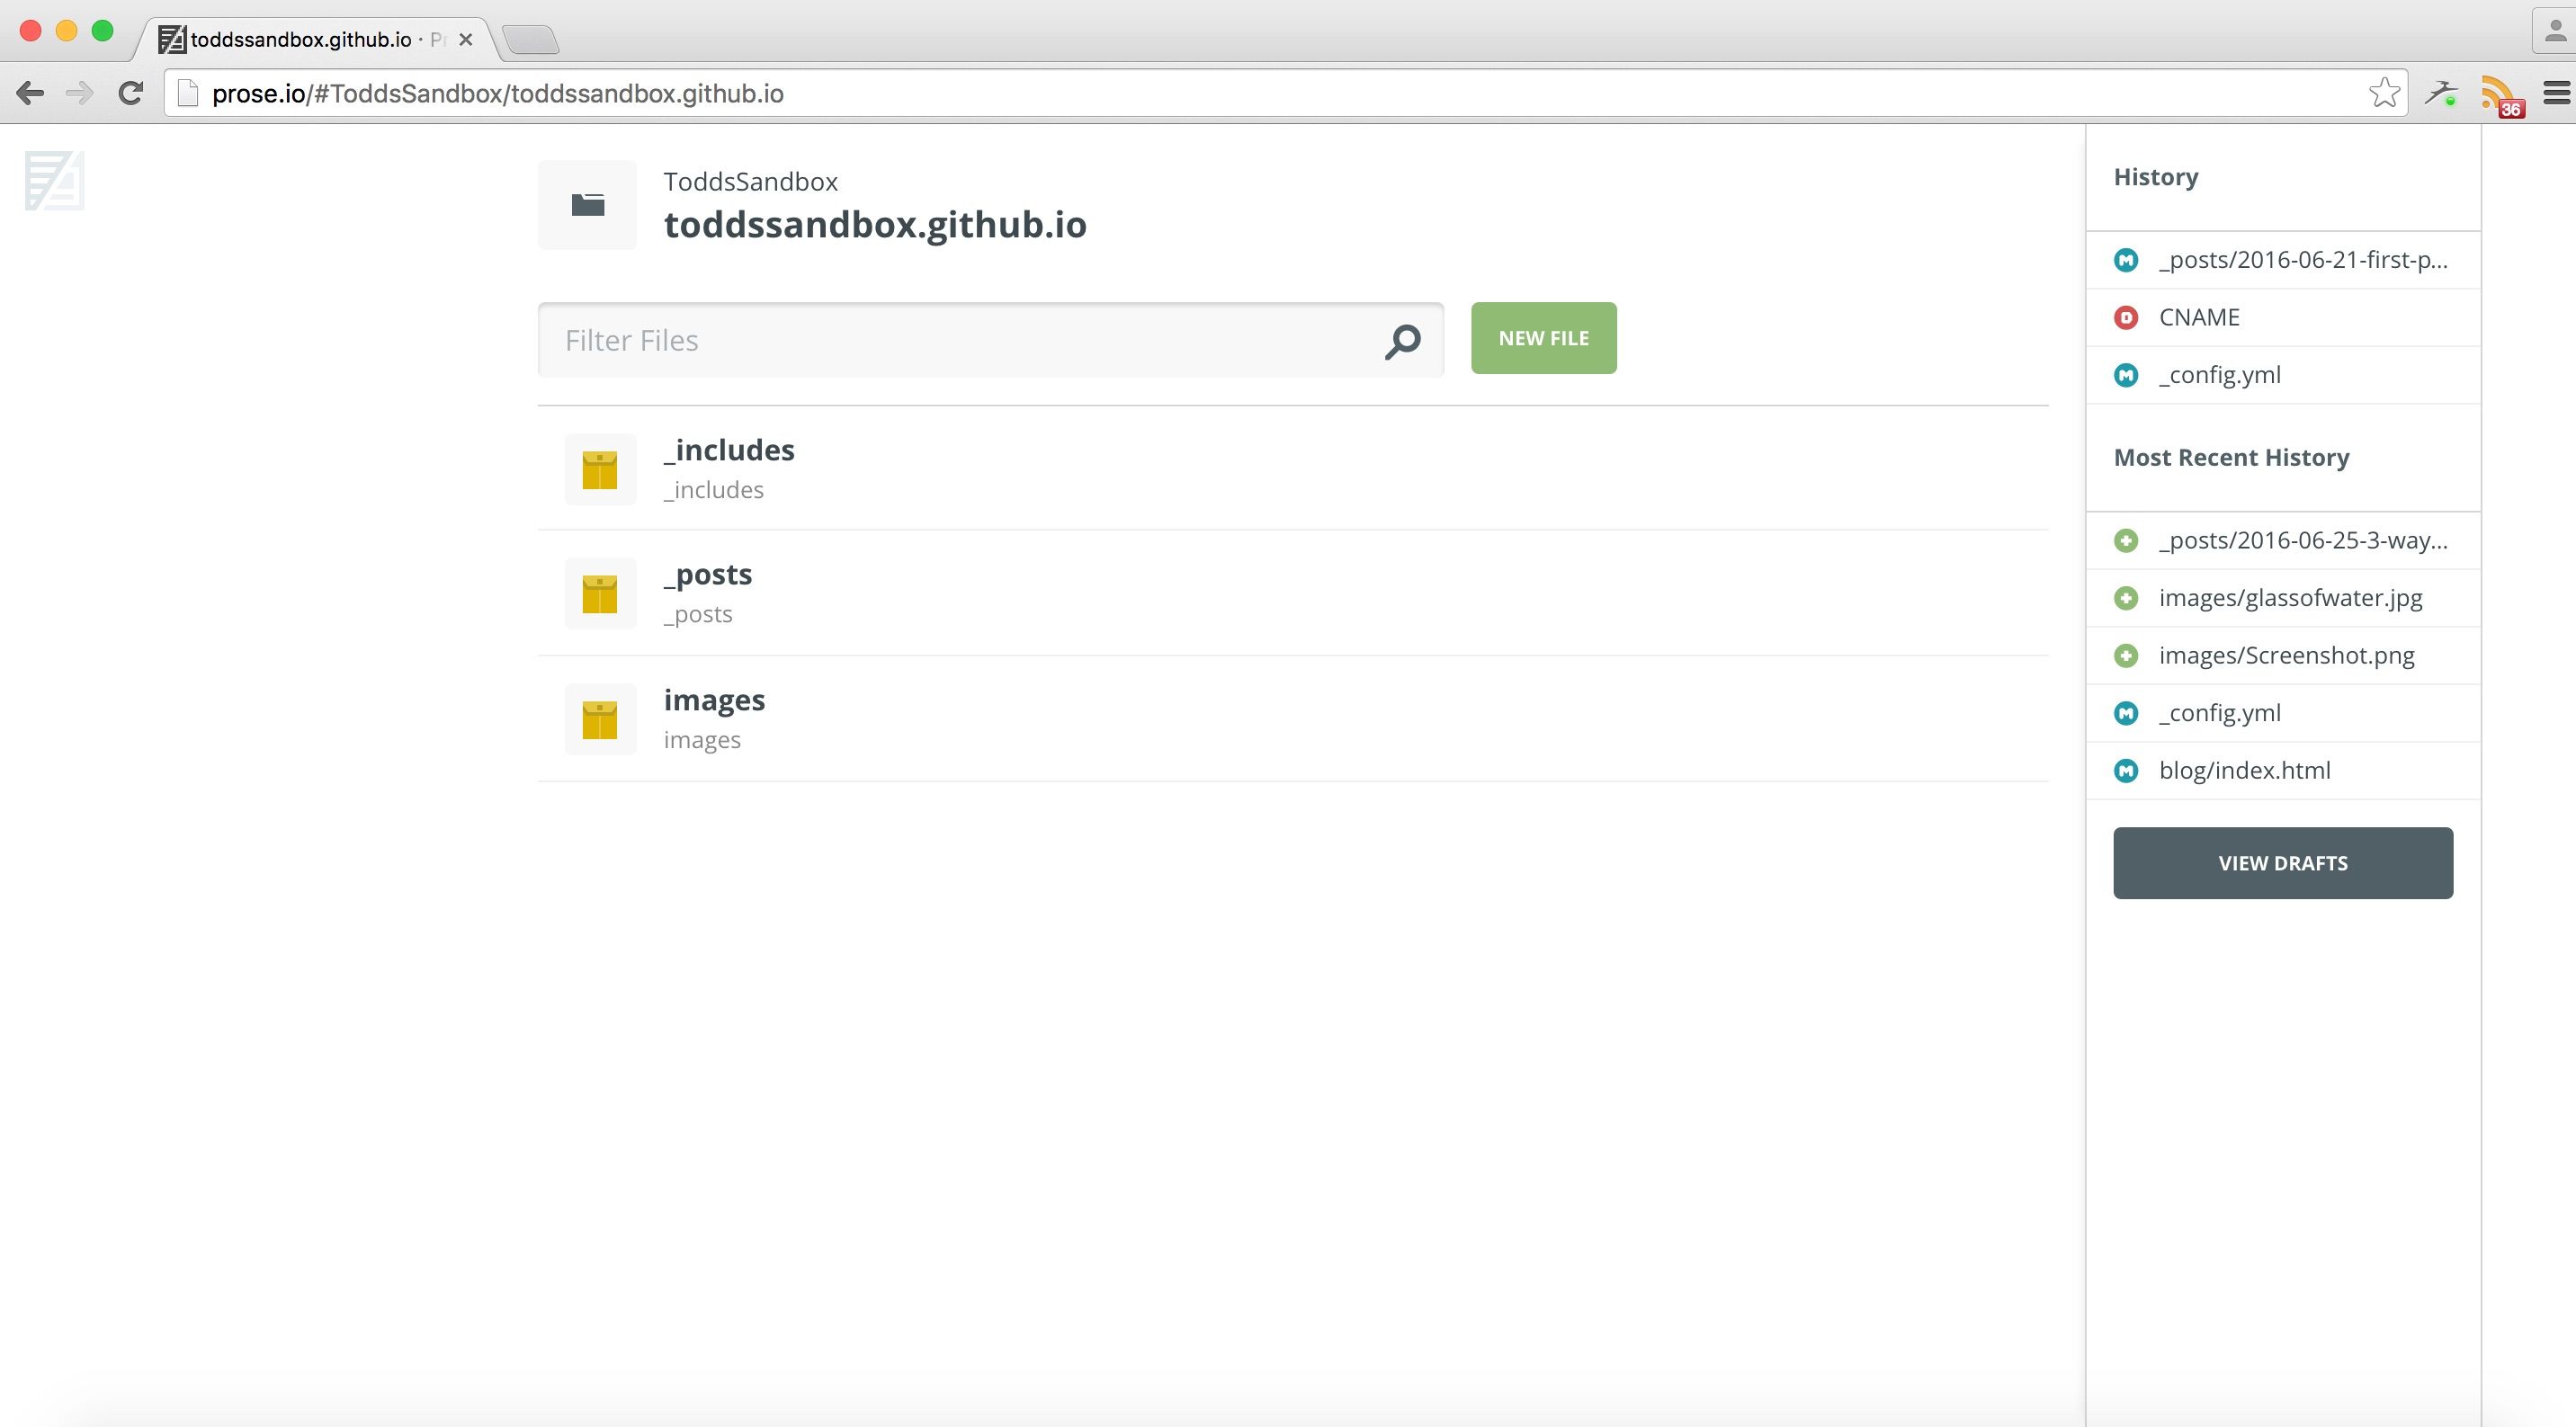
After you've clicked a project you will see 3 folders. All blog posts are in the _posts folder. Click the folder to enter.
Create a new post
Back
Click the green "New File" button. A new post template will be created with some text already inside. Delete this text.
Be sure to add a title to the post
Add a featured image
Back
If you are going to add a featured image to the post I recommend you do this step first.
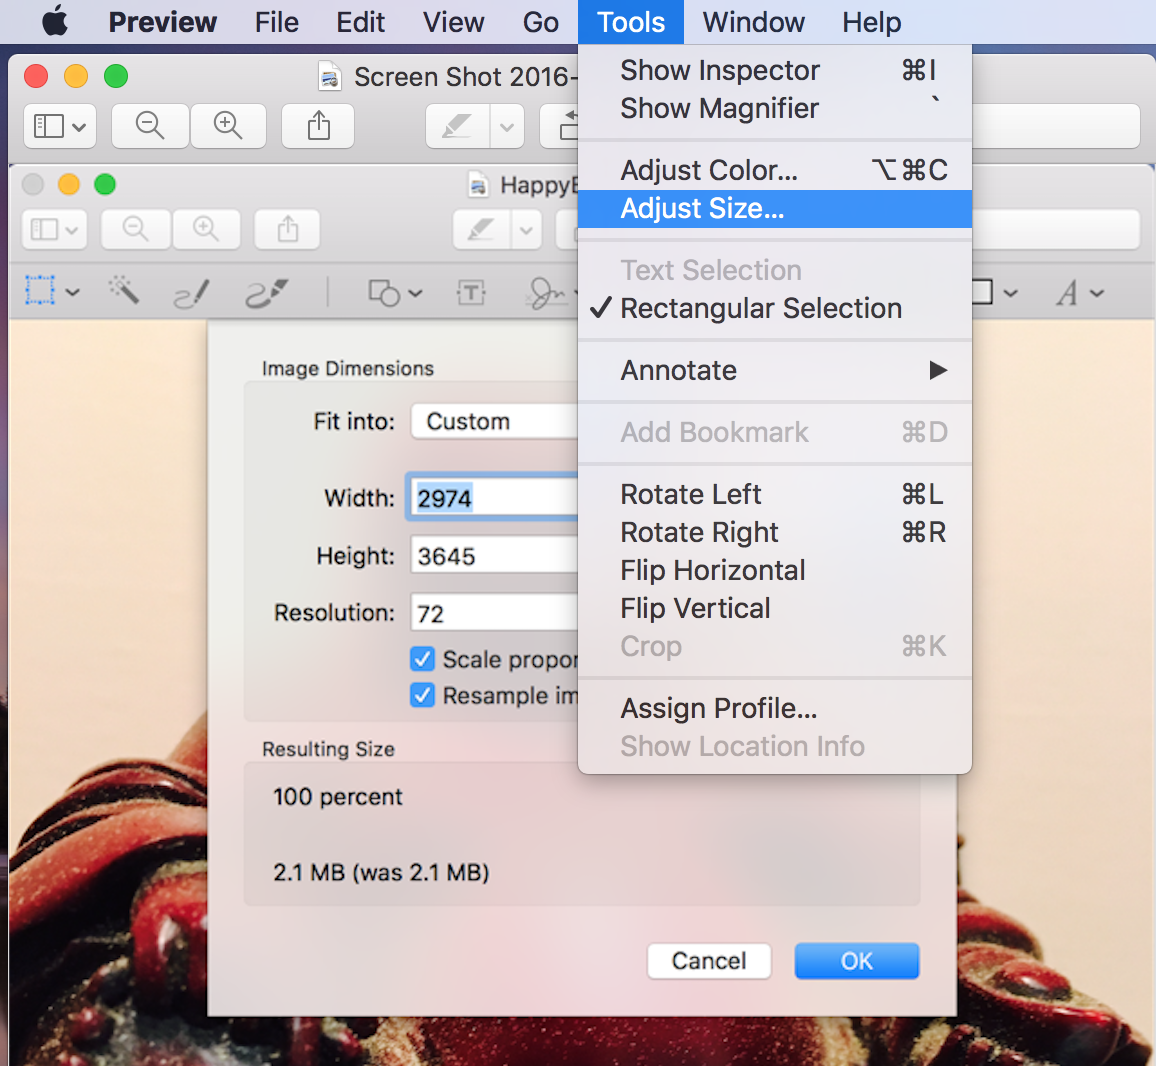
First, make sure your image is the proper size before you upload it.
On a Mac follow these steps:
Open the image in Preview, the default Mac image viewer.
On the toolbar, go to "Tools -> Adjust Size...".
Ensure "Resolution" is set to 72.
Adjust the width to your preferences. Generally 1500px is close to full screen width on medium sized laptops. 150px is a good thumbnail size.
The height will adjust automatically when you change the width.
Don't forget to save your changes!
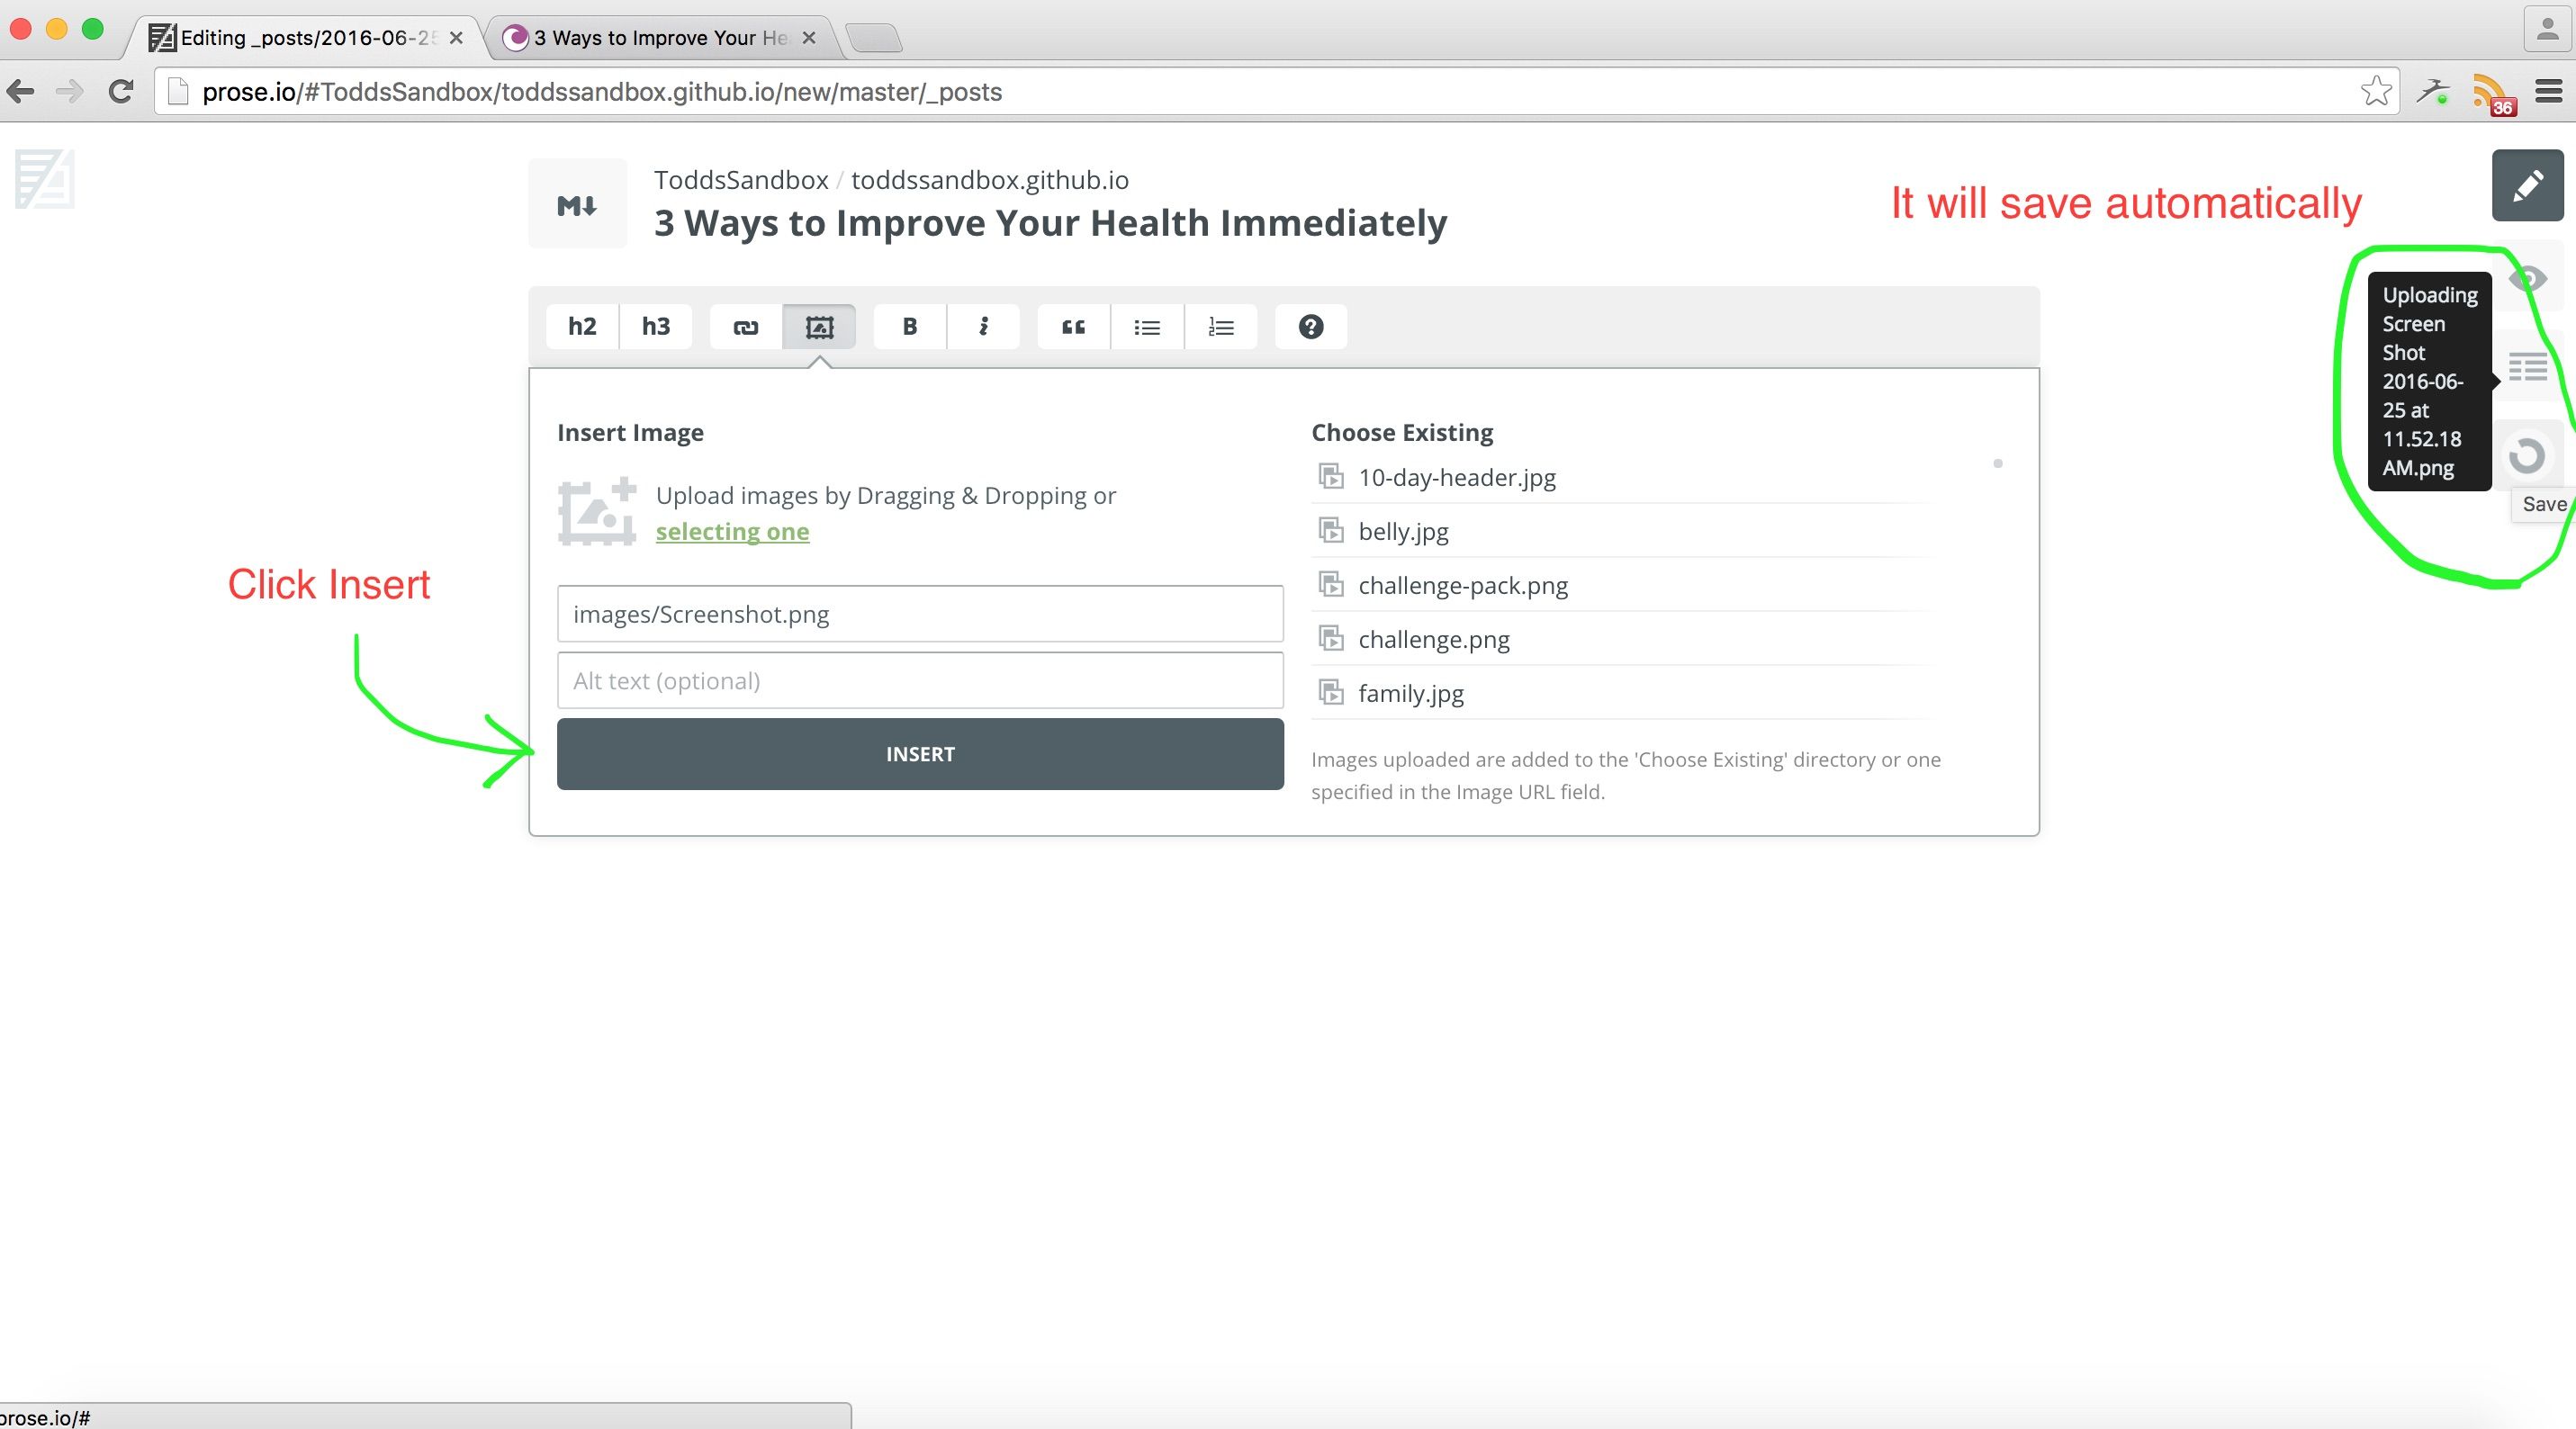
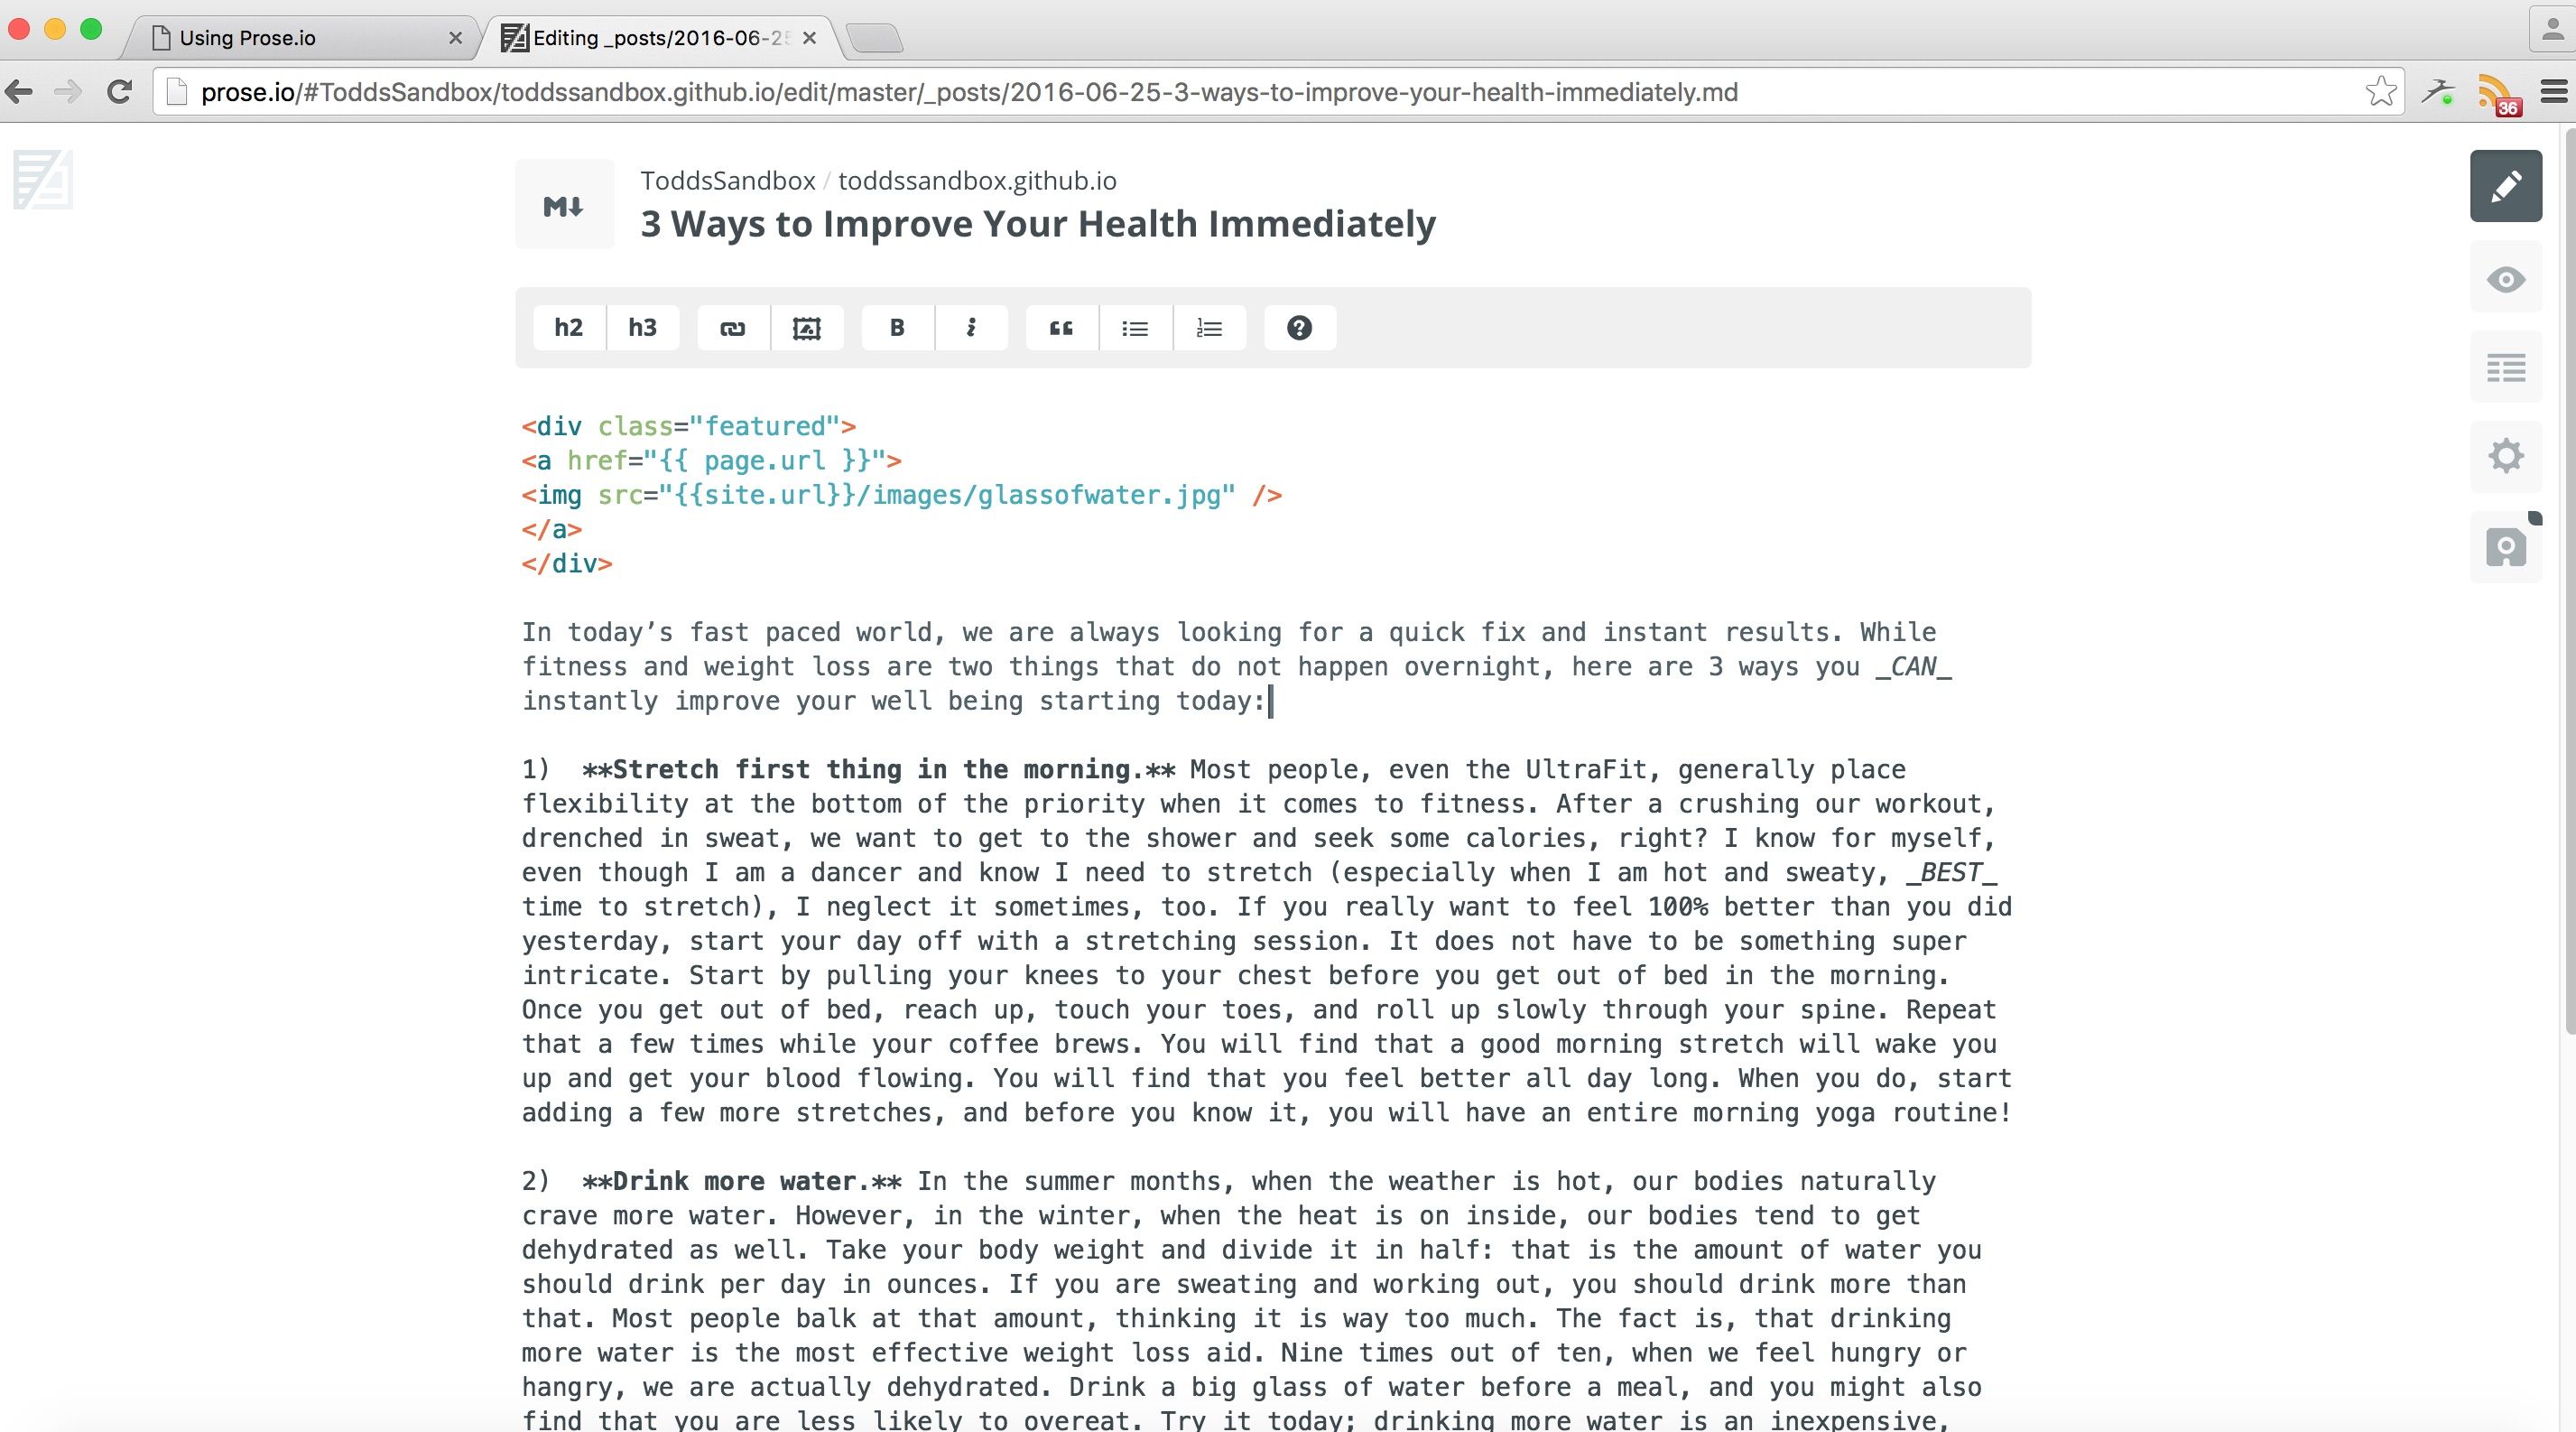
Now click the image button on the toolbar and drag and drop an image into the box or click "selecting one" and browse for the image file.
Rename the image if you wish but make sure the filename begins with "images/" as seen in the example.
Click "Insert" when you are finished. Confirm that the image is being uploaded properly by looking at the save button in the sidebar. It will keep you informed of the image upload progress.
When the image is finished uploading a "Saved" message will display and Prose will generate a line of image code for you.
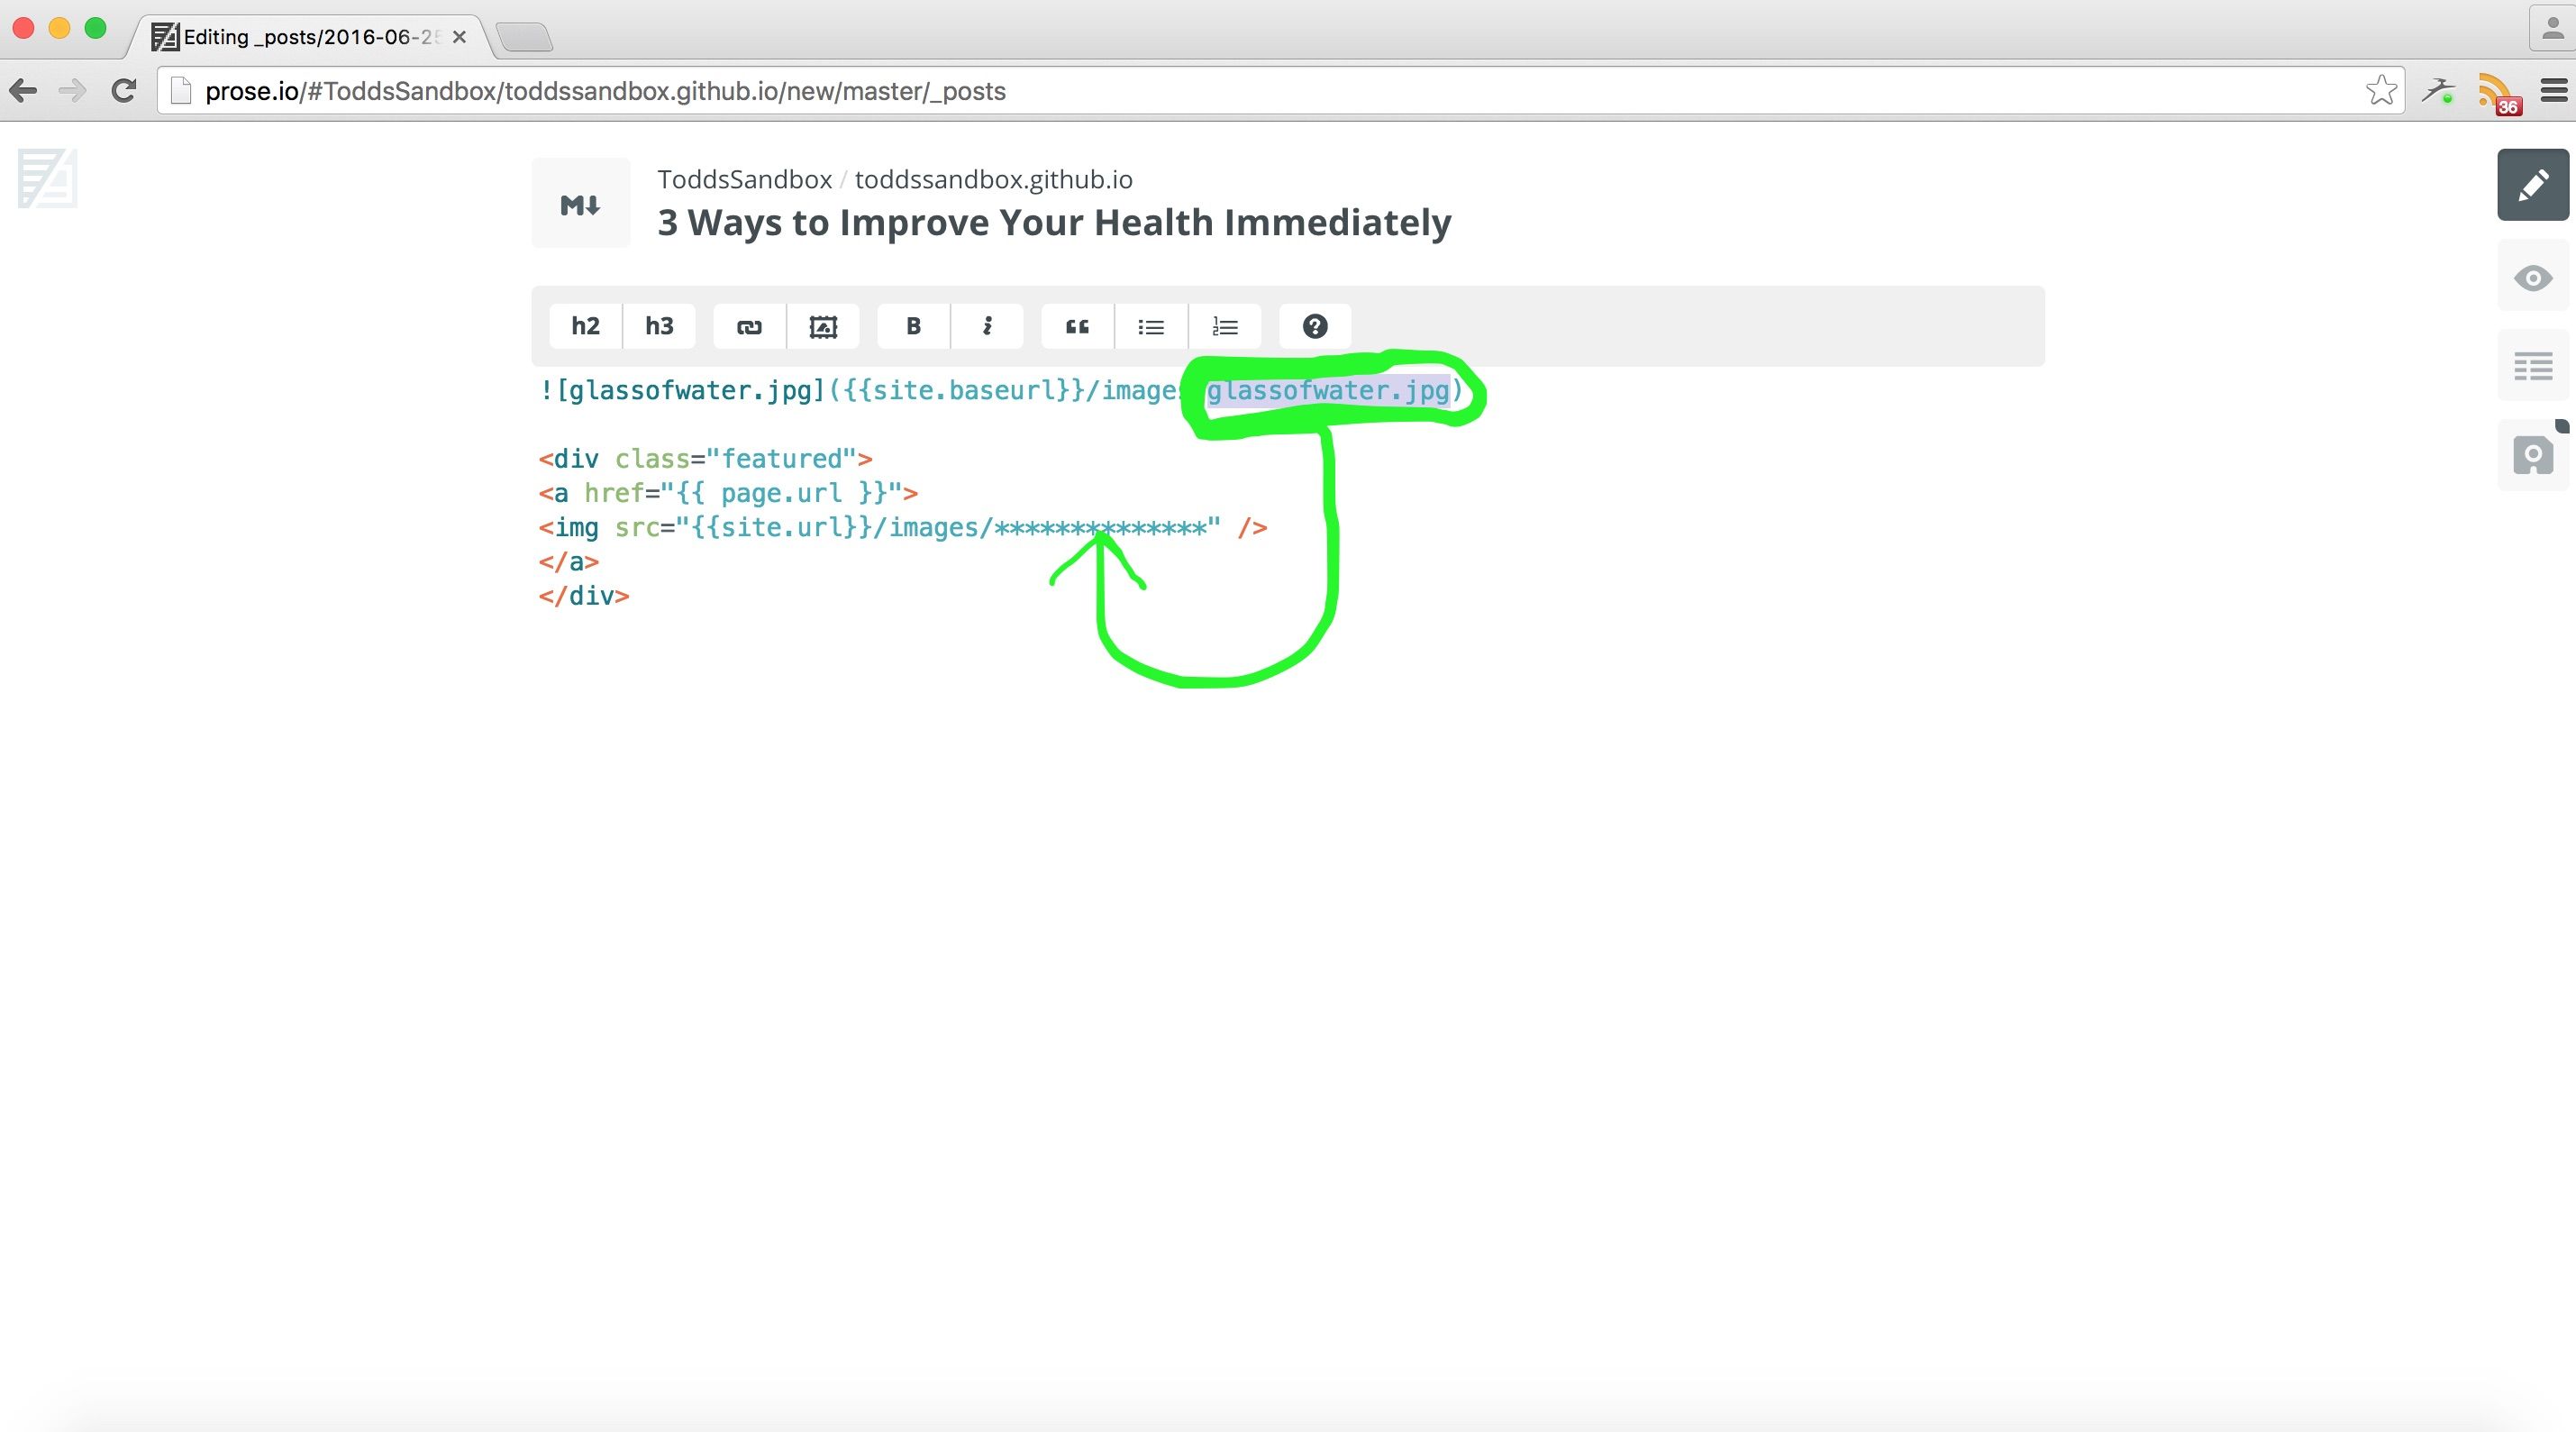
Next copy and paste the featured image raw HTML block into the post,
and replace the stars with the name of the image file you just uploaded. Be sure to keep "/images/" before the filename.
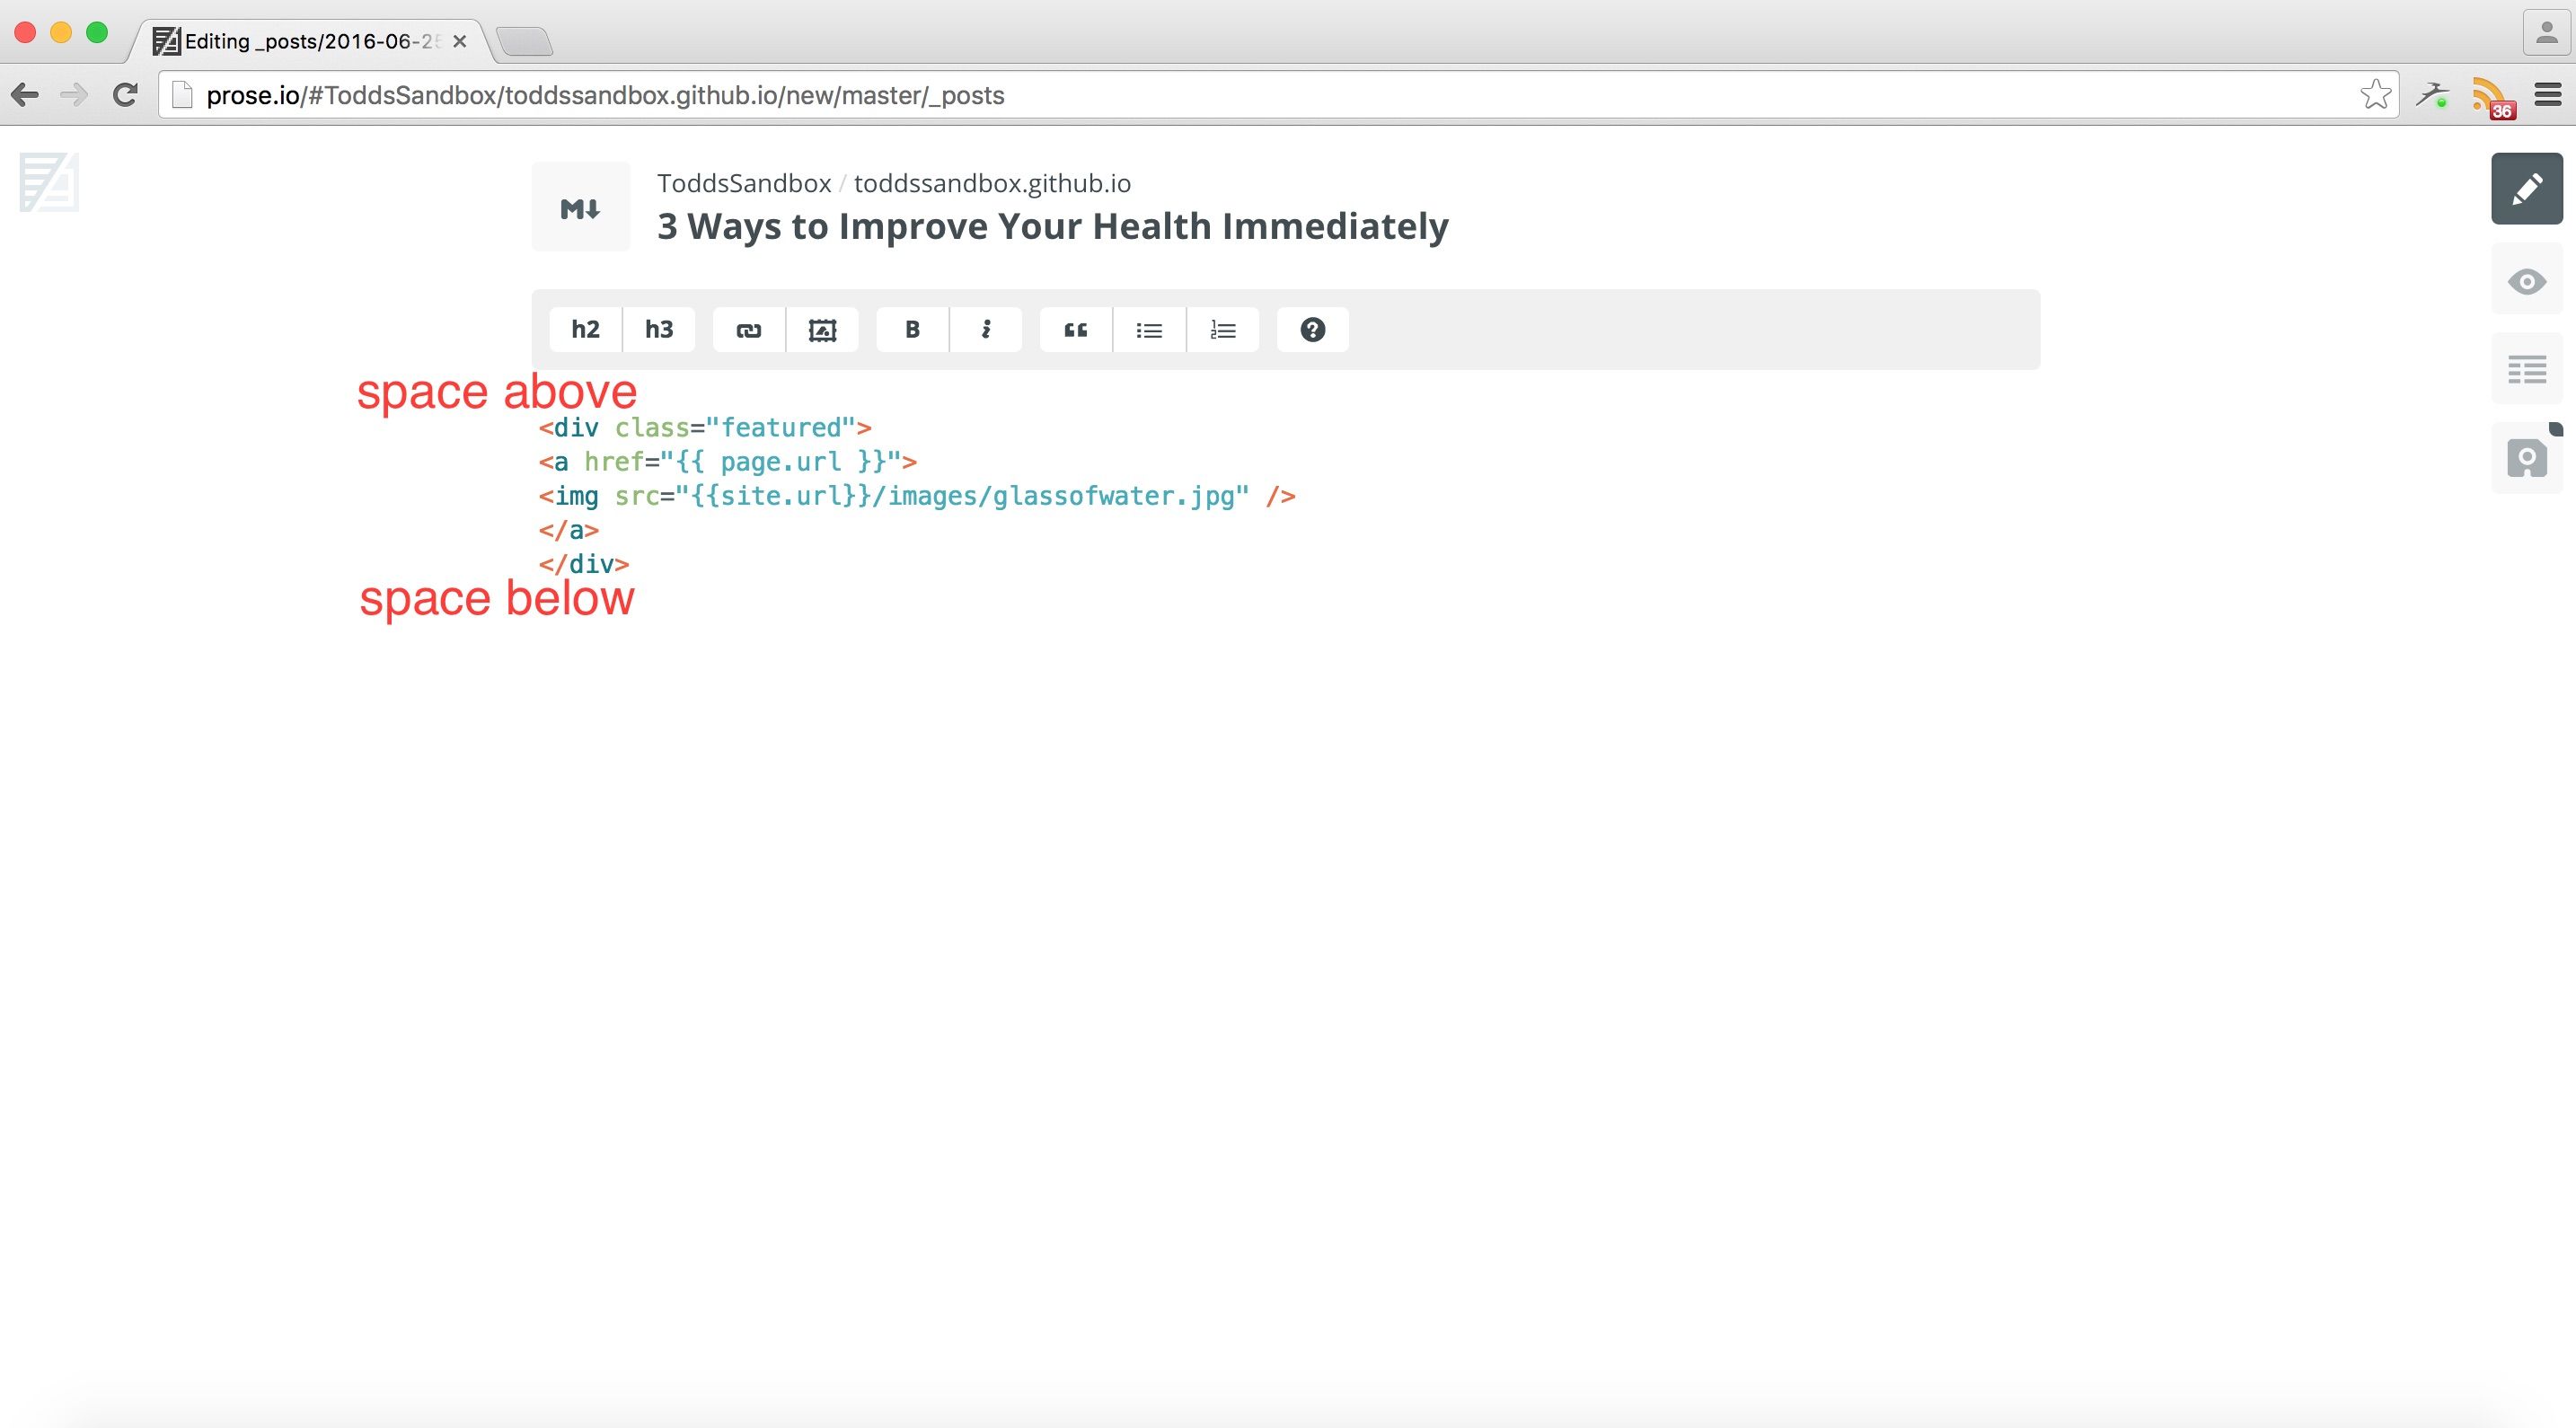
The last step is to delete the image code that Prose generated for you and then add a blank line above and a blank line below the raw HTML code.
If you don't add the blank lines the image will not display.
Make featured image available to facebook
Back
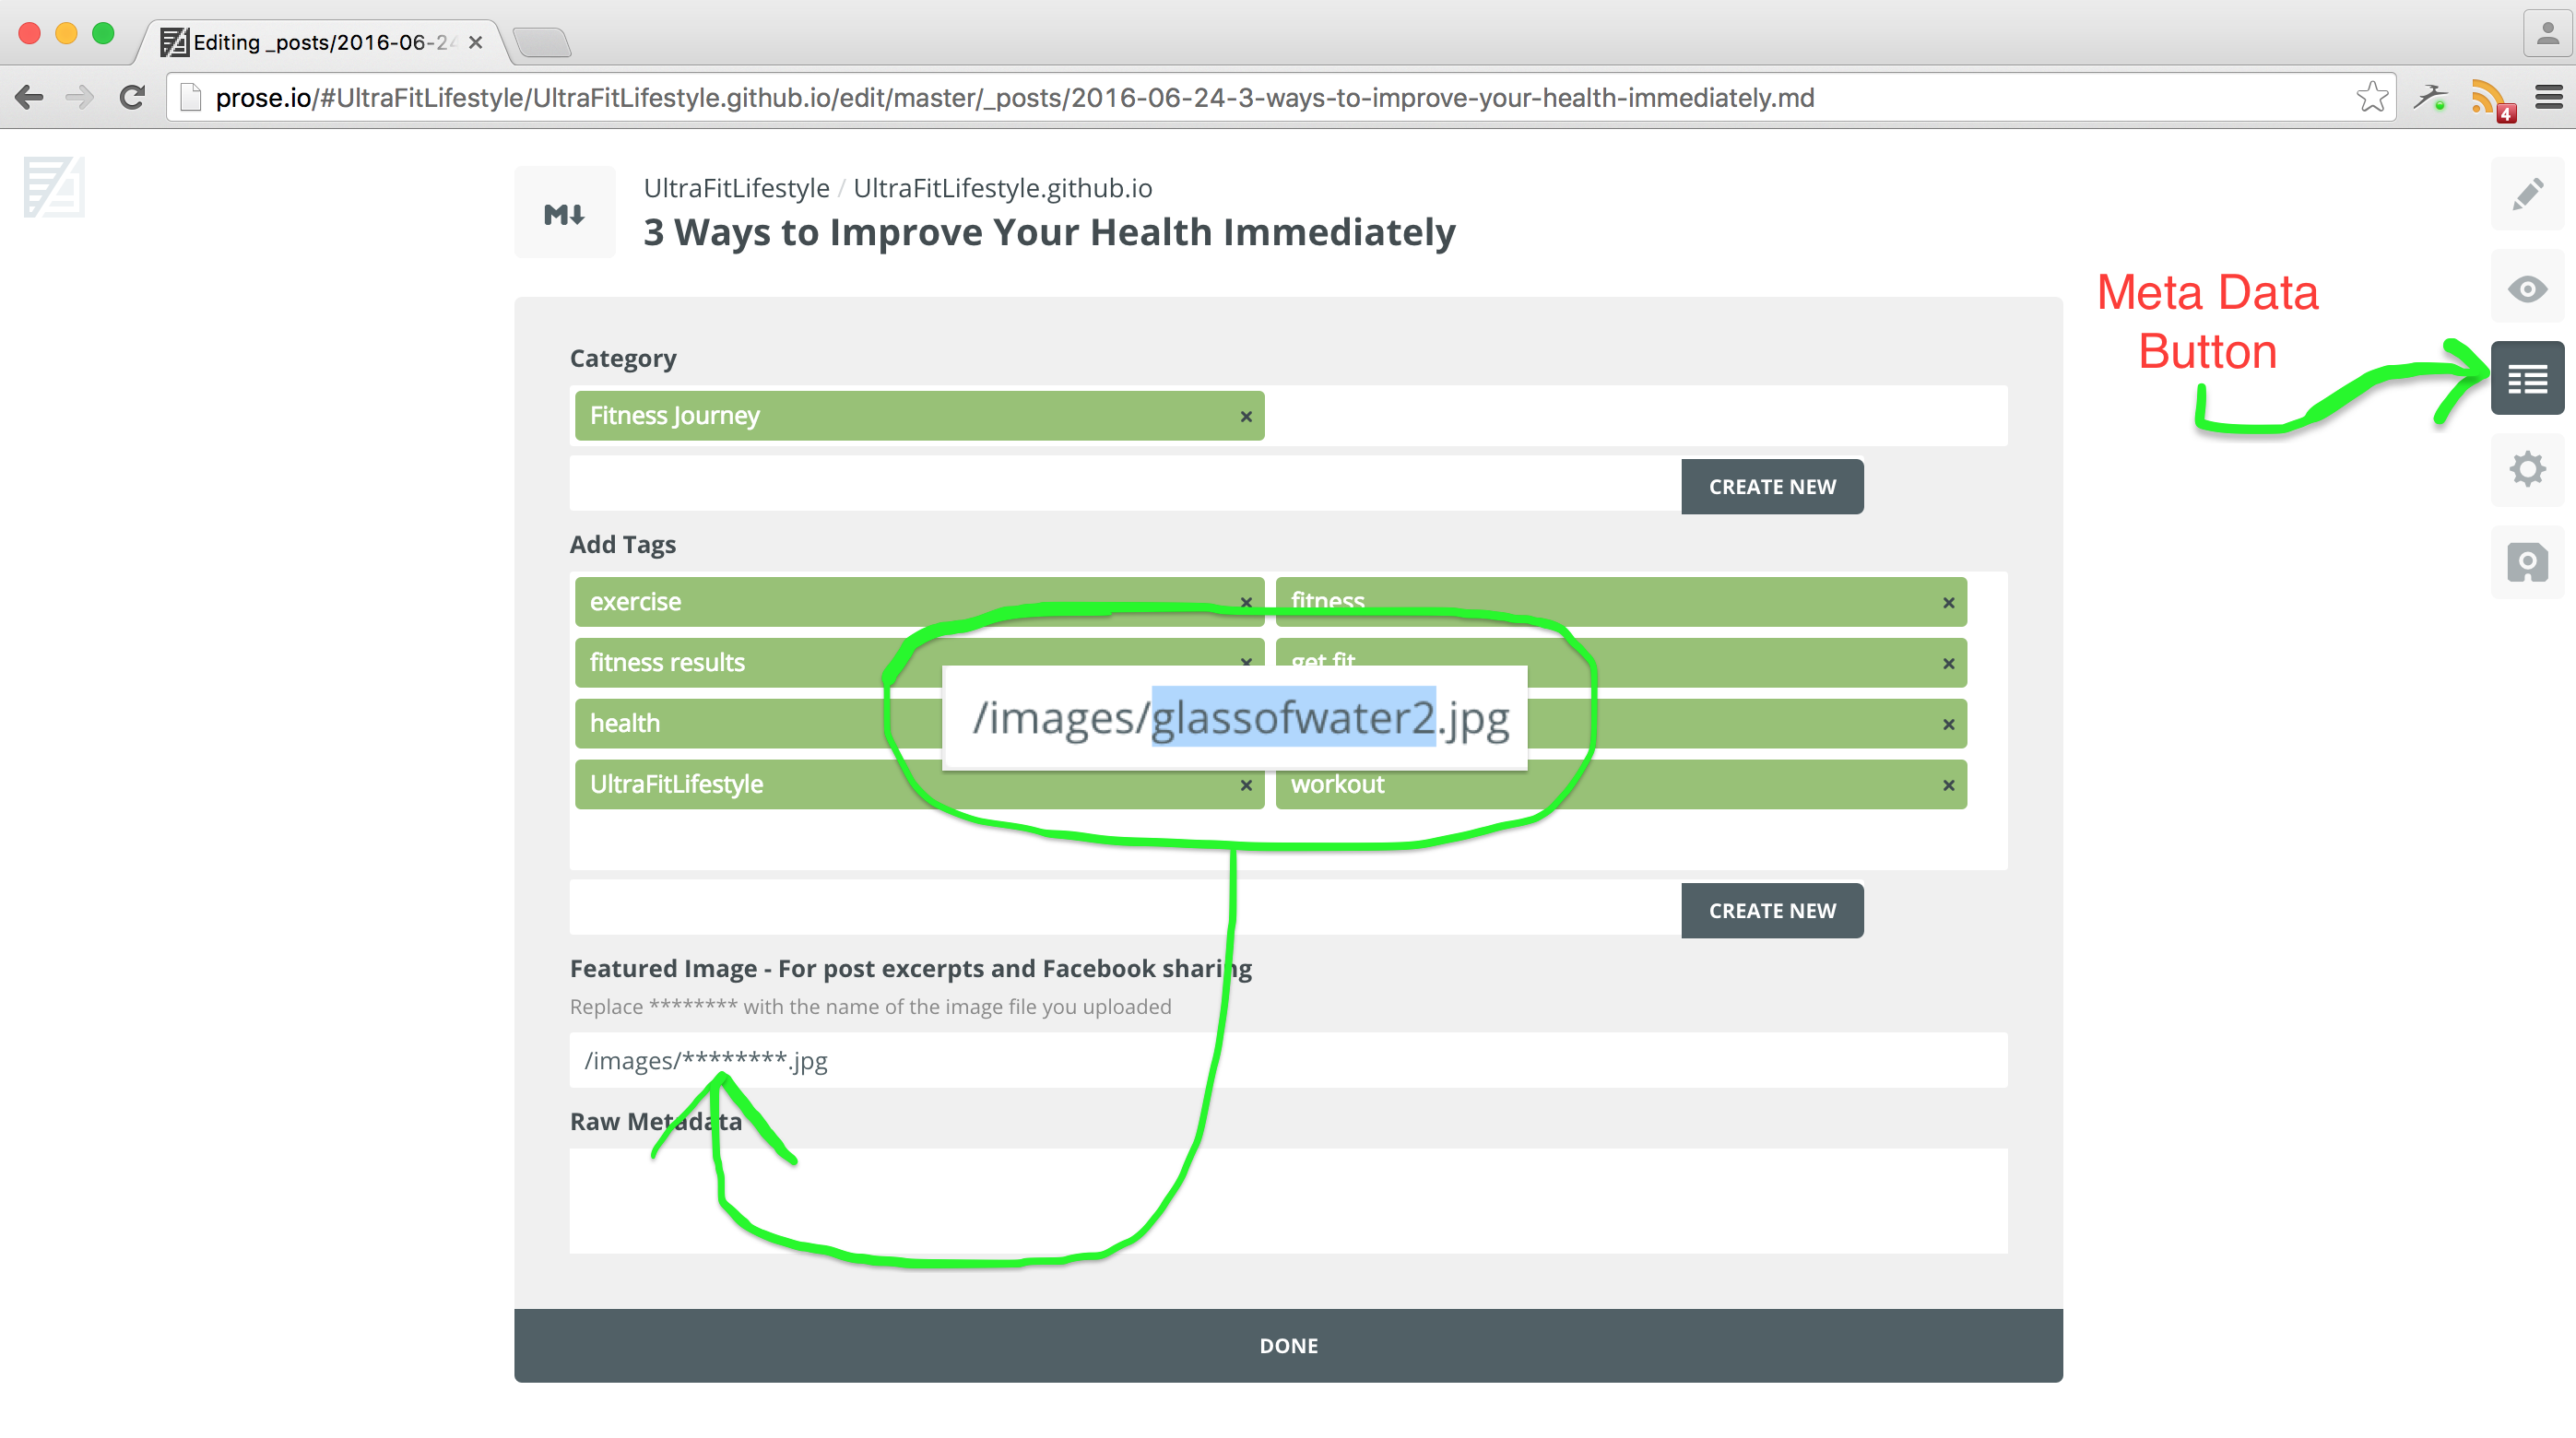
After you have uploaded the featured image, click the “Meta Data” button on the sidebar. In the “Featured Image” text box update the filename of the image by replacing the stars with the name of the image file you just uploaded. This will make the featured image available when you share your post on Facebook and other forms of social media.
Be sure to keep /images/ before the filename.
Write your post
Back
You can use the editor to write your post. If you have previously written your post in a Word document then you can paste your post into the editor. Be sure to check all formatting since bold, italics, numbers, and bullets will not paste nicely into the Prose editor. There are buttons on the toolbar that you can use for this formatting.
If you have a paragraph that needs special formatting (e.g. center alignment) you can wrap the paragraph in HTML with the proper class added to it. Be sure to include a space between each unique class name.
<pclass="centered-text bold italic">
Your special paragraph goes here
</p>
If you are composing your post for the first time in the Prose editor, use the "Save" button frequently. It is safe to save and commit your post as many times as you'd like. There is a separate step for publishing your post before it is live on your website.
Add an excerpt separator
Back
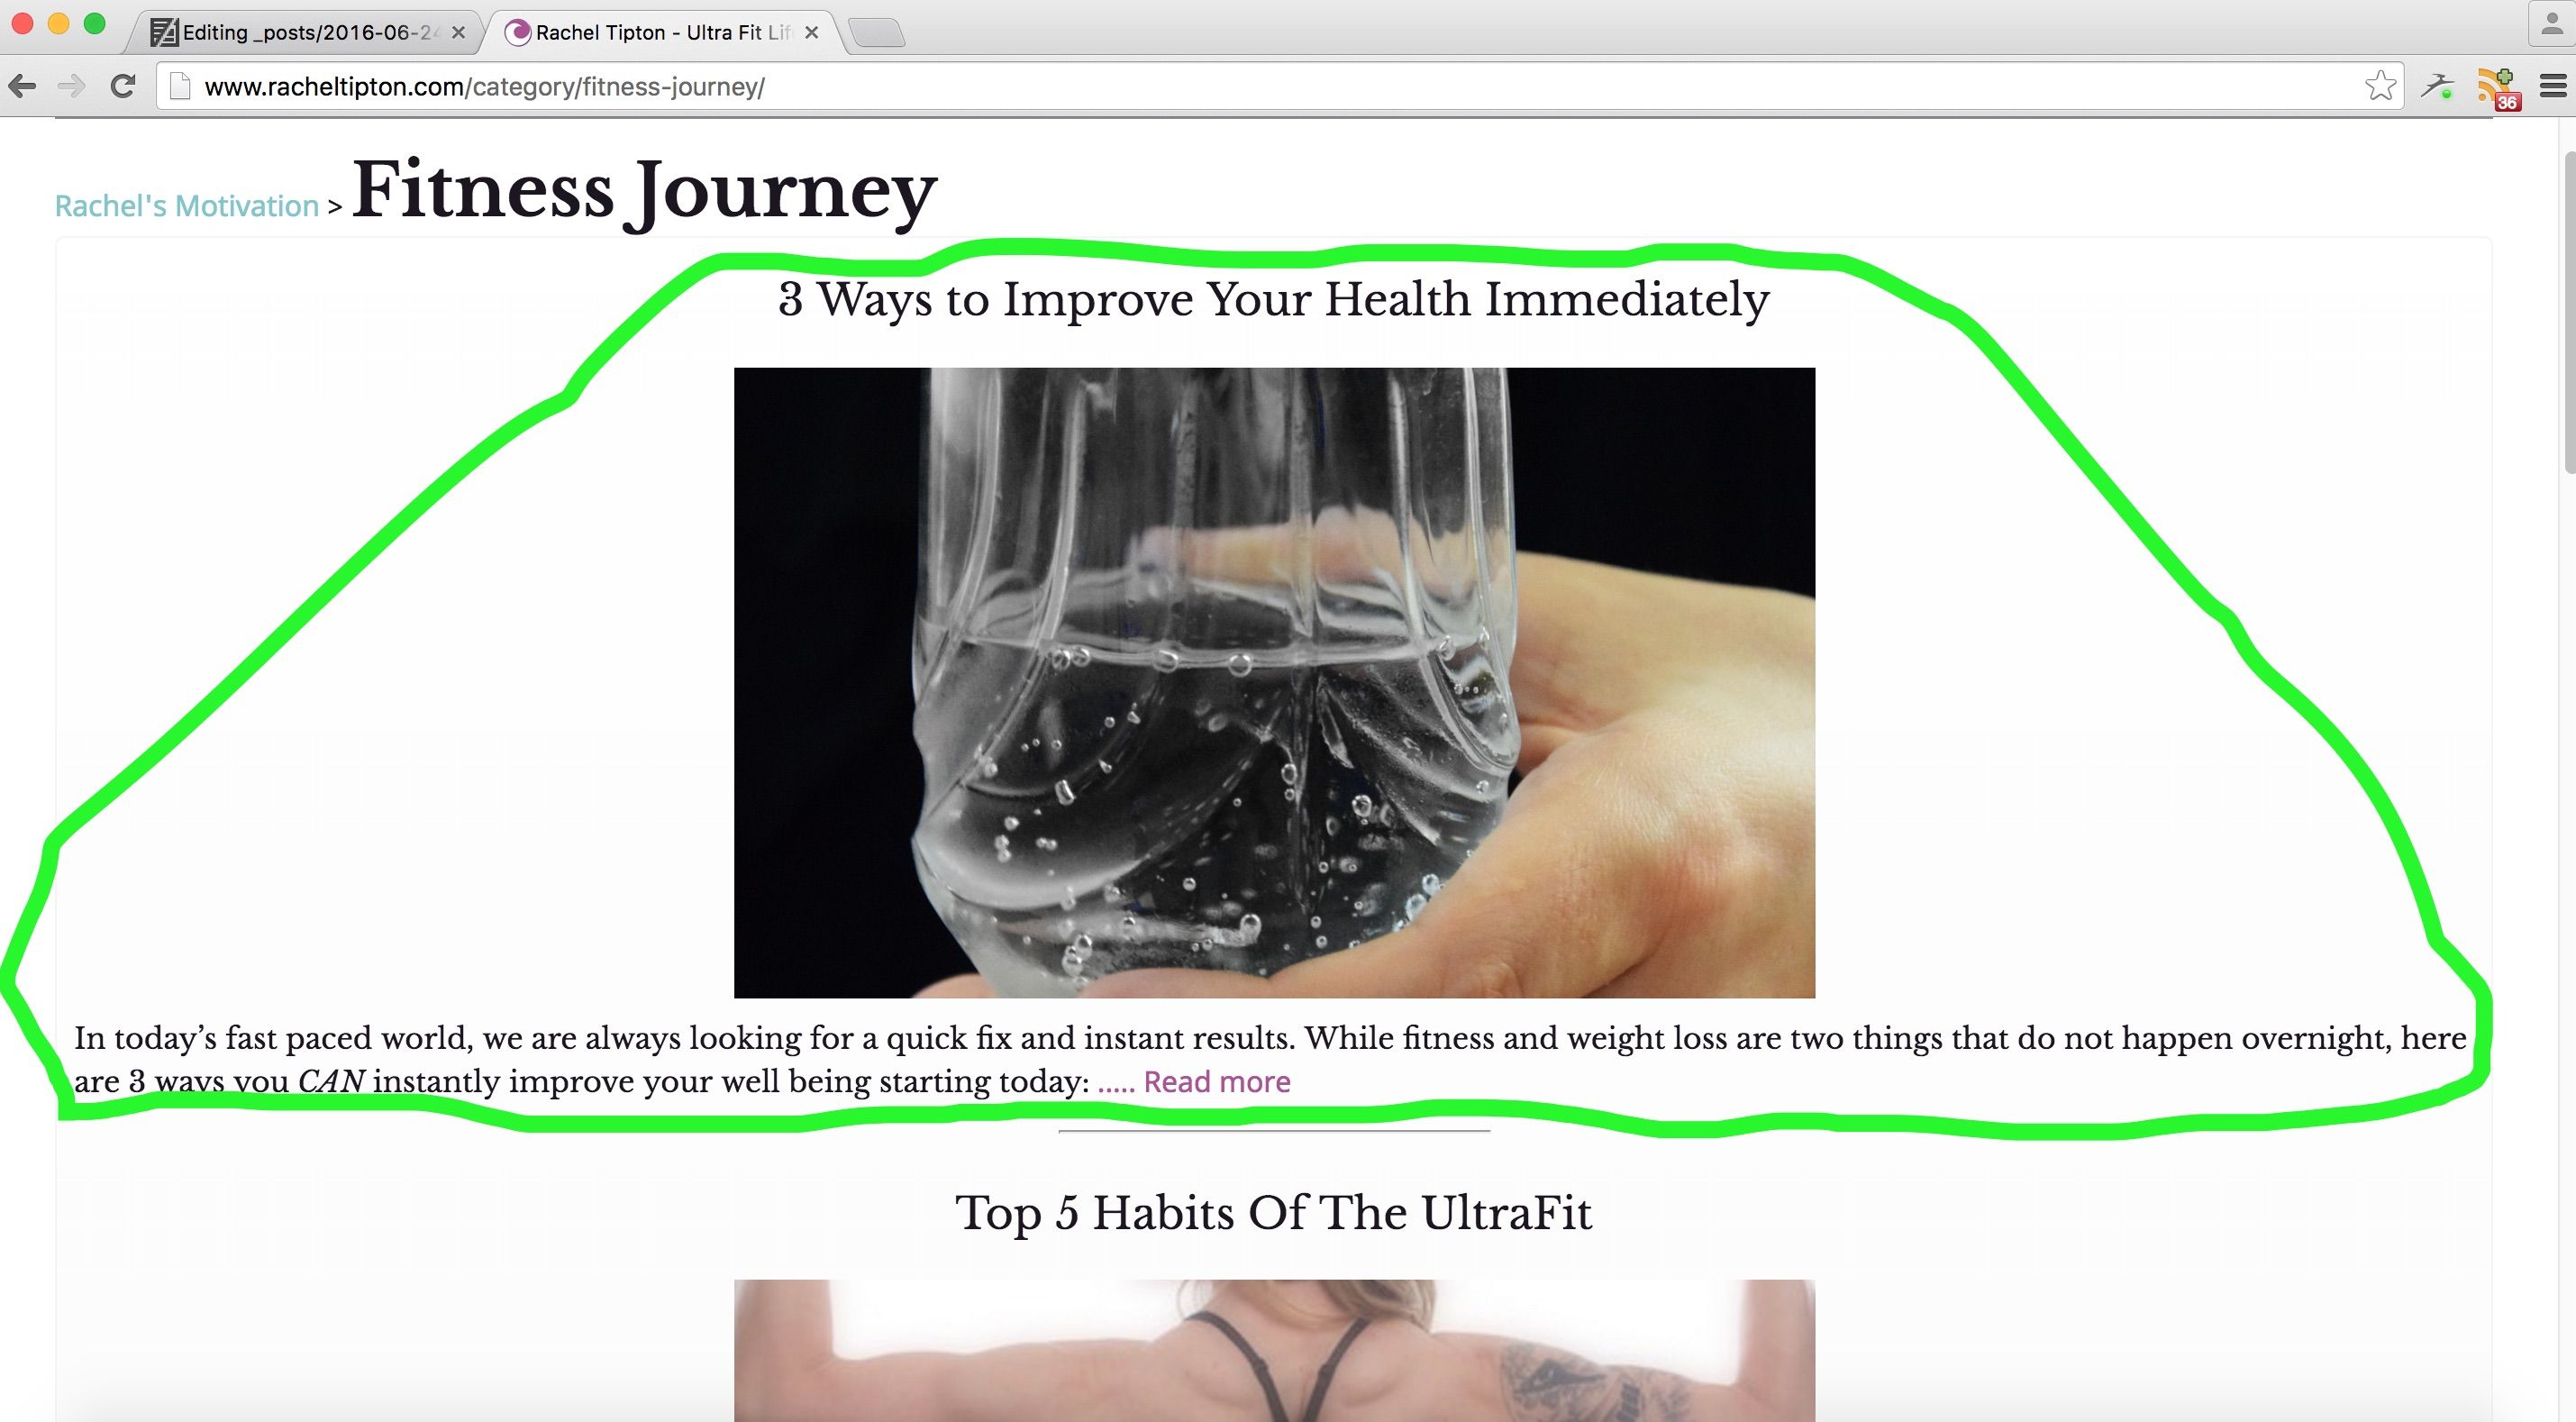
A post excerpt includes the featured image and a small preview of the post. It can be used in many places but is most commonly seen on main blog pages and in RSS feeds.
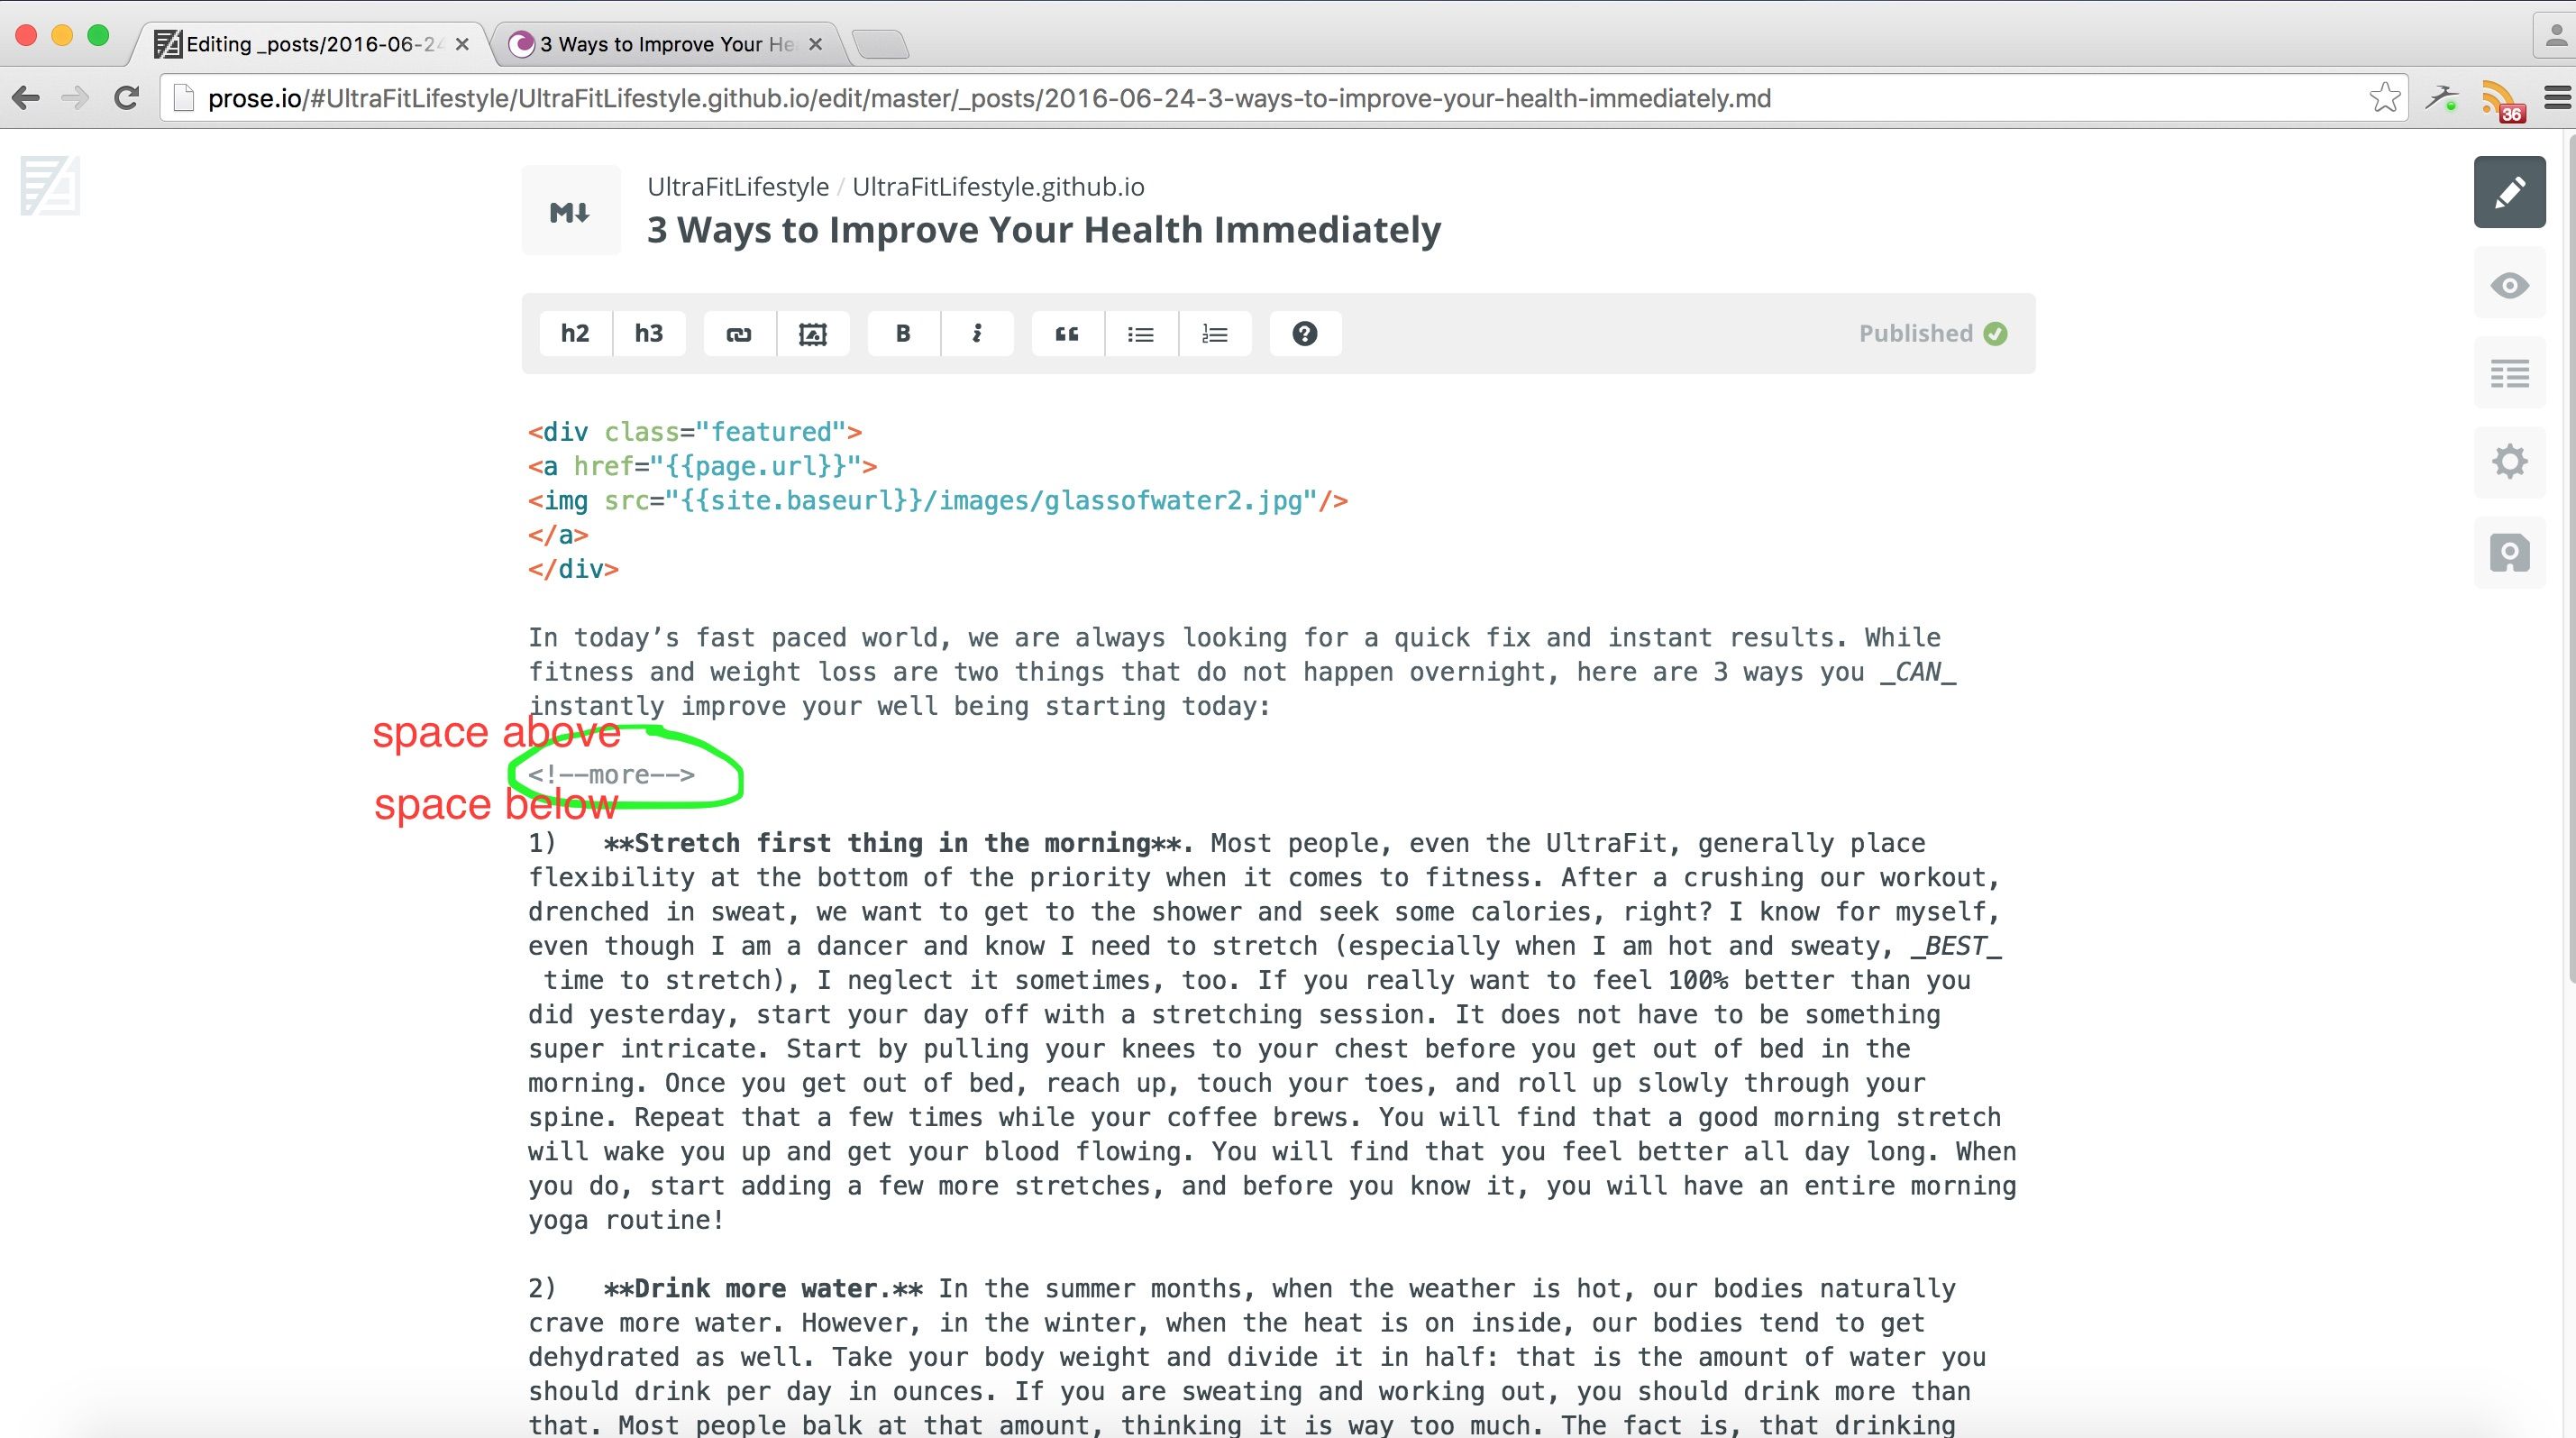
To tell Prose where the post excerpt ends copy the "more" code below into your post.
<!--more-->
Just like you had to do with the raw HTML for the featured image, you must leave a blank line above and a blank line below the excerpt separator.
Add links
Back
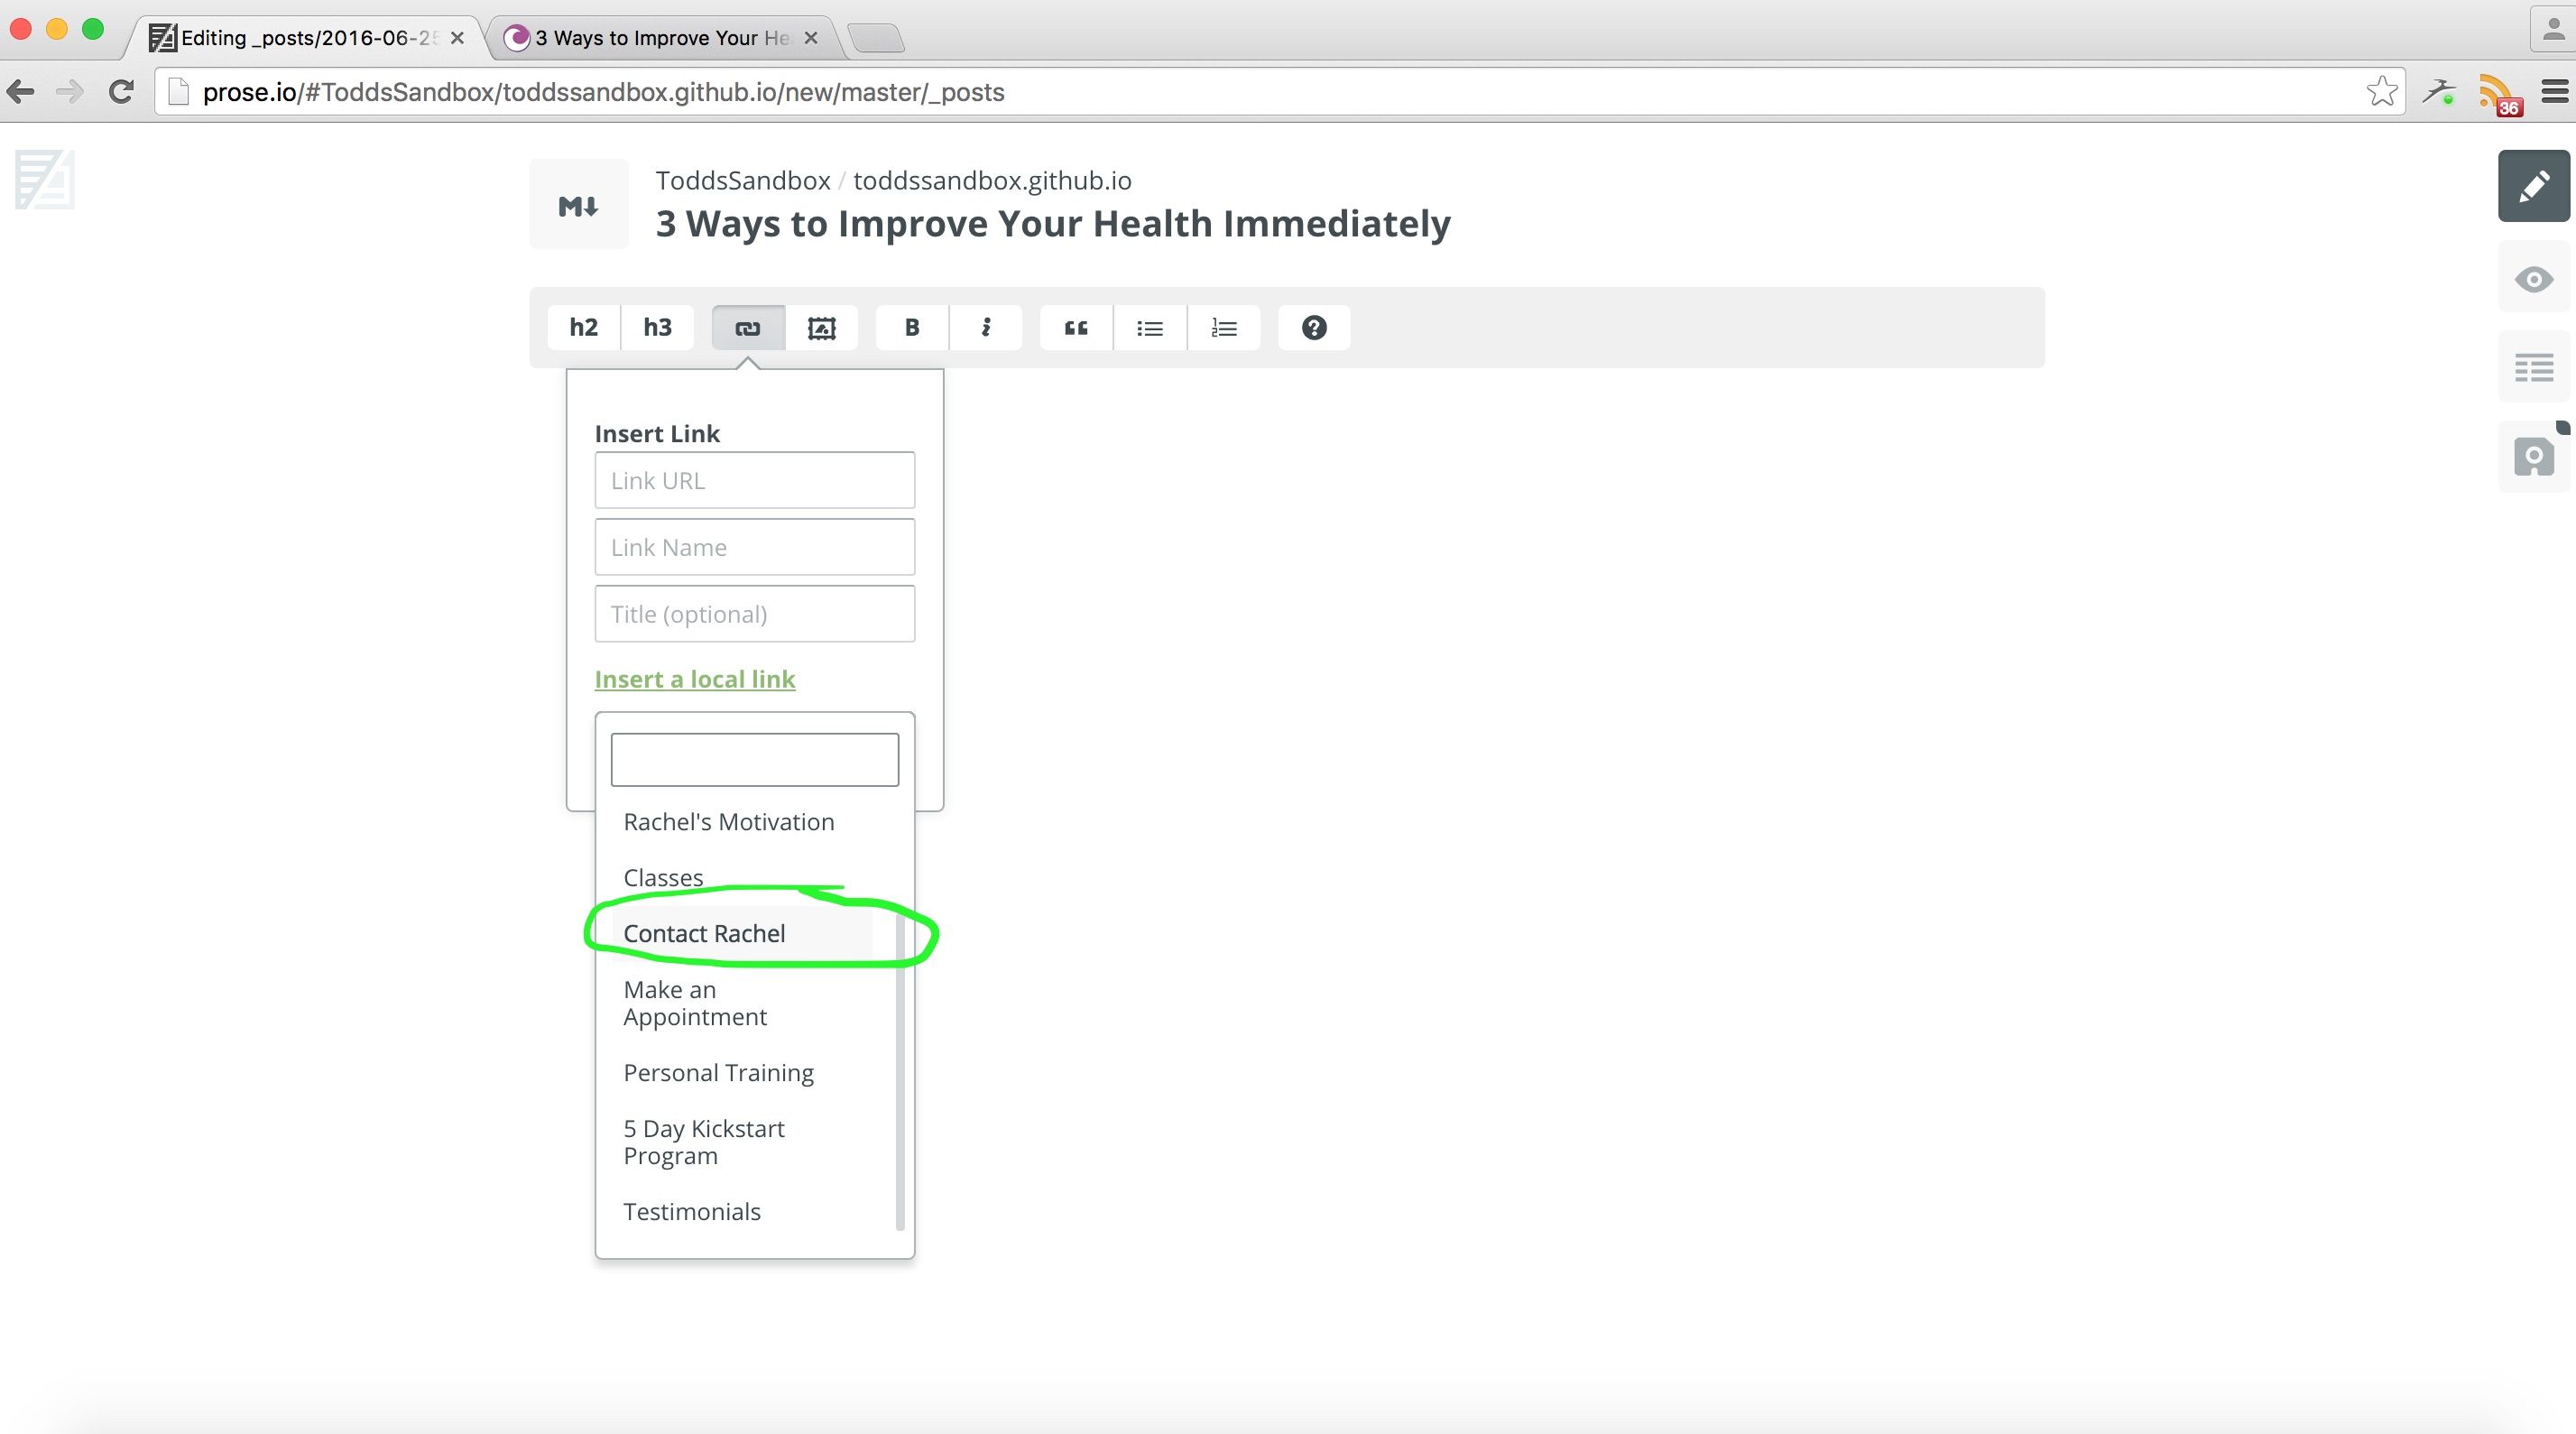
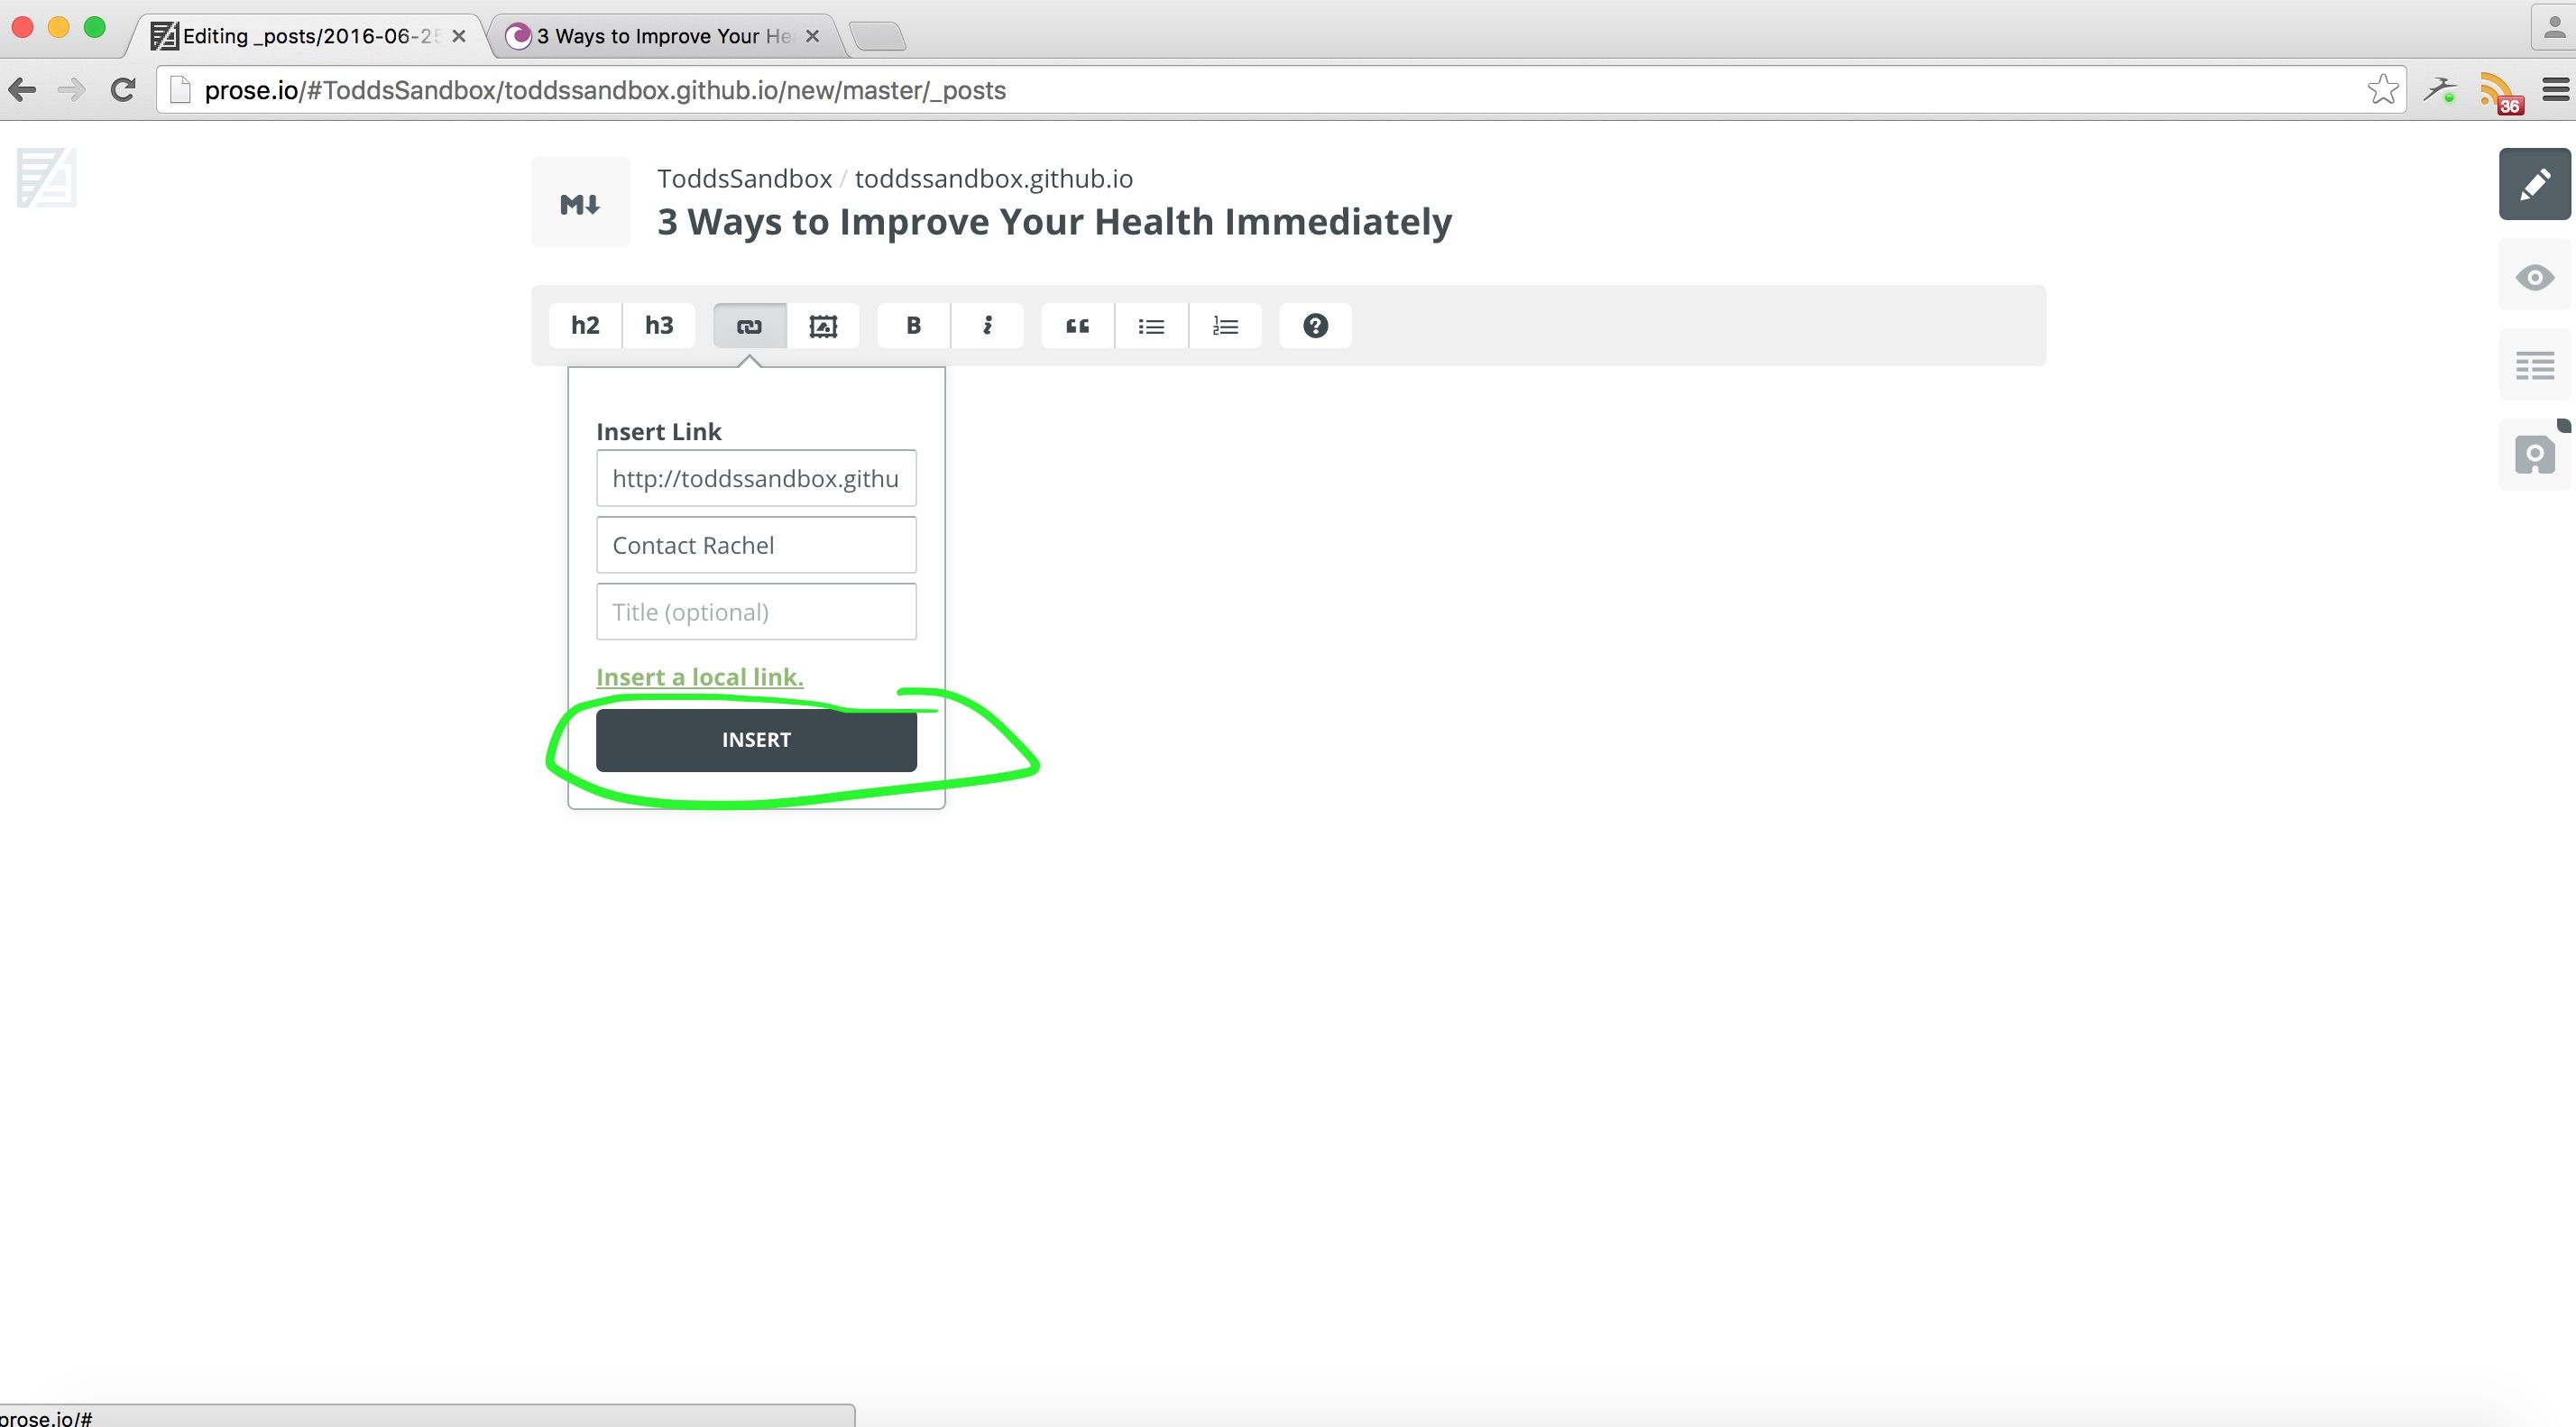
There is a link button on the toolbar that you can use to add links into your post. If you are linking to a page that is not on your own site then you can provide the link URL, the link text, and an optional title. If you are linking to a page on your own site you can click "insert a local link".
If you are inserting a local link choose the page you want to link to from the dropdown menu.
The last step is to click "Insert" and the link will be inserted to where your cursor is located within the Prose editor.
Add images
Back
You can add images to your post in addition to the featured image. Follow the same steps for uploading your image as you did for the featured image. You can either leave the image as it is when you upload it or you can align it by replacing the stars in the different HTML examples below.
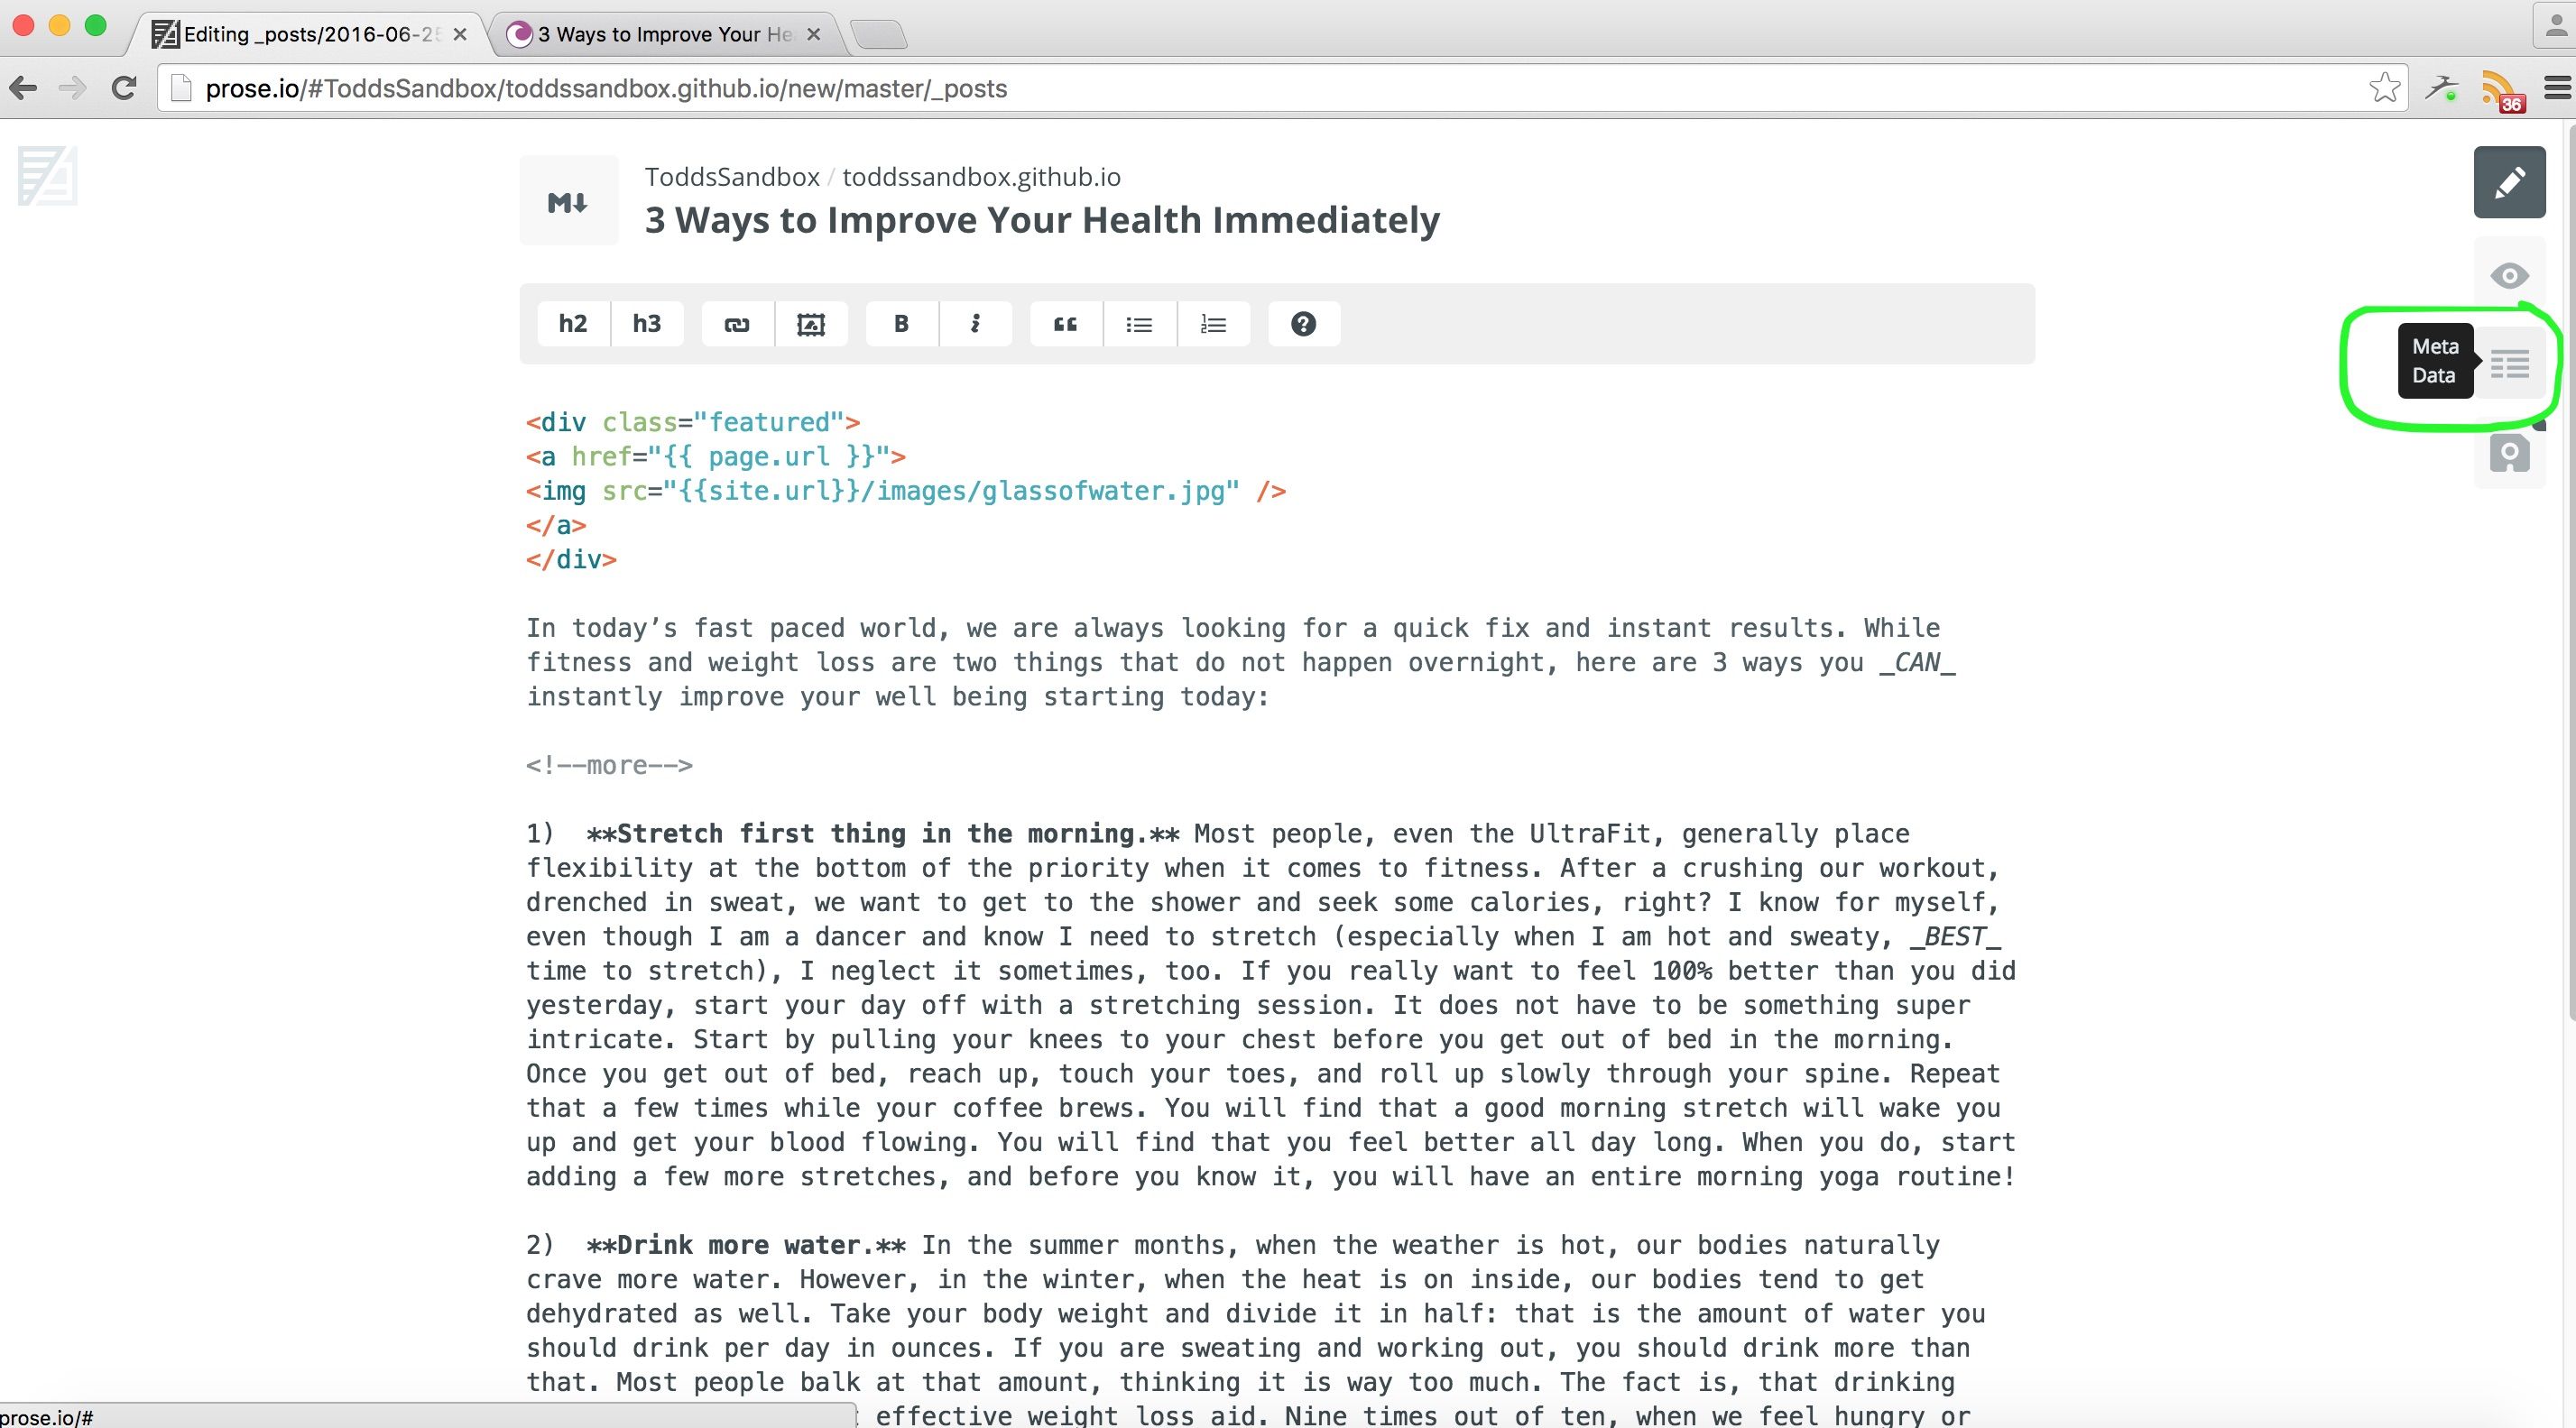
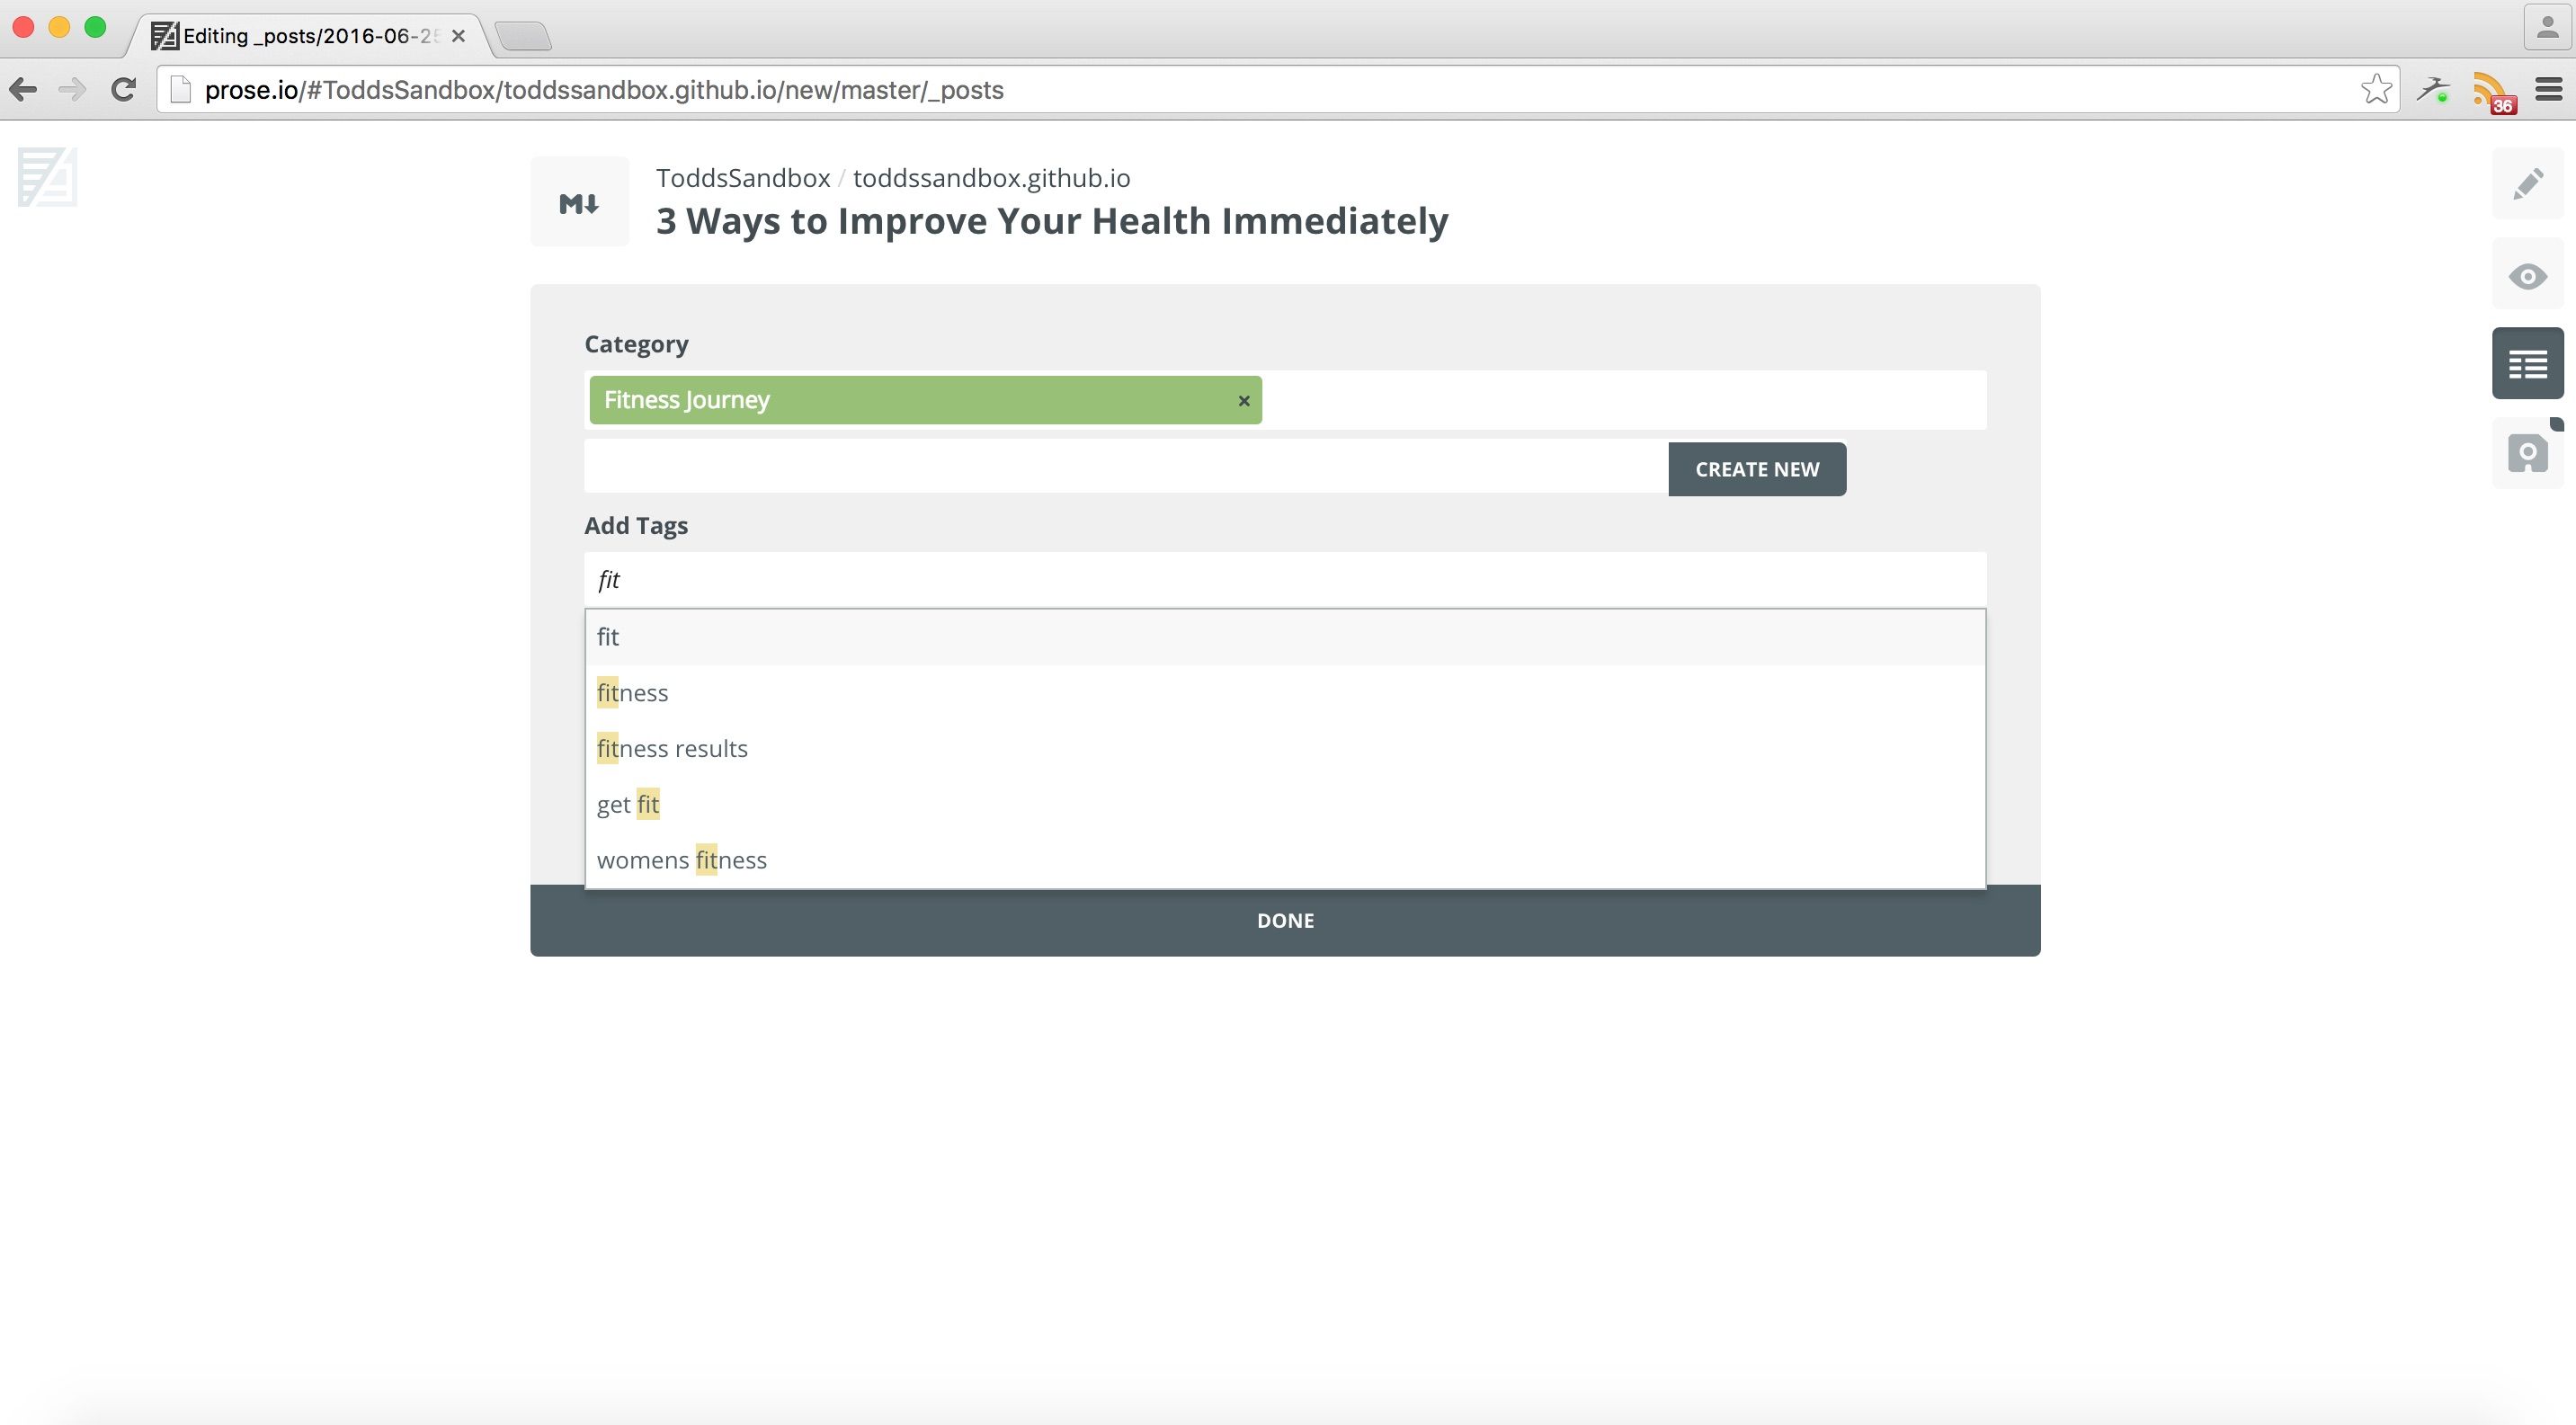
On the sidebar above the save icon there is an icon for "meta data". Click this.
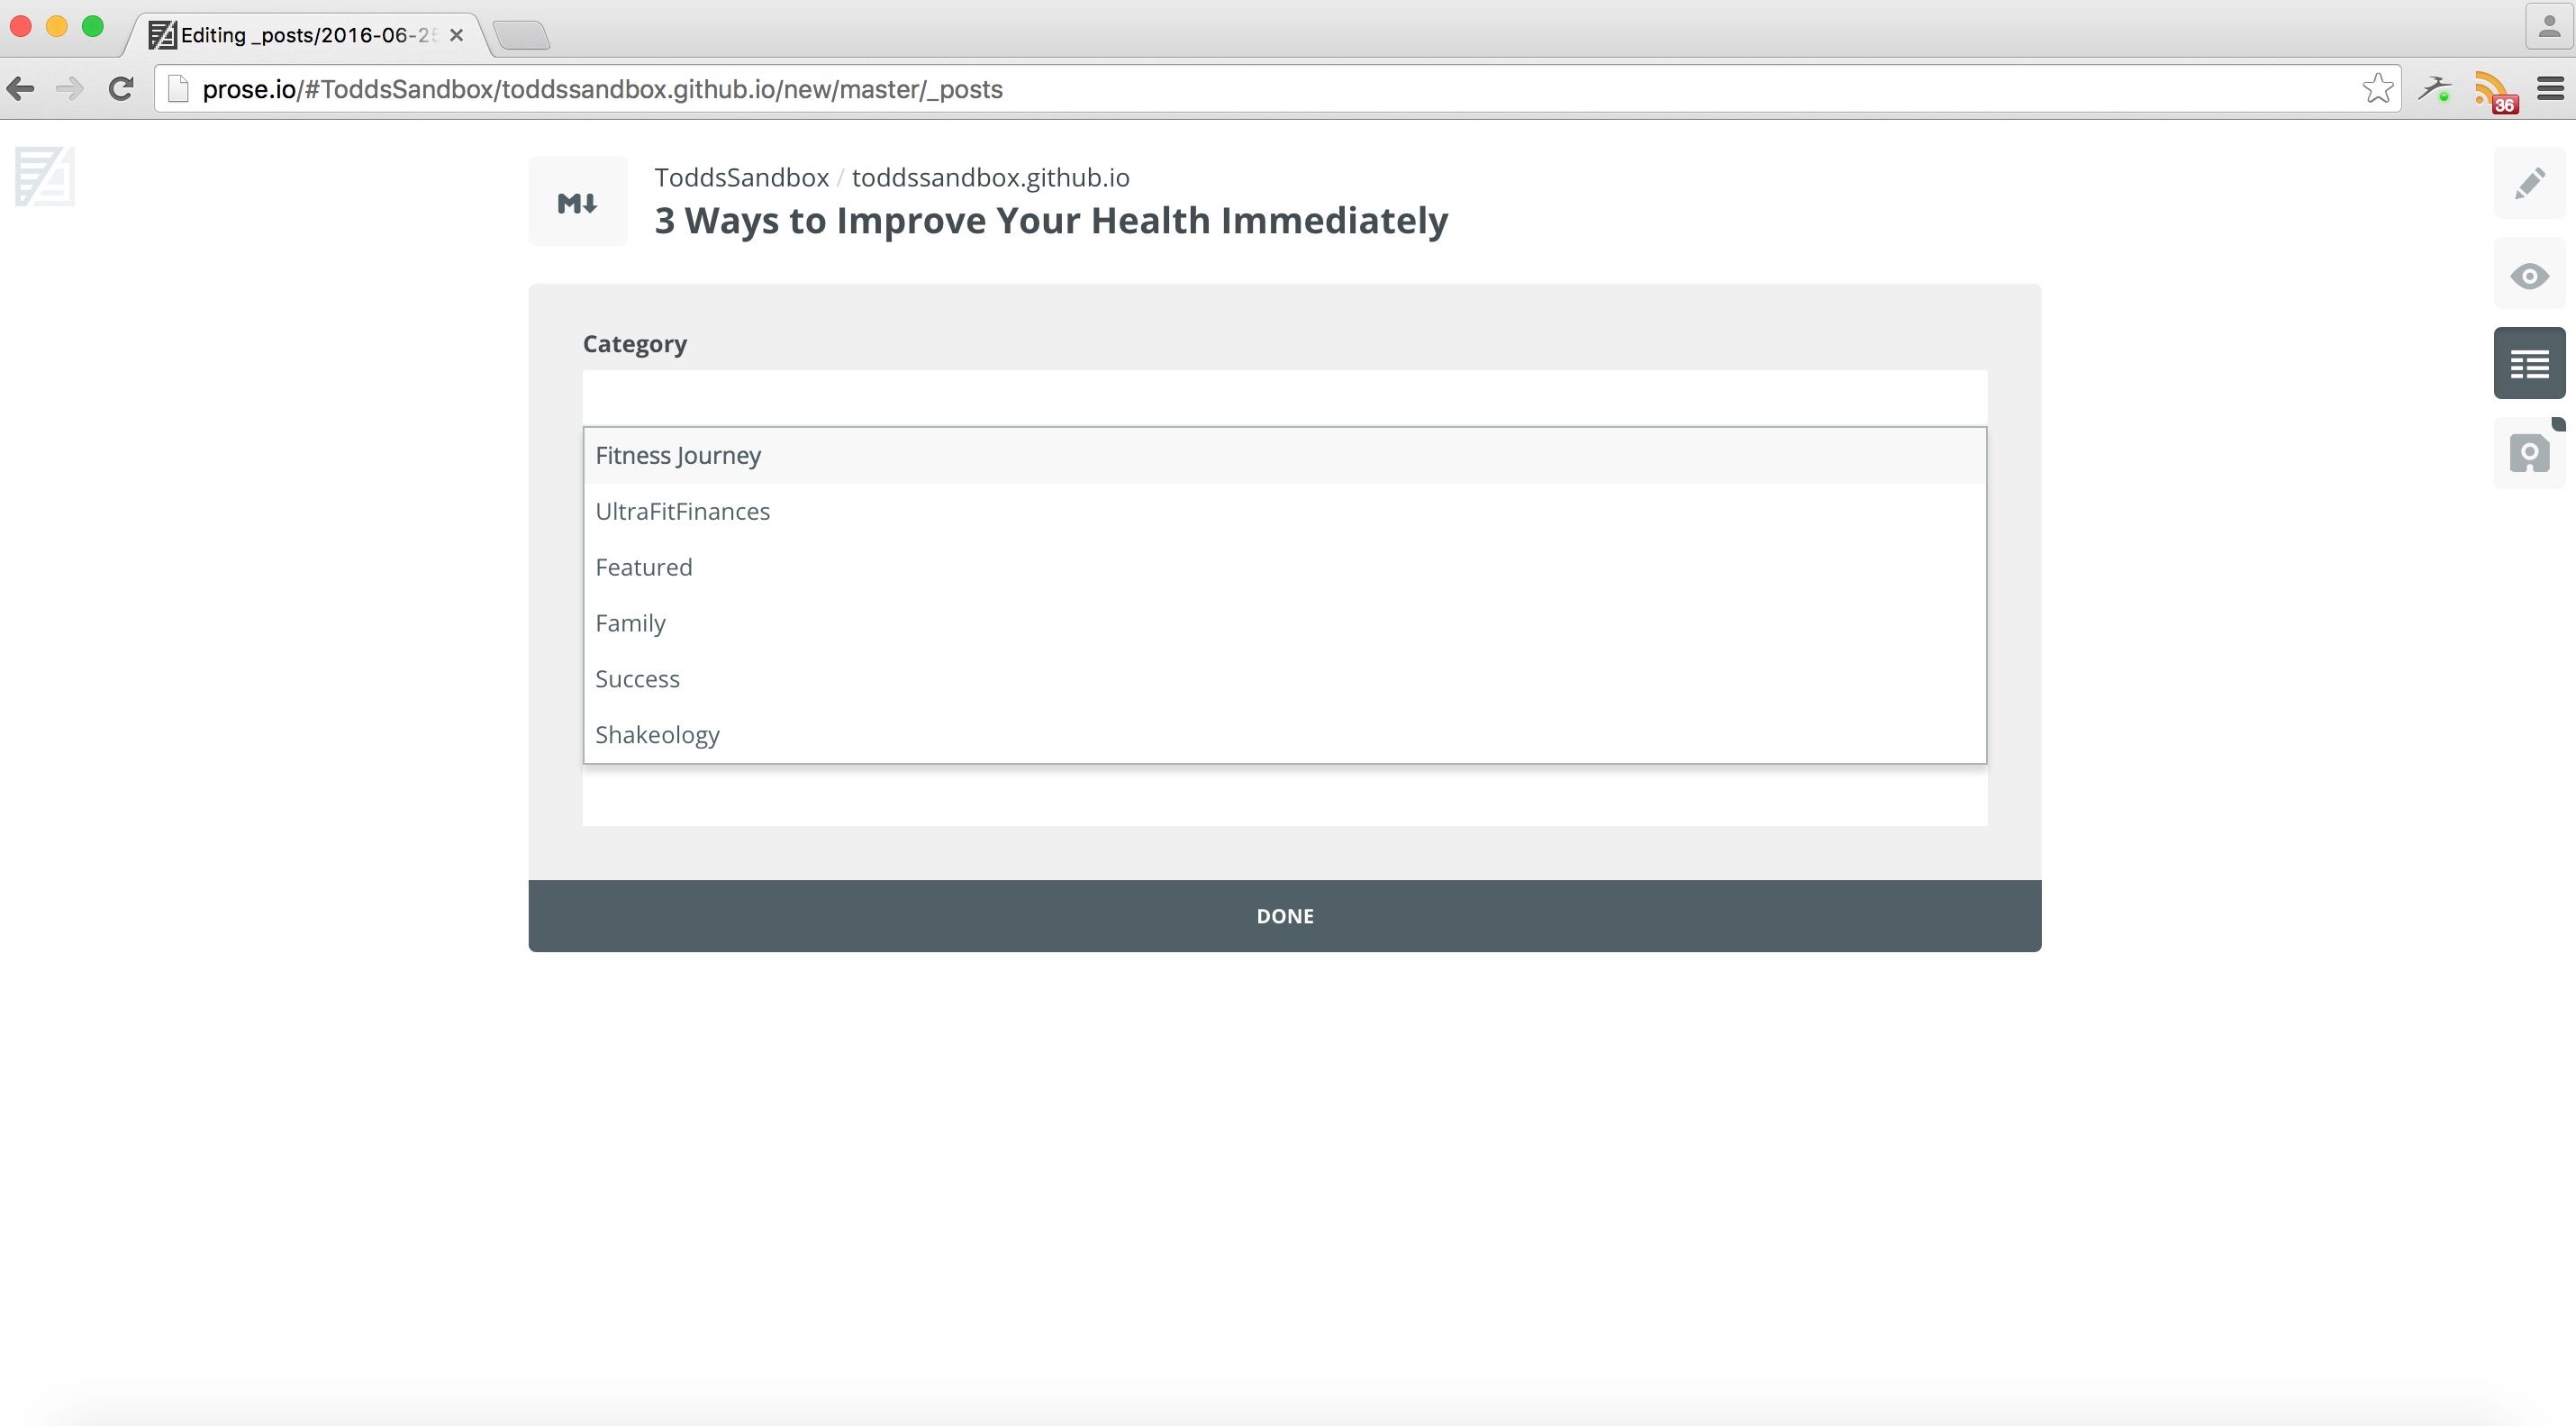
You can select from a list of existing categories in your blog or you can create a new category.
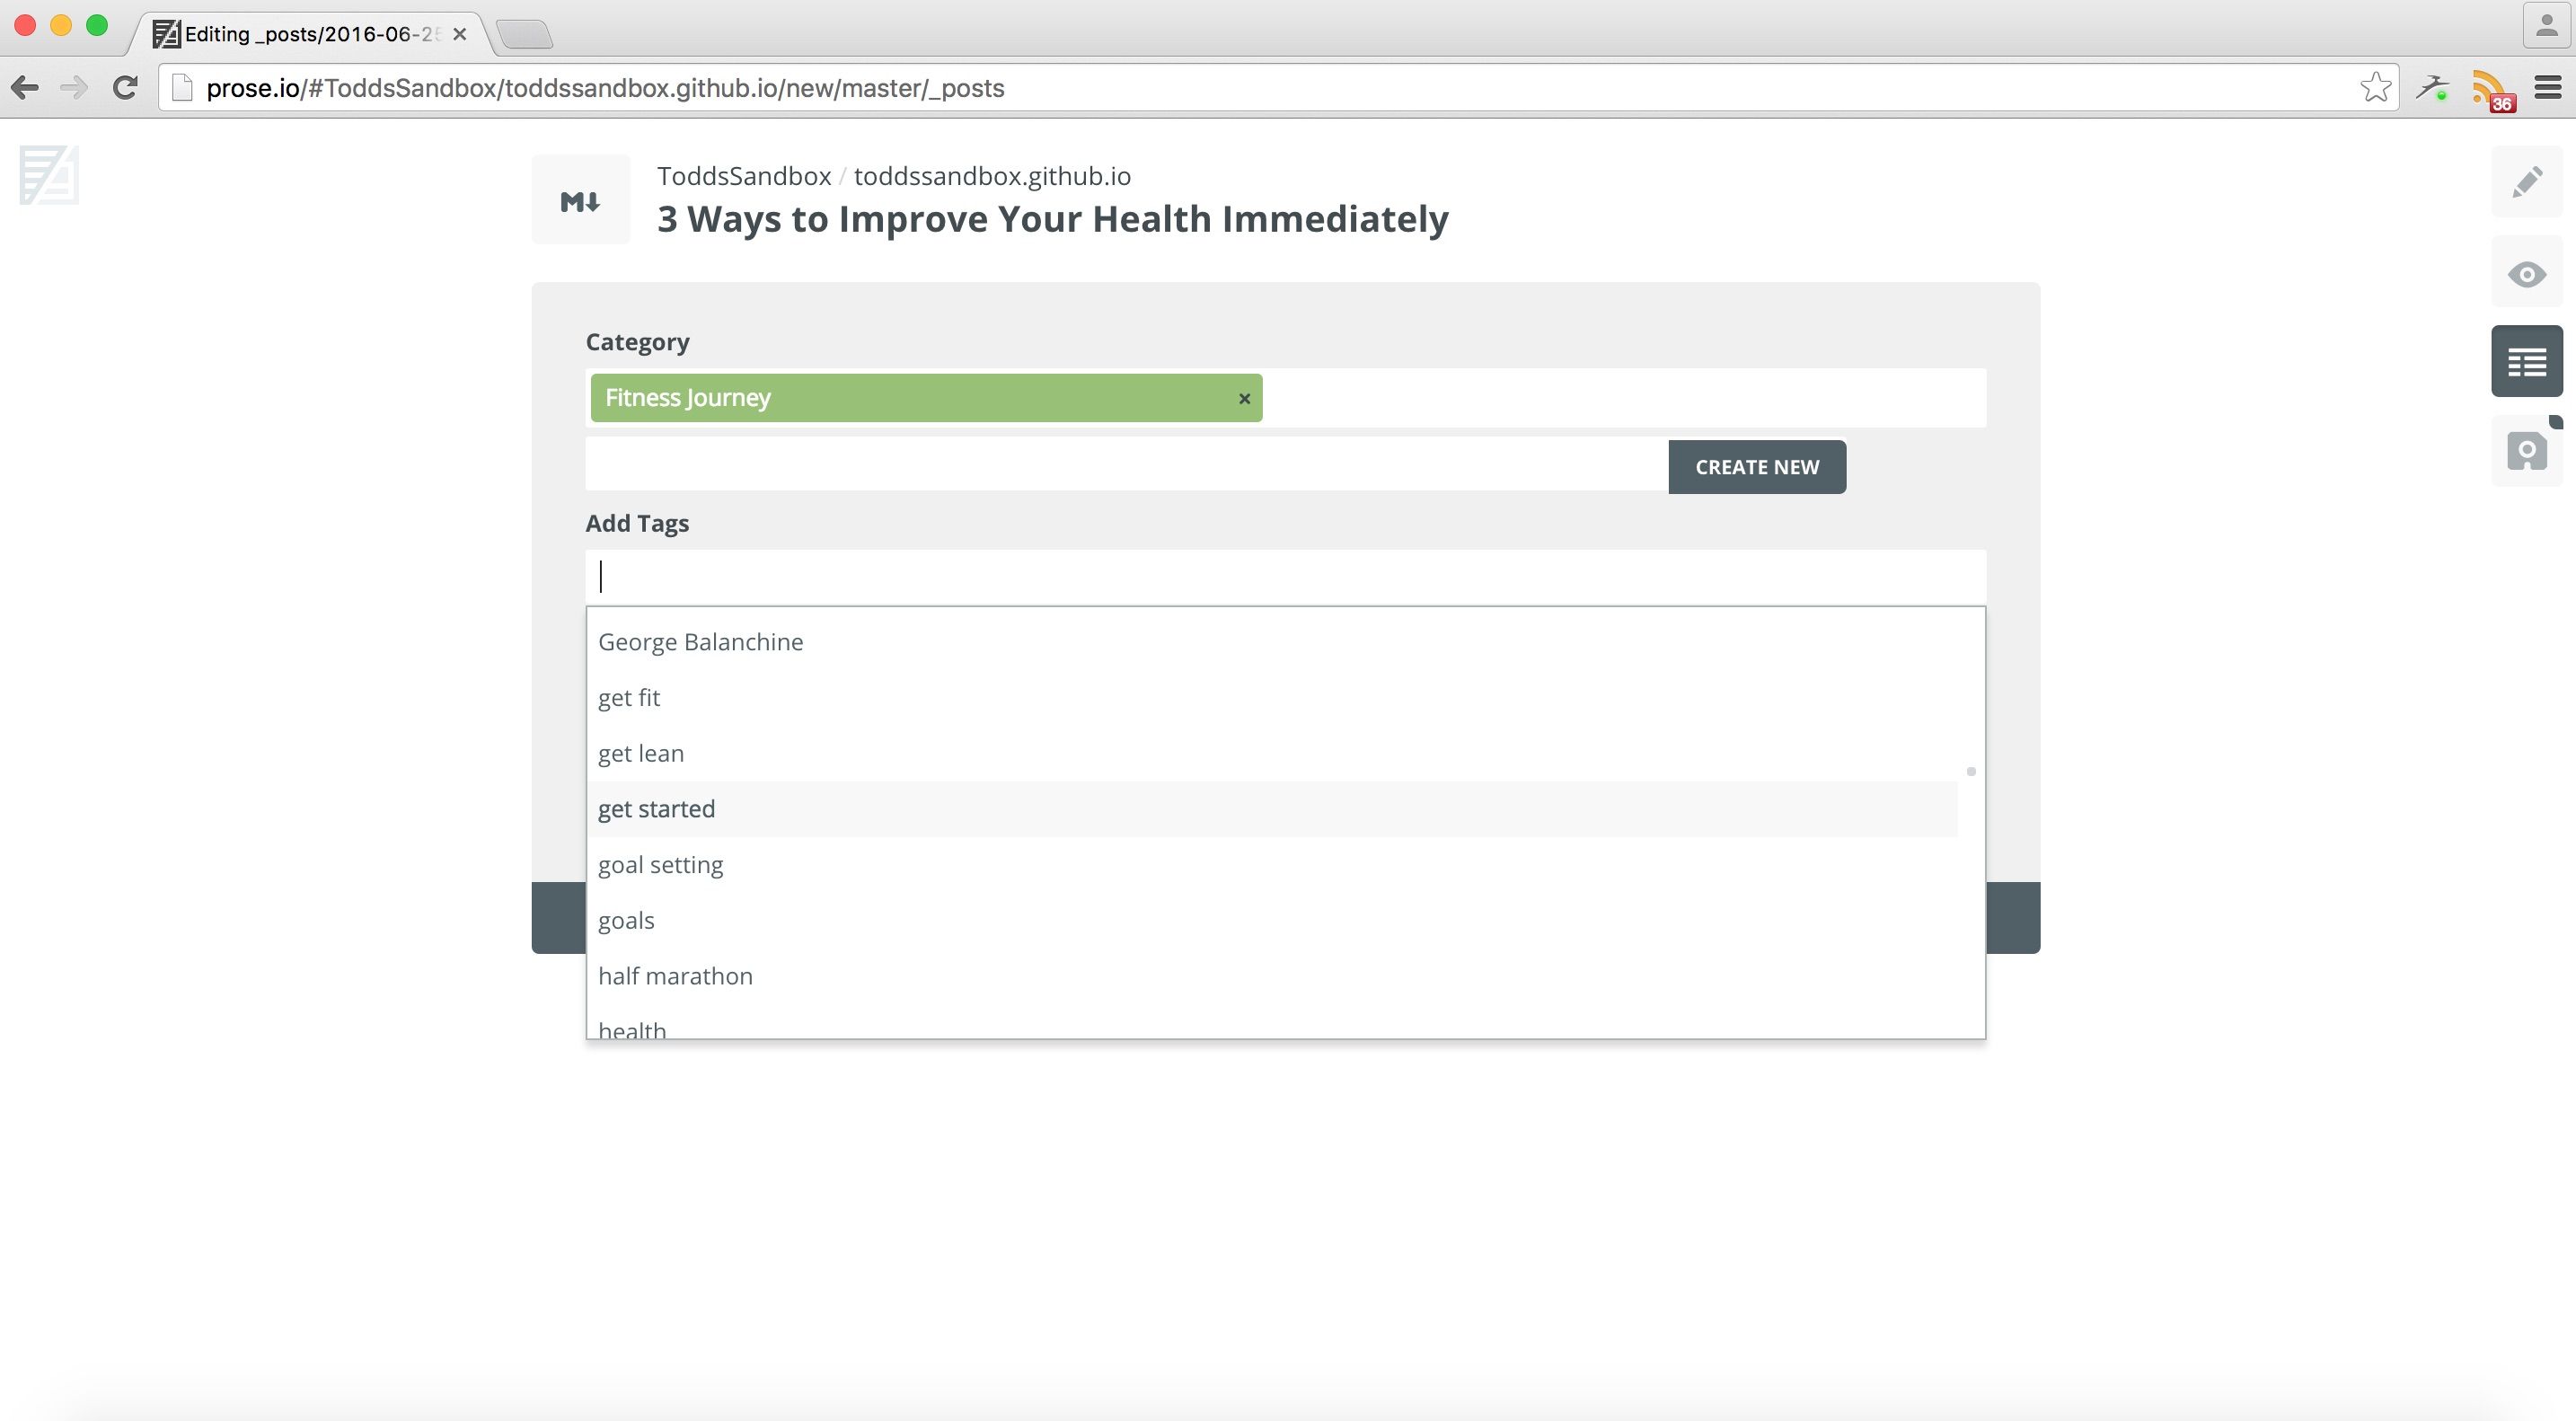
You can select from a list of existing tags in your blog or you can create new tags.
If you already have a long list of categories or tags you can start typing what you are searching for and the relevant tags will appear for your clicking pleasure.
Save and publish your post
Back
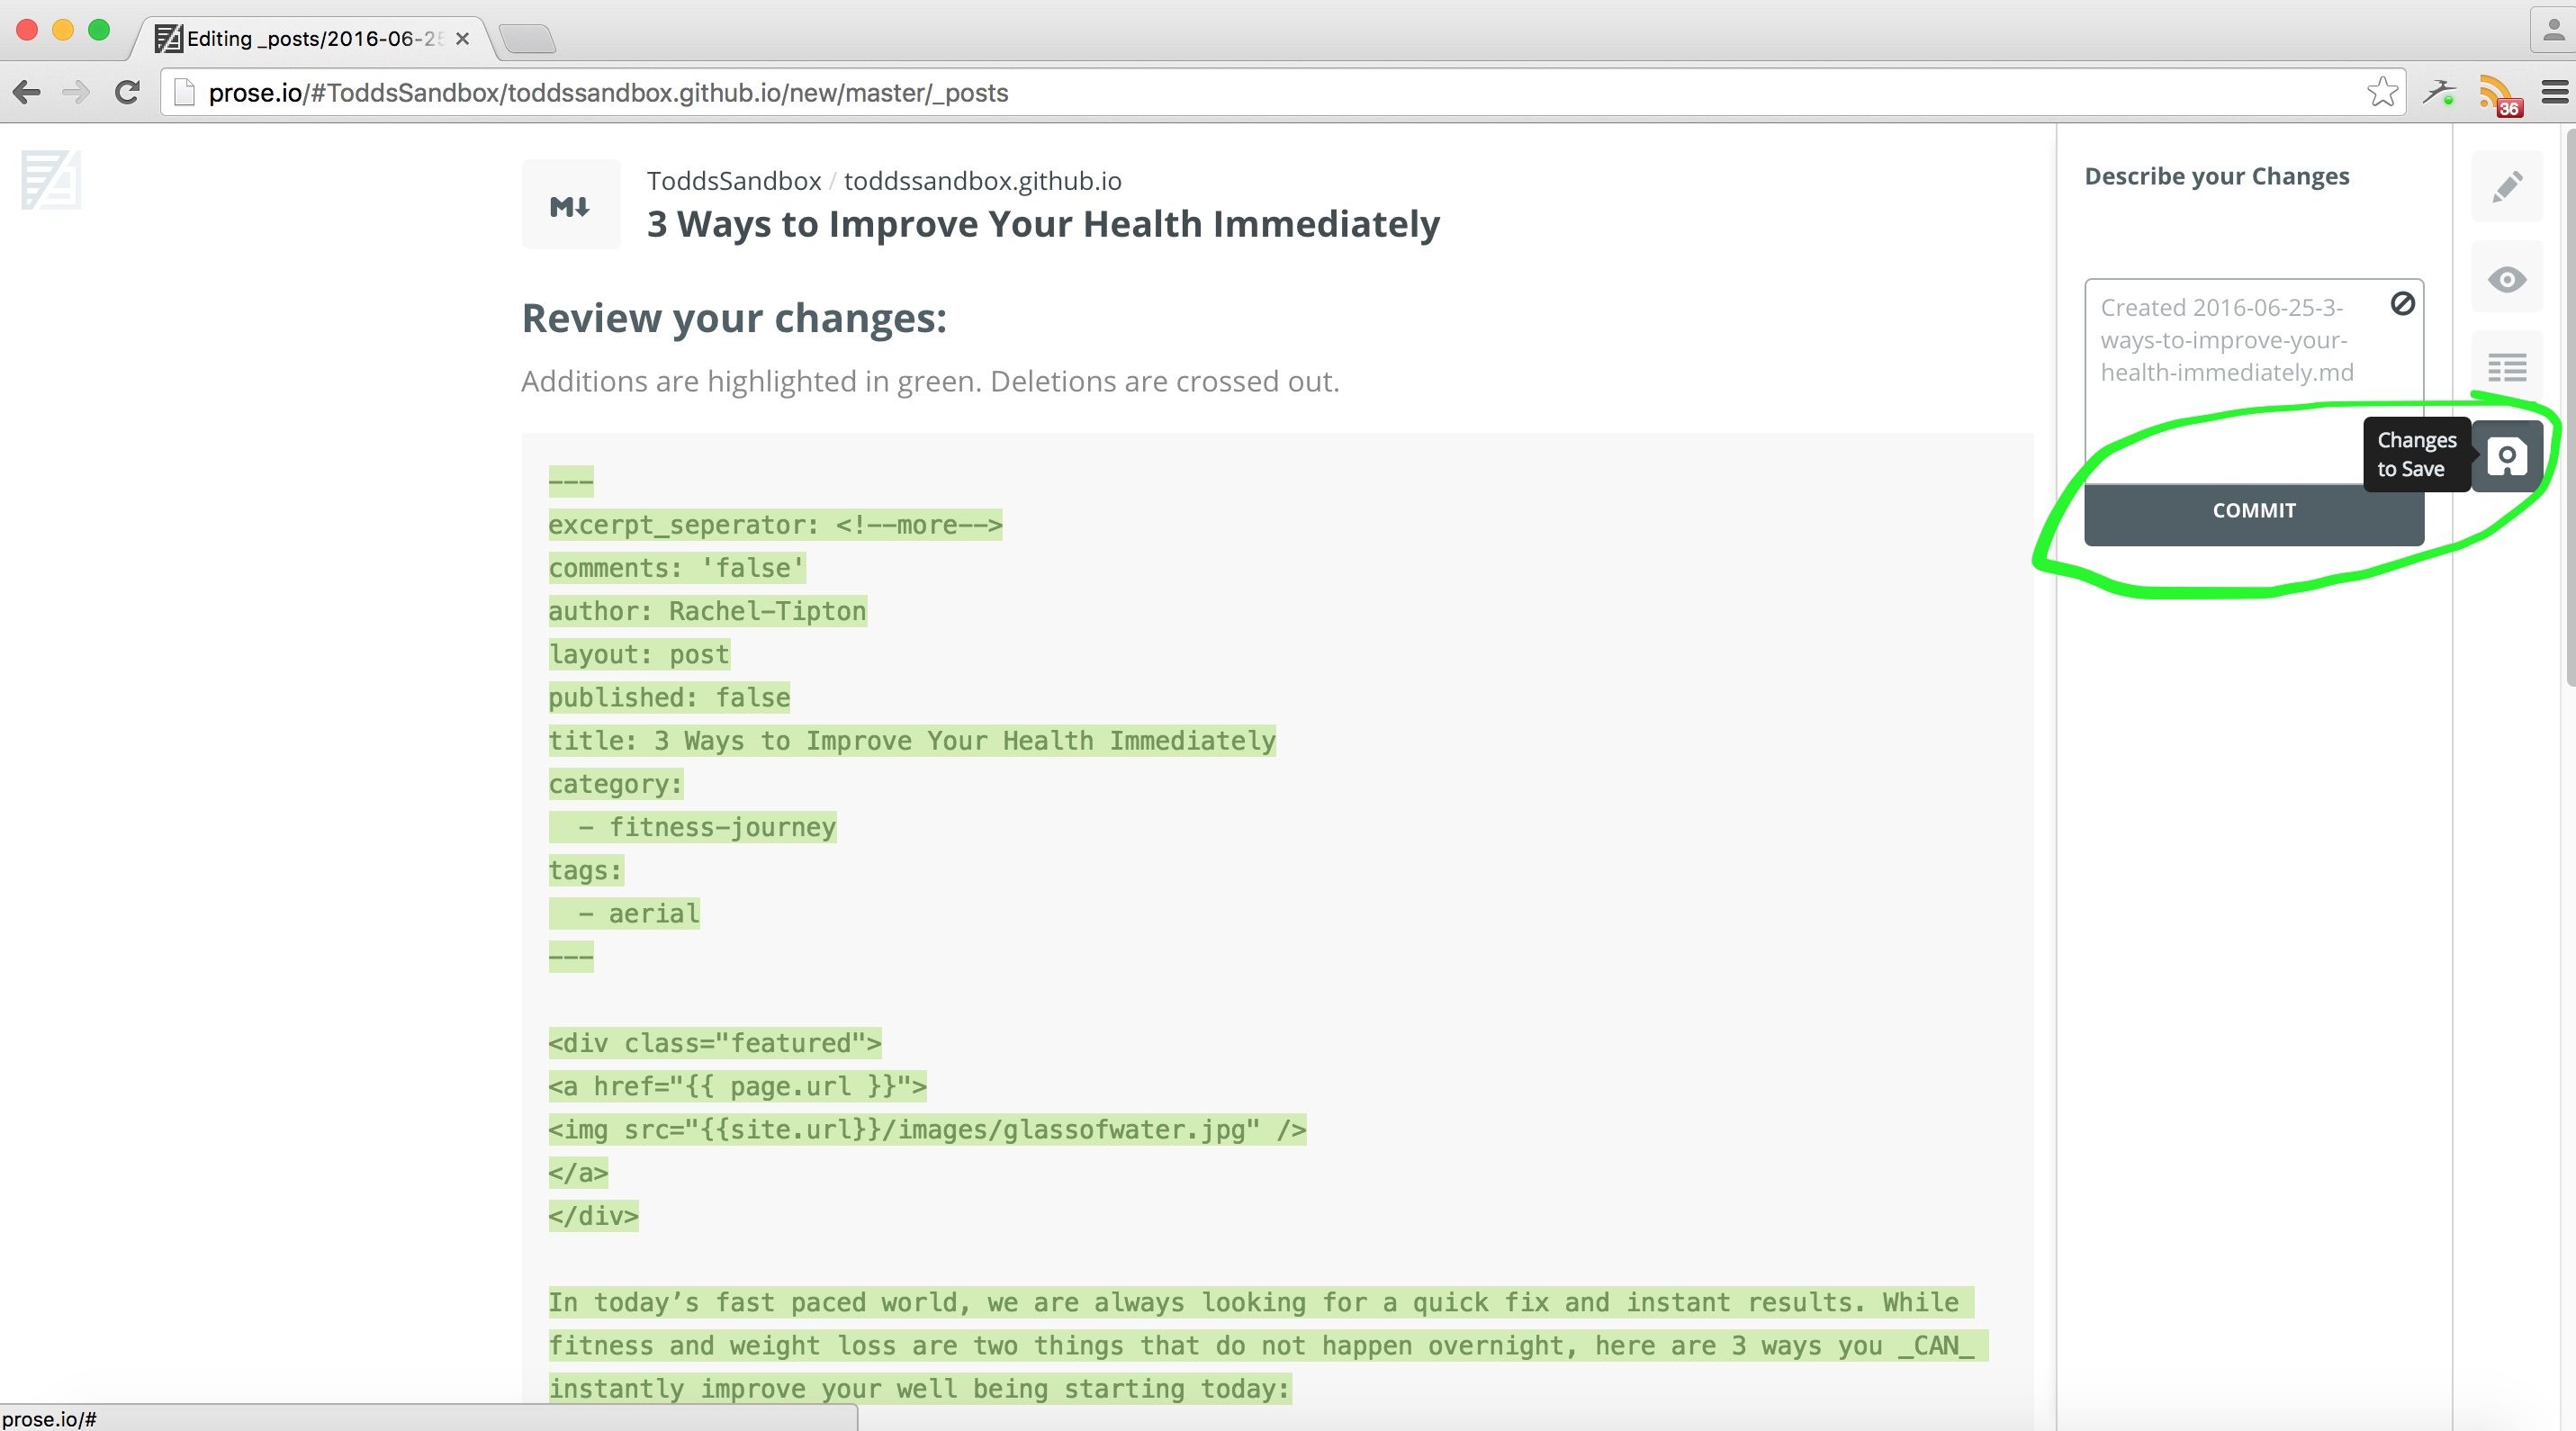
On the sidebar click the save icon and then click commit.
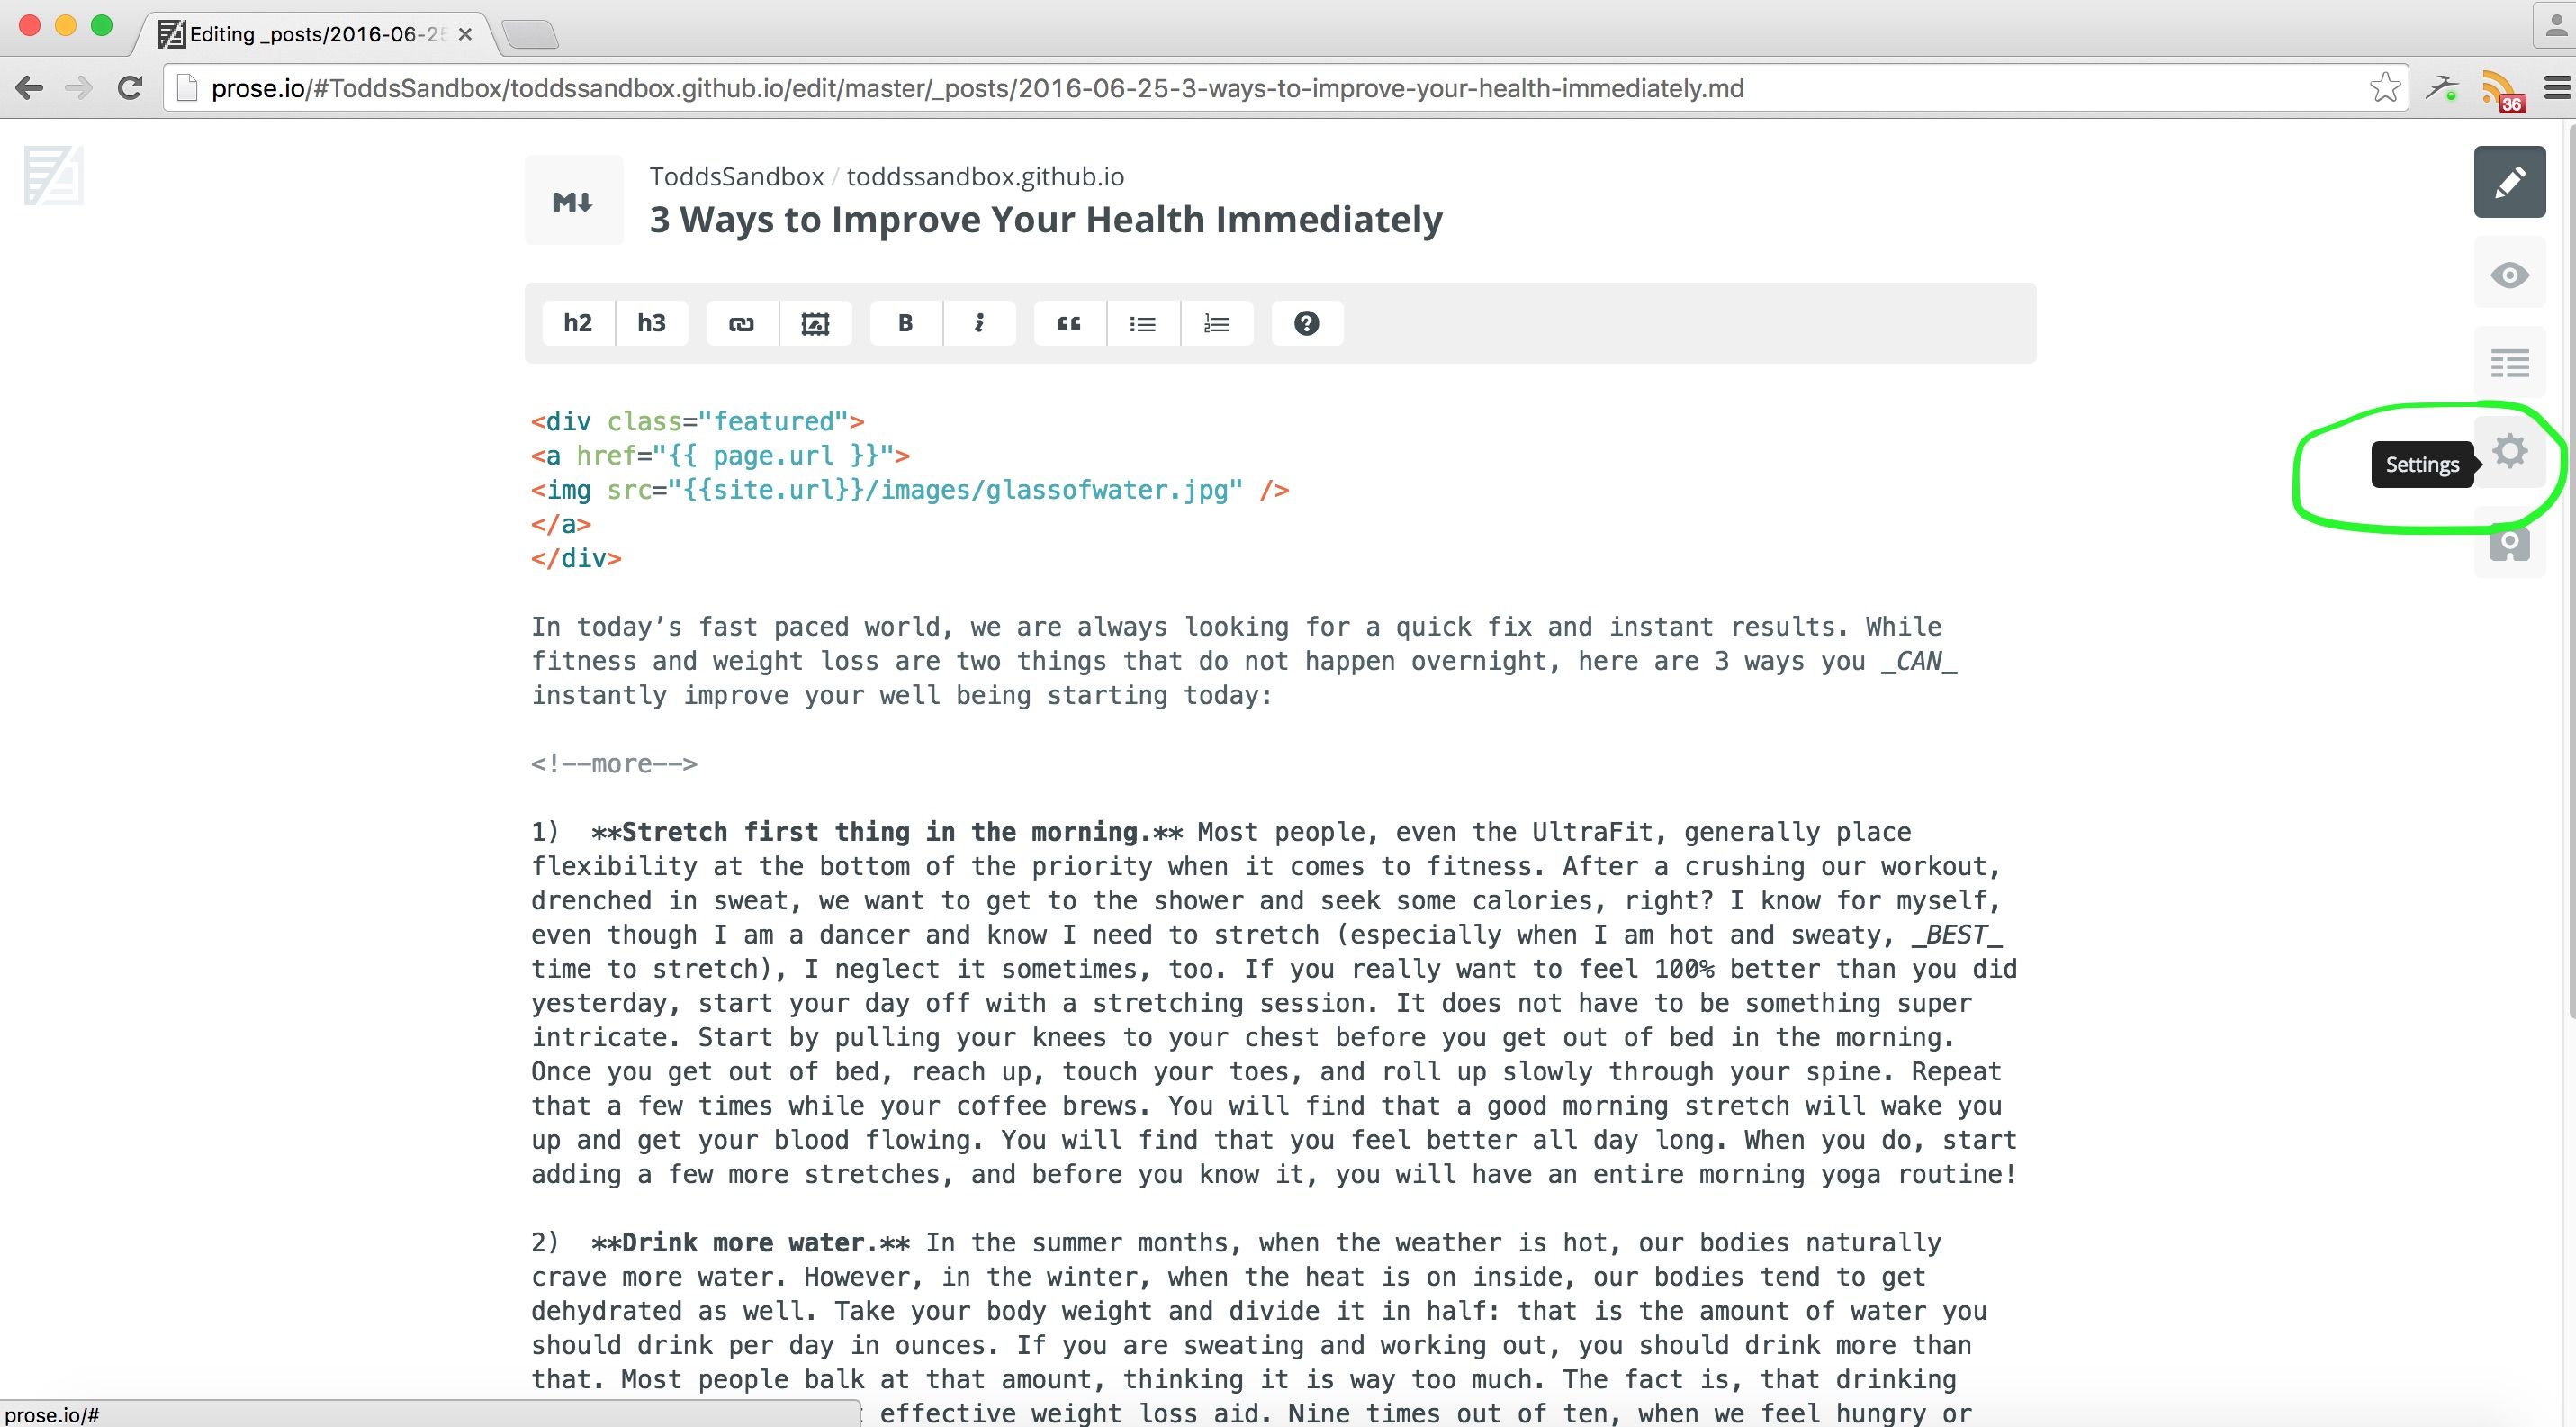
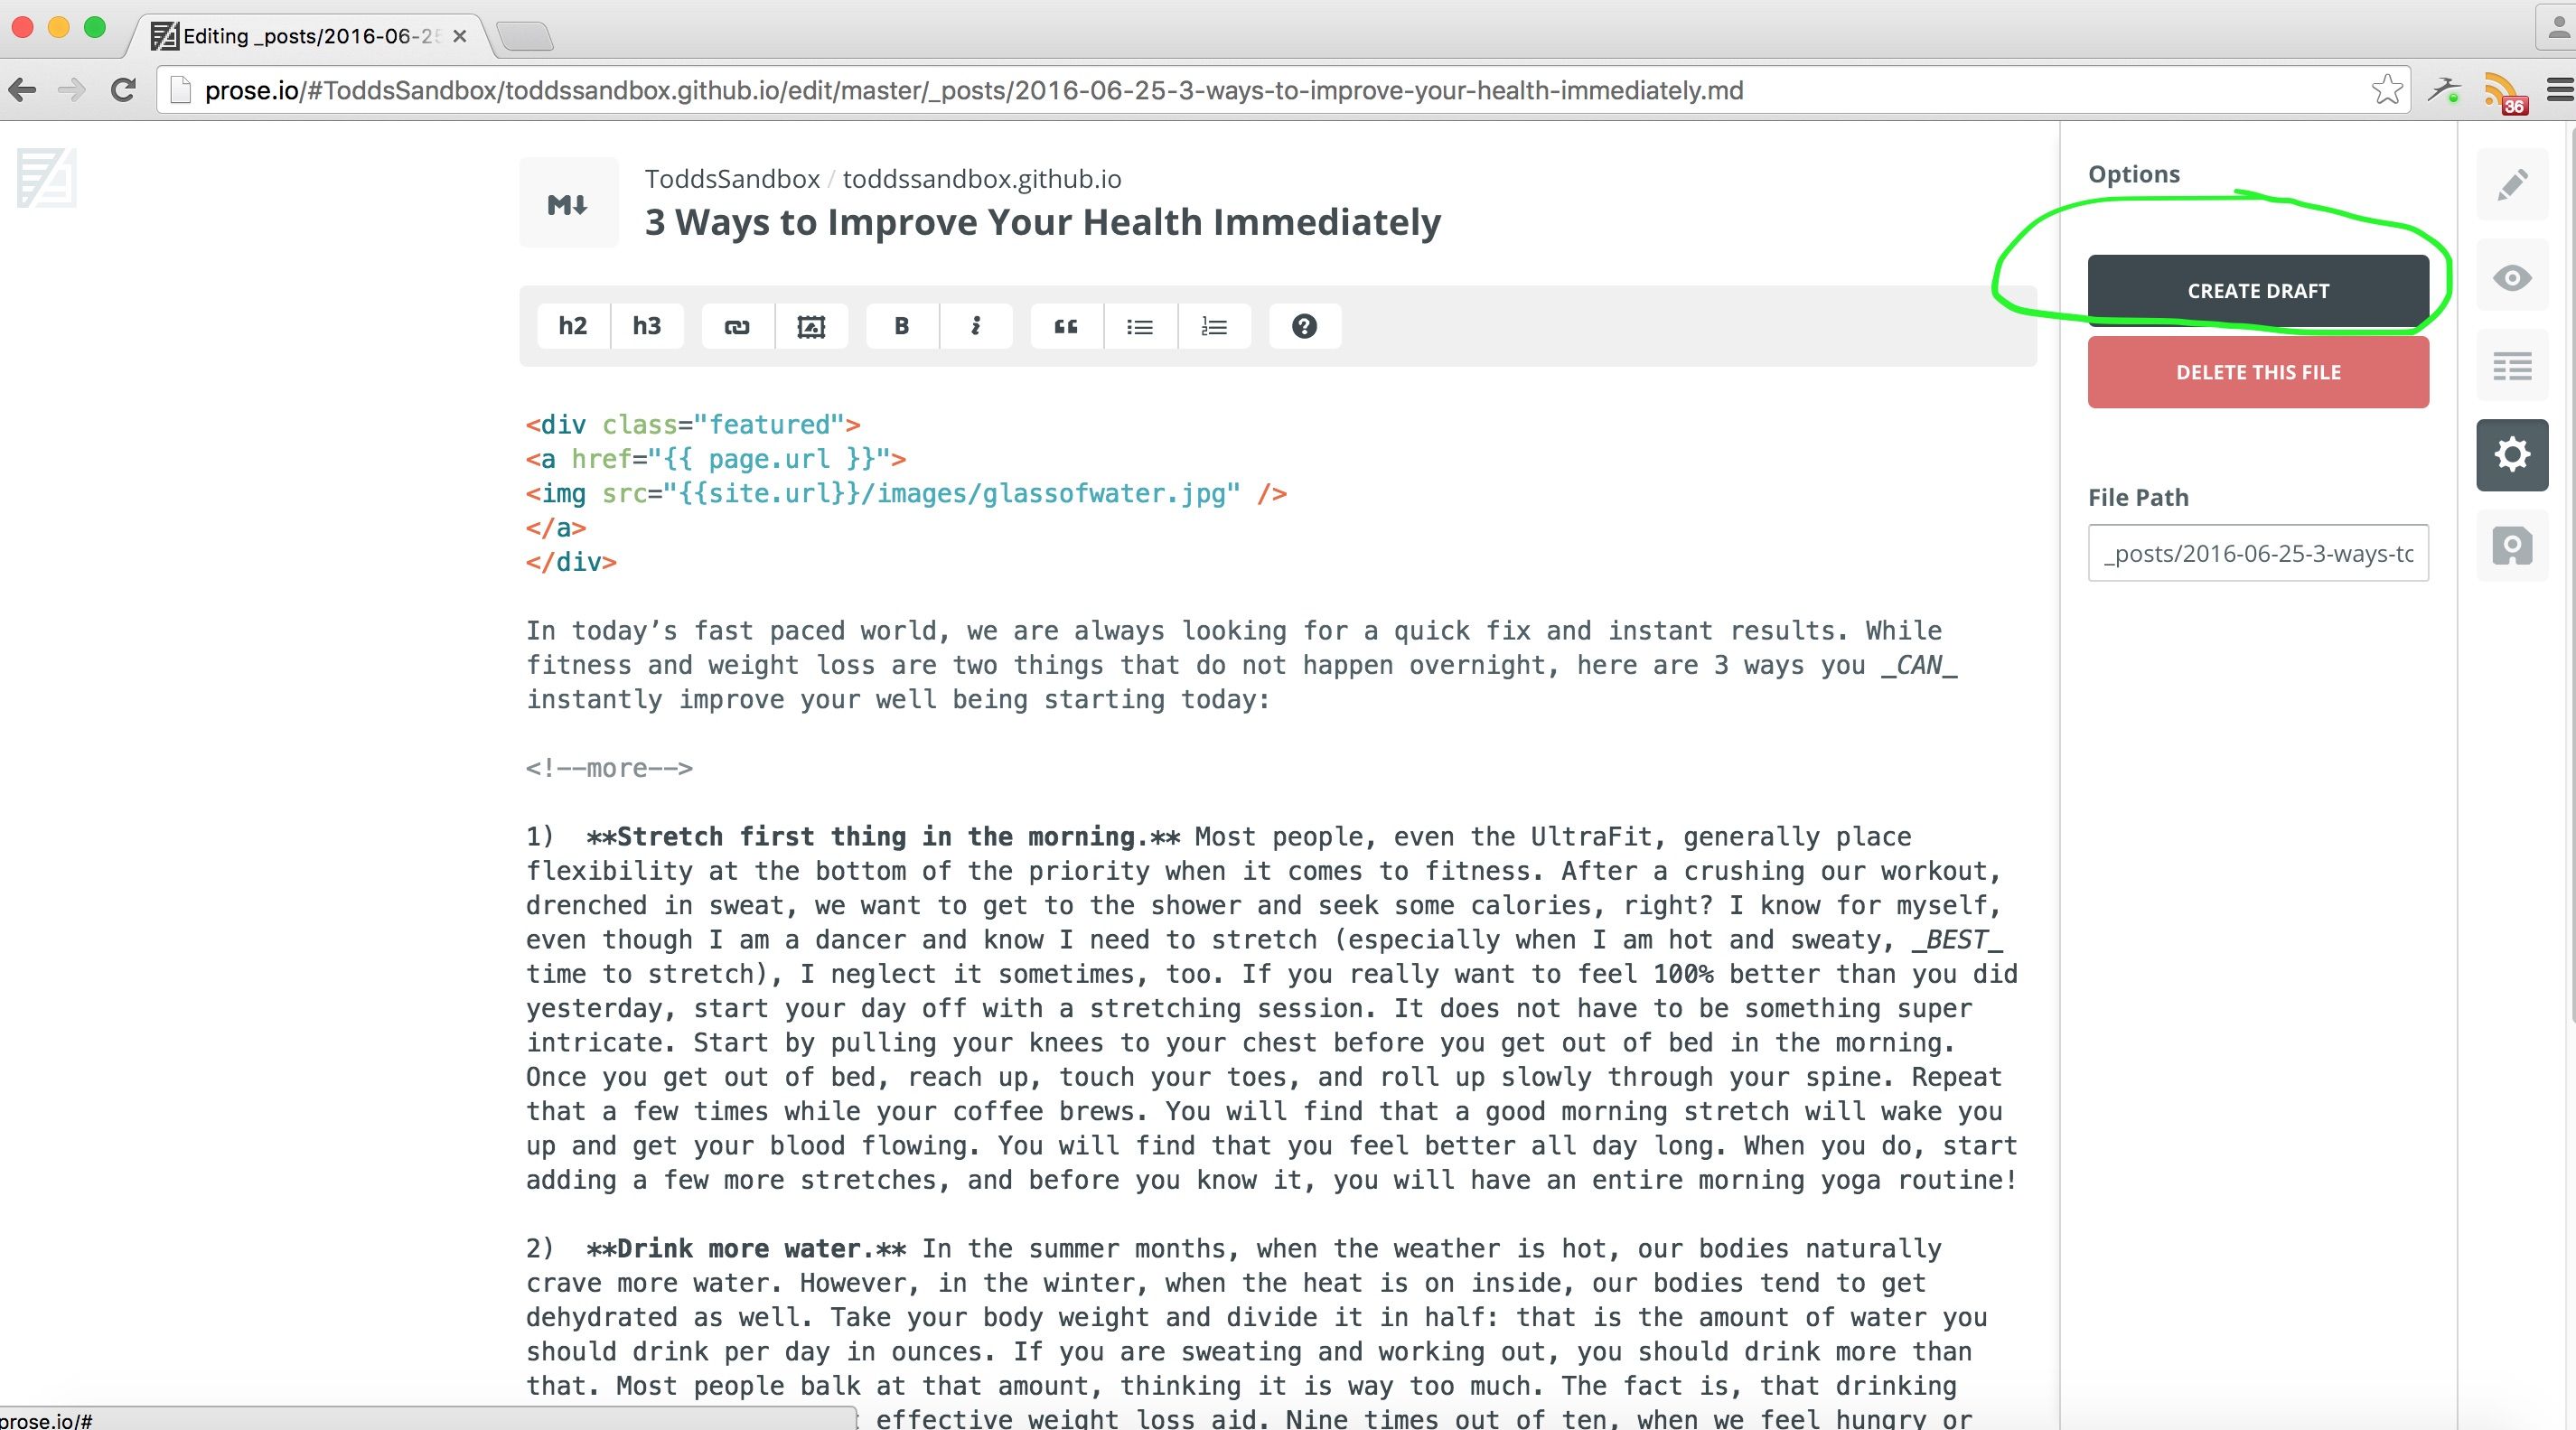
After you have committed your post a settings button appears in the sidebar. Click this.
Then click "Create Draft".
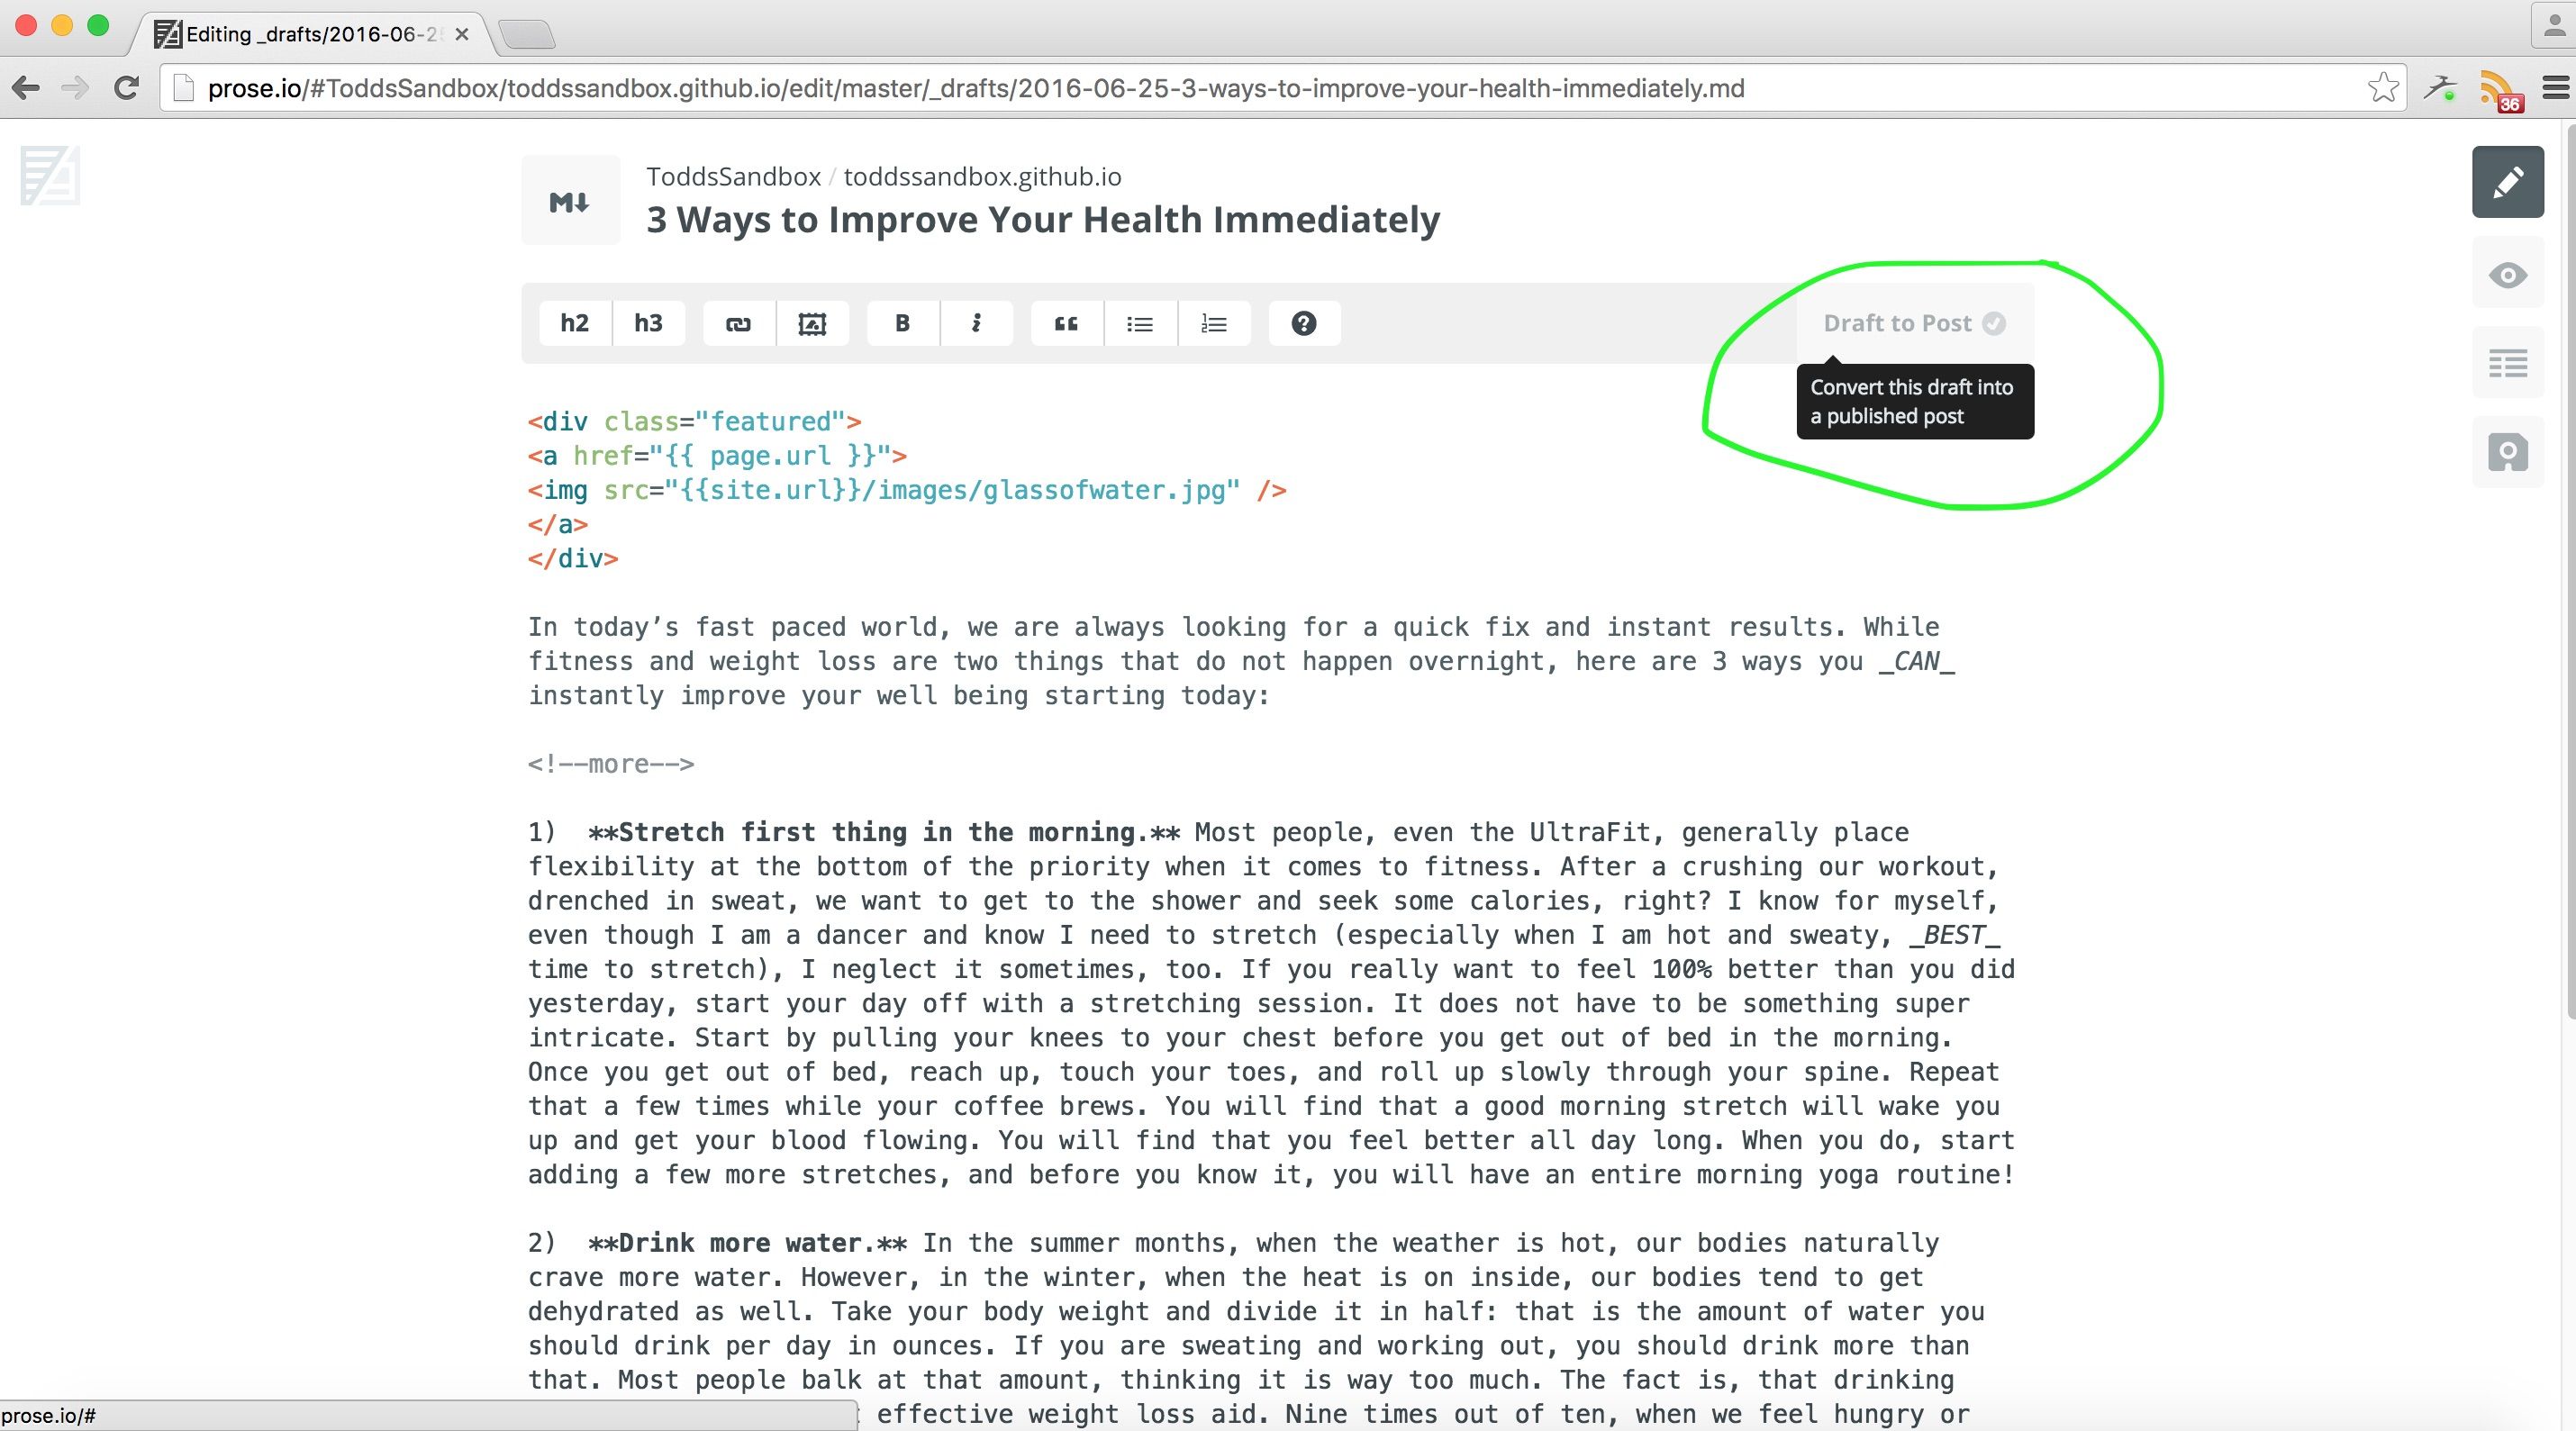
In the toolbar you can now click "Draft to Post" to convert the post draft into a published post.
Save and commit one last time and your post will be published.
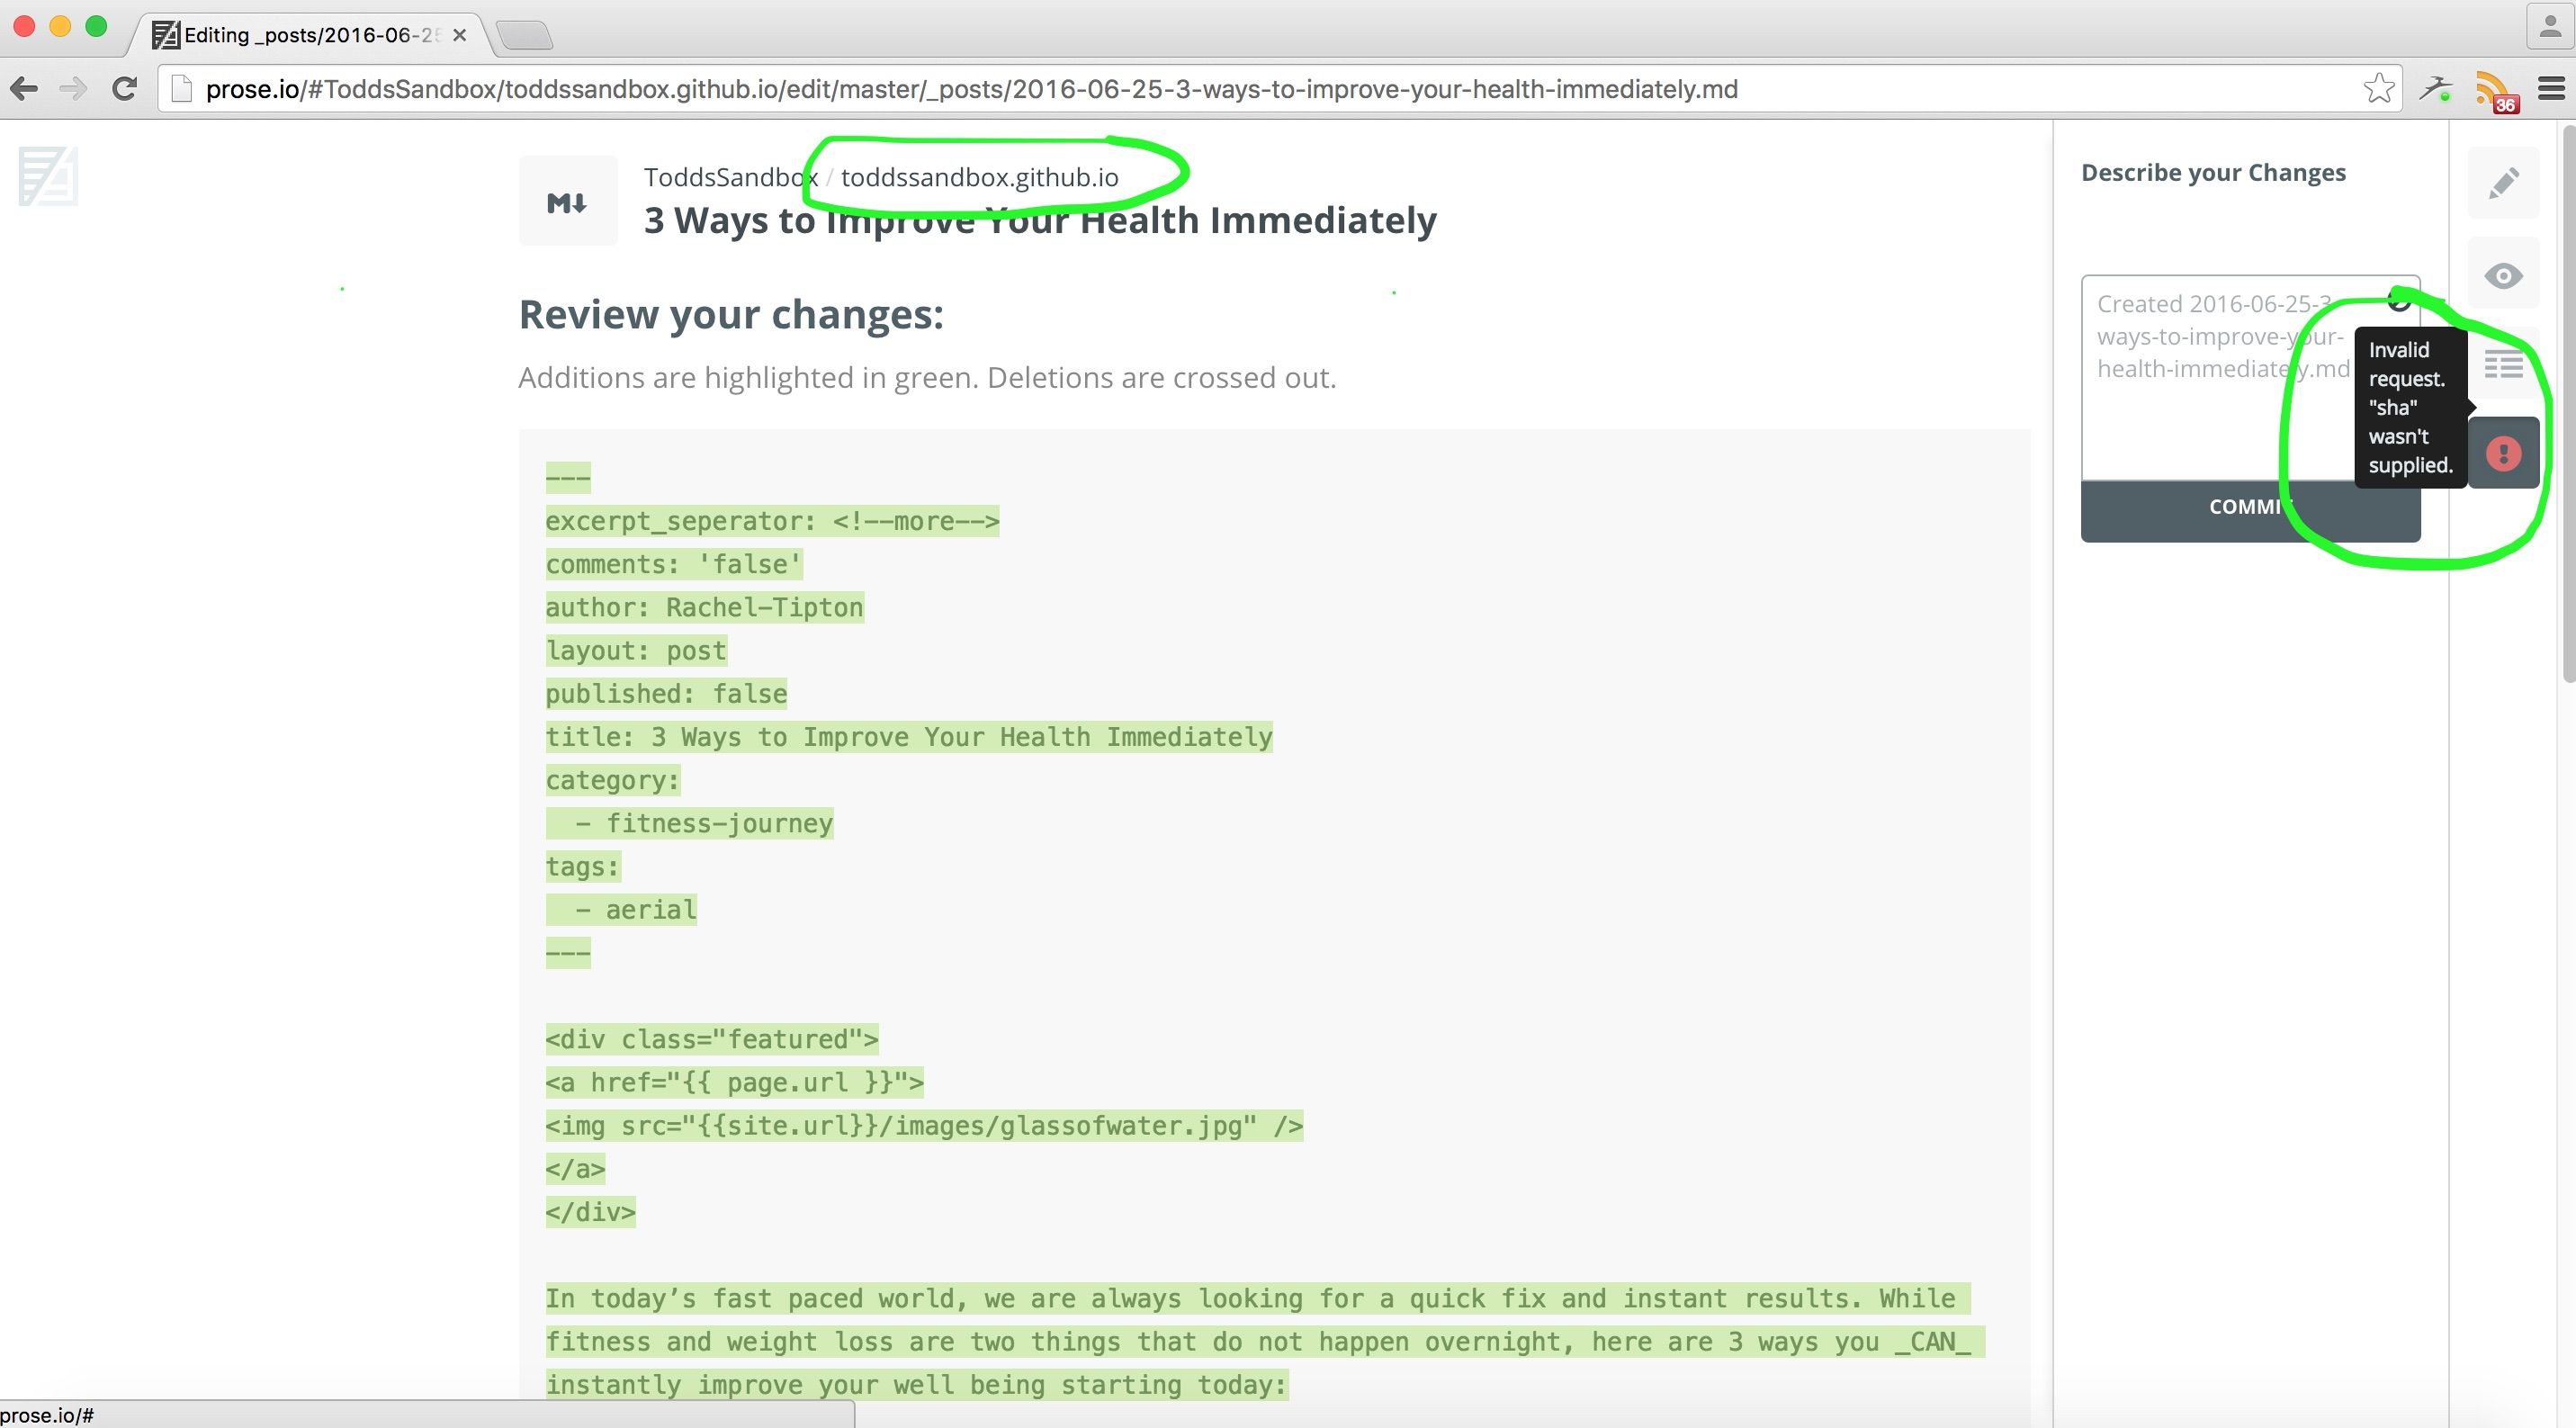
Note: If you have gone through these steps quickly it is very likely that you will try to publish a draft that GitHub doesn't know about yet. If you run into errors don't panic, but check out the section below.
Avoiding errors
Back
So you clicked save and you got a red exclamation point. No worries, just click the project name at the top of the page to return back to the project file listing.
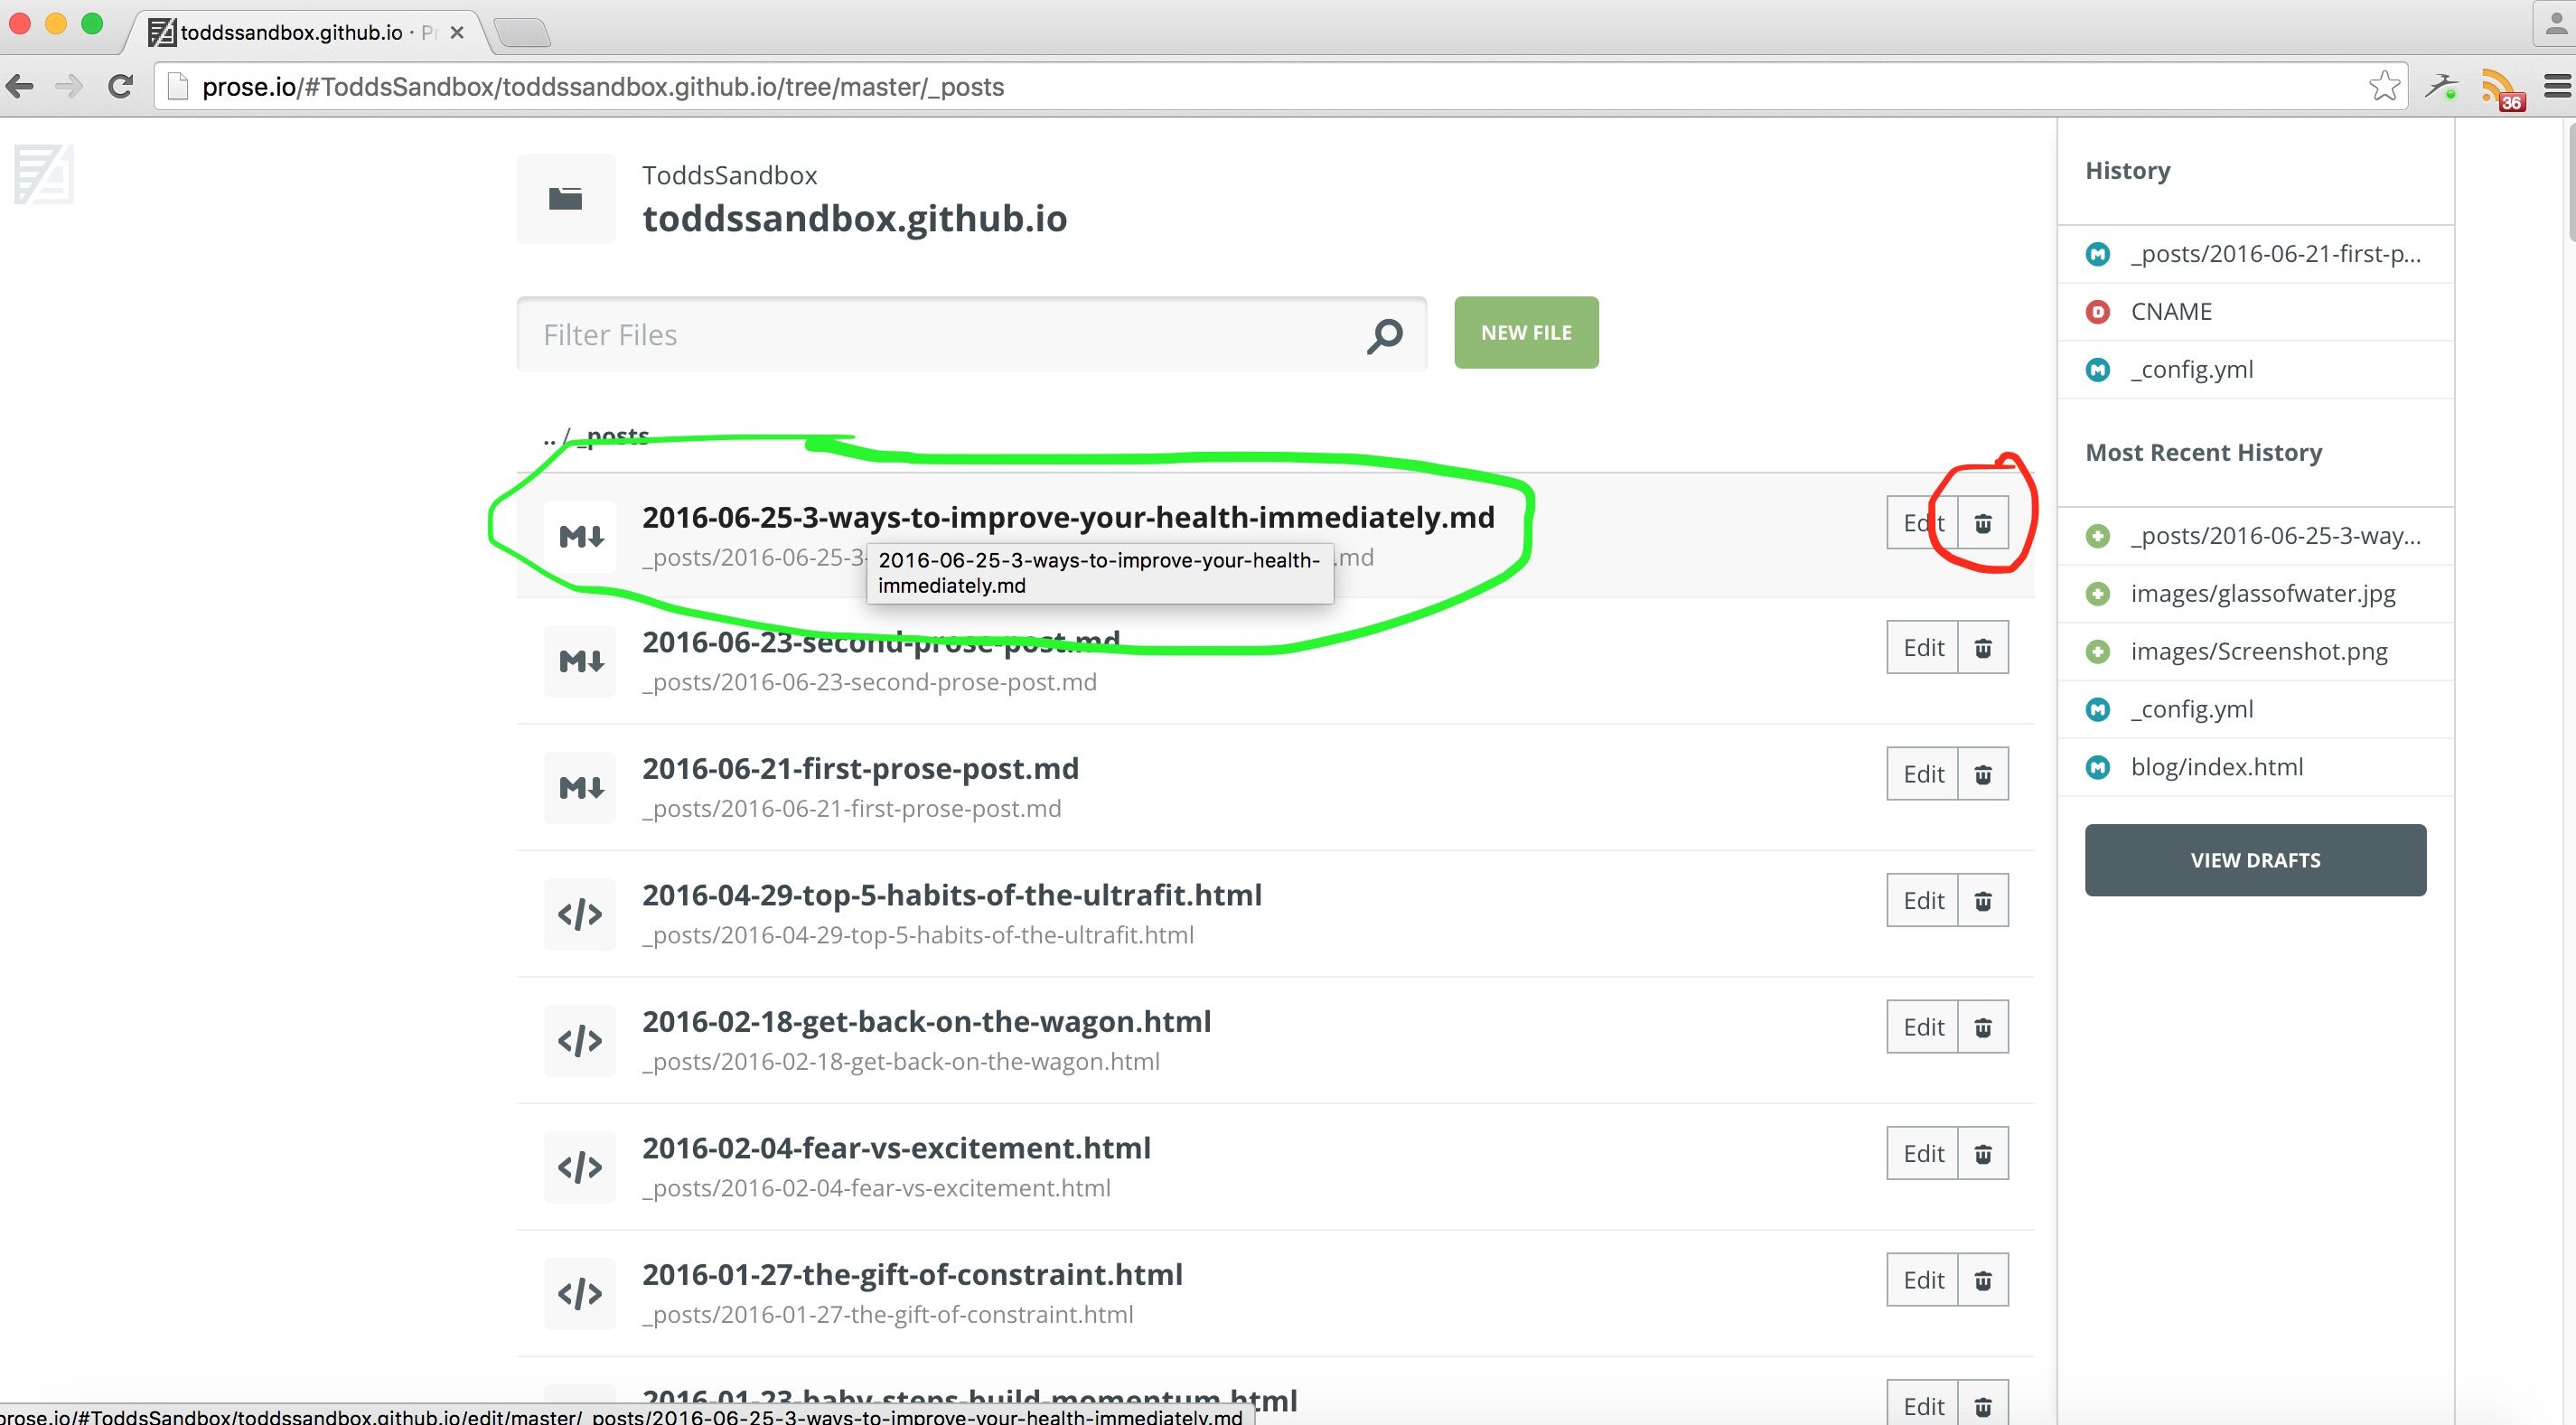
Click the posts folder again.
Then click the post that you are trying to publish.
Or if you want to start over you can click the trash can on this page to delete your work
And you should now be able to publish the post.
Save and commit one last time.
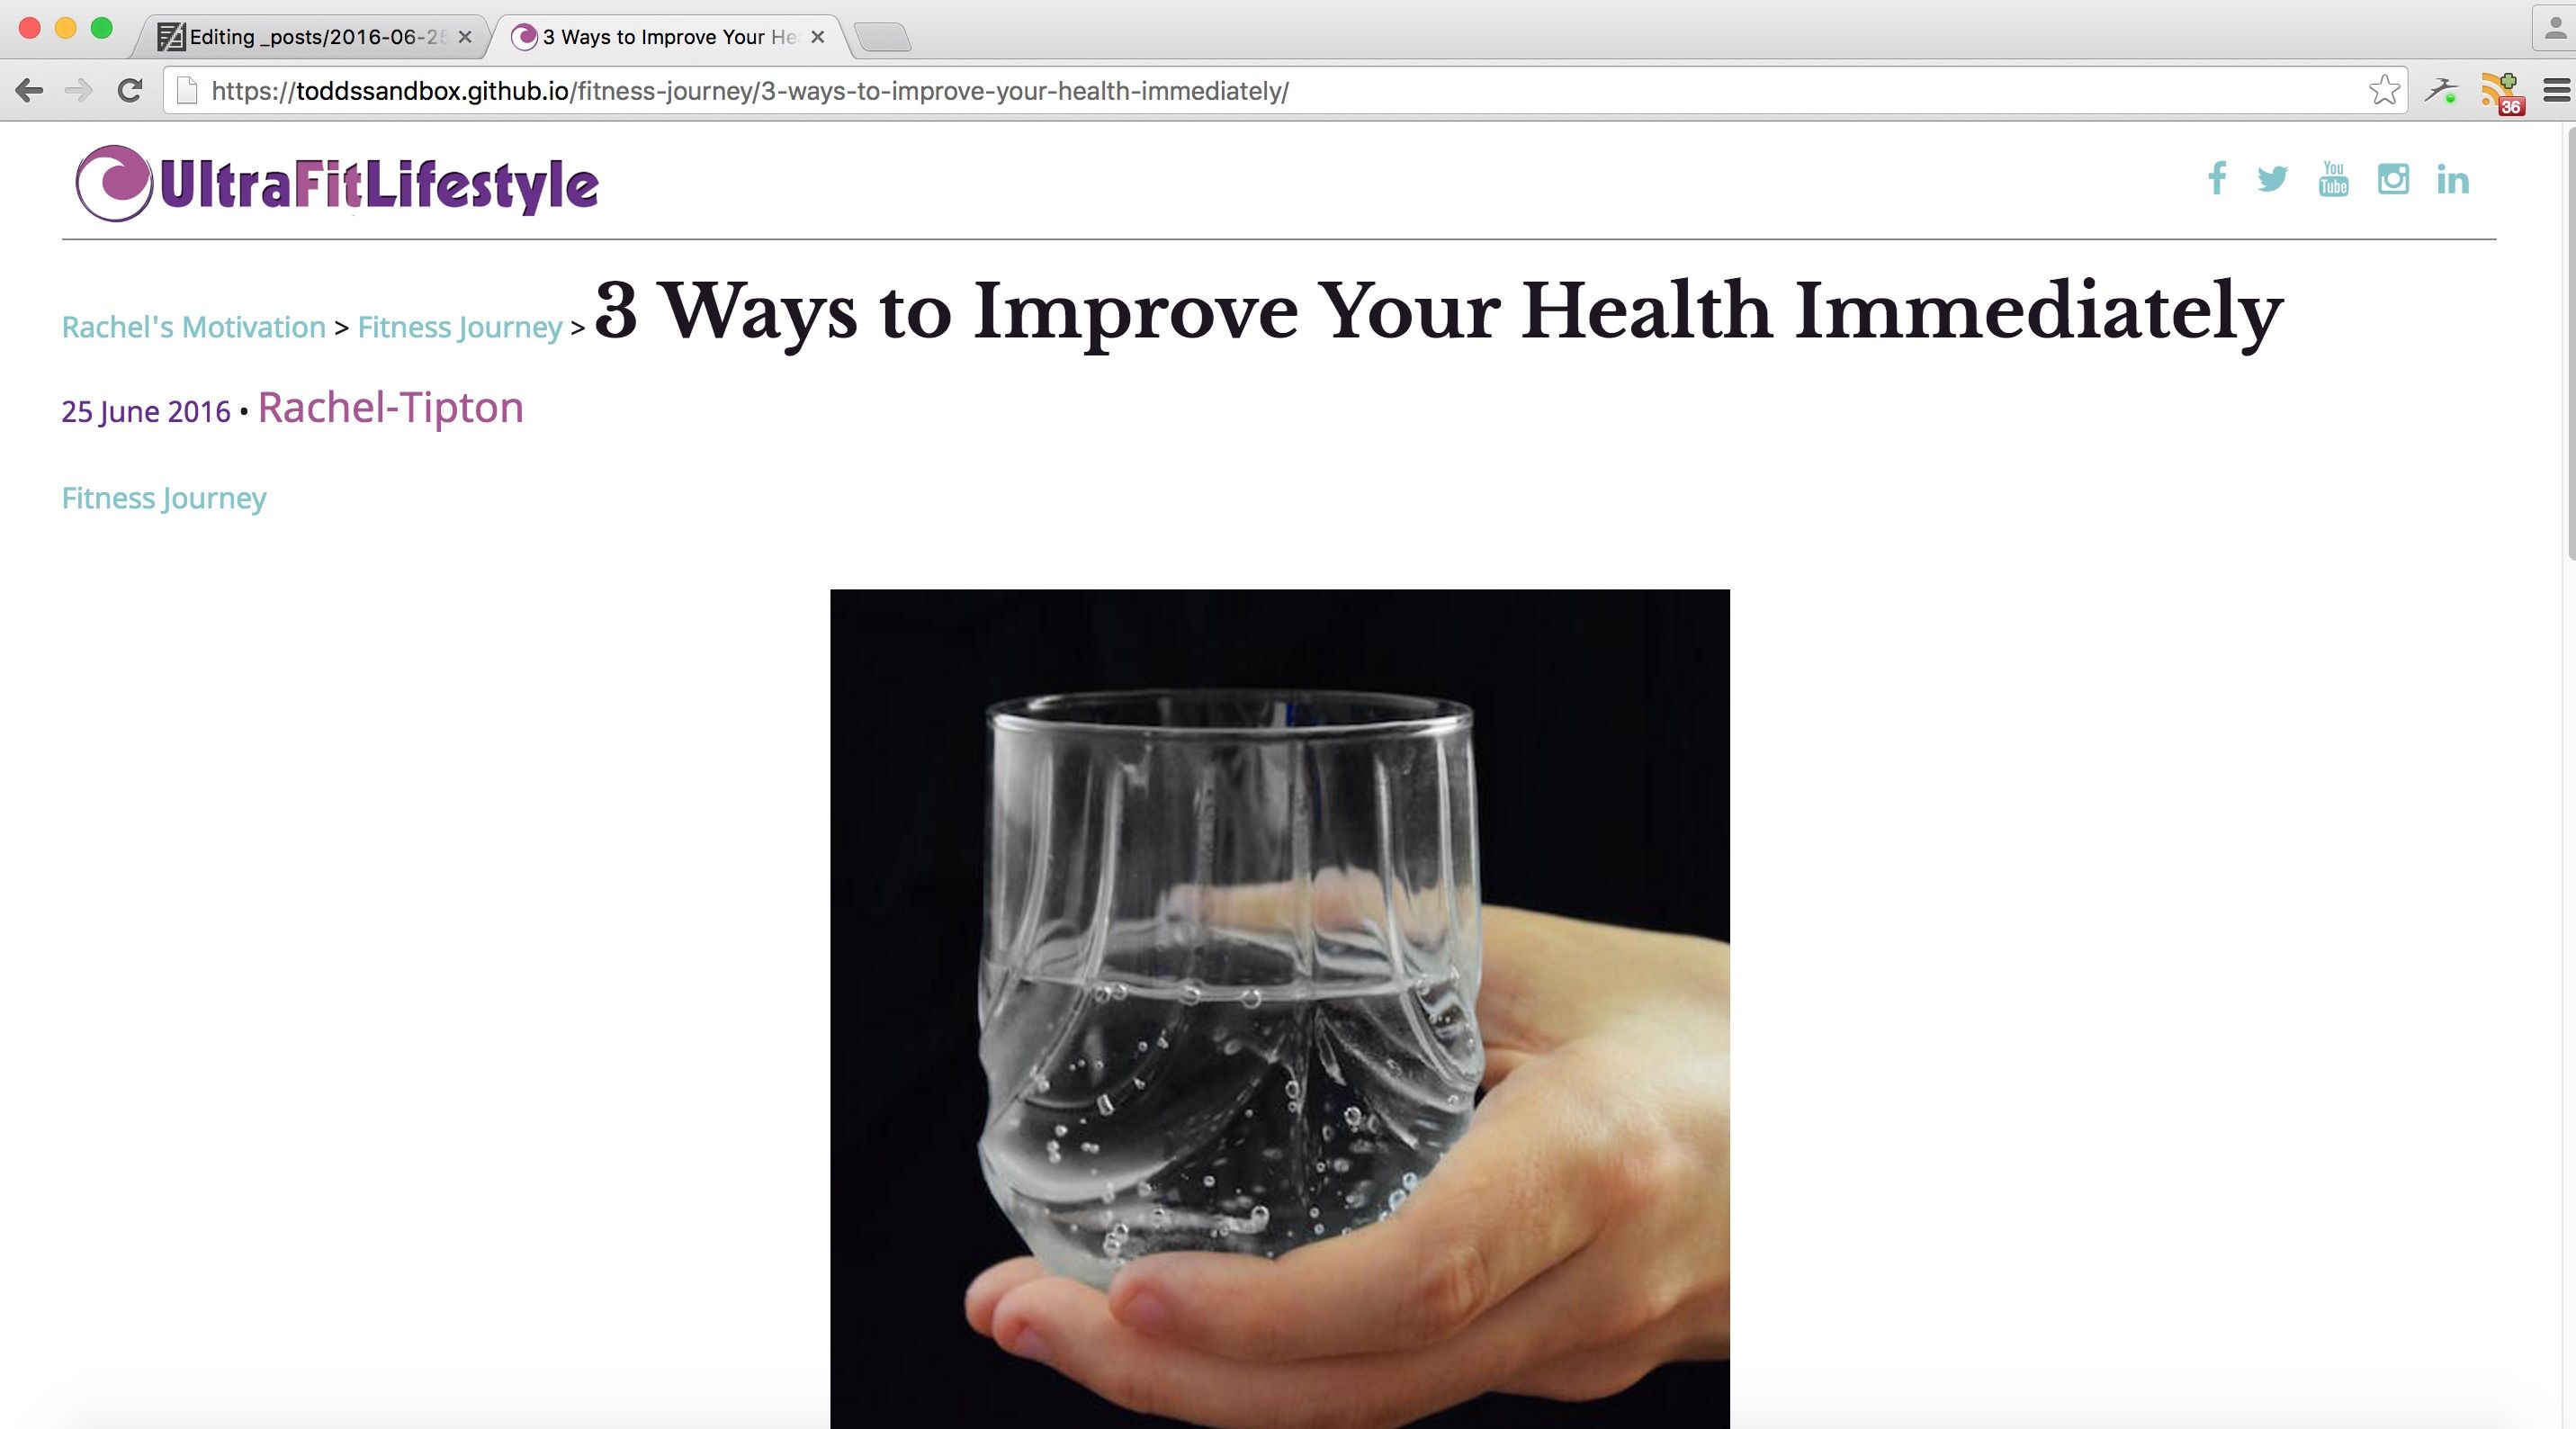
Then navigate to your blog to check our your new post!
Note: it may take a few minutes for your website to build the new post, especially if it contains large image files. Be patient and check your email if you think something went wrong. GitHub will send you an email if there are any errors with your page builds
Questions and comments
Back
Is something unclear? Have a made a mistake somewhere? Do you want to use Prose.io to maintain your site?
Leave a comment below or contact me directly to get the conversation started.
Development view: Disqus thread goes here in production


Development view: Disqus thread goes here in production